Ceramic spoons are not only functional kitchen tools but also beautiful, handcrafted pieces of art. Whether used for serving sauces, soups, or as part of a decorative set, creating ceramic spoons allows you to combine creativity, craftsmanship, and practicality. If you’ve ever wondered how to make ceramic spoons, this guide will walk you through every step — from choosing the right clay and designing your spoons, to shaping, drying, firing, glazing, and finishing.
Making ceramic spoons is accessible to both beginners and experienced ceramic artists. By following the right techniques and using quality materials, you can produce spoons that are durable, food-safe, and visually striking.
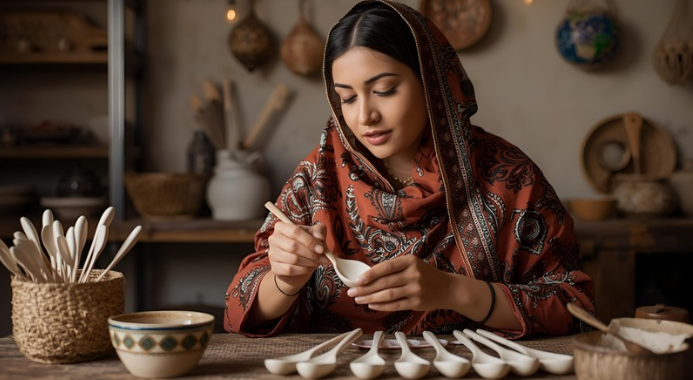
🧱 Understanding Ceramic Spoons
Before crafting your own spoons, it’s important to understand what makes ceramic spoons unique and functional.
What Are Ceramic Spoons?
Ceramic spoons are small, hand-shaped utensils made from clay and fired in a kiln. They can range from simple, utilitarian designs to intricate, decorative pieces. Unlike metal or wooden spoons, ceramic spoons can be customized in shape, size, texture, and color.
Benefits of Ceramic Spoons:
- Durability: Properly fired ceramic spoons are long-lasting and resistant to heat.
- Non-Toxic: Food-safe glazes ensure they are safe for serving or eating.
- Customization: Unique shapes, colors, and textures make them ideal for gifts or décor.
- Artistic Expression: Allows for creativity with patterns, layering, and glazing.
Types of Ceramic Spoons:
- Serving Spoons: Larger spoons used for serving sauces, soups, or side dishes.
- Measuring Spoons: Smaller, precise spoons for ingredients.
- Decorative Spoons: Artistic spoons for display or gifting.
- Hand-Built vs. Wheel-Thrown: Hand-built spoons are flexible and creative, while wheel-thrown spoons offer symmetry and precision.
💡 Pro Tip: Decide whether your spoons will be primarily functional or decorative, as this affects clay selection and glazing techniques.
🧰 Tools and Materials Needed
Using the right tools and materials ensures your ceramic spoons are both beautiful and functional.
Materials:
- Clay (stoneware, porcelain, or earthenware)
- Slip (liquid clay for joining pieces)
- Food-safe glaze
- Water
- Optional: Oxides or underglazes for decorative details
Tools:
- Rolling pin or slab roller
- Wooden modeling tools
- Needle tool for scoring and detailing
- Sponge for smoothing
- Wire clay cutter
- Rib tool for shaping
- Kiln for firing
- Paintbrushes for glazing
- Sandpaper for refining edges after firing
💡 Pro Tip: Always use food-safe glazes for functional spoons to ensure they are safe for eating.
⚗️ Step 1: Designing Your Ceramic Spoons
Designing your spoons is the first crucial step. Consider size, shape, handle length, bowl depth, and intended use.
Steps:
- Sketch Your Spoon: Include measurements for the handle and bowl.
- Choose Spoon Type: Serving spoon, soup spoon, measuring spoon, or decorative.
- Plan for Thickness: Ensure the handle is thick enough for durability but not too heavy.
- Select Clay Type: Stoneware for durability, porcelain for refined, smooth finishes, and earthenware for rustic designs.
💡 Pro Tip: Consistency is key, especially if making a set of spoons. Use templates to ensure uniform size and shape.
🧹 Step 2: Preparing the Clay
Proper clay preparation prevents cracks and ensures smooth shaping.
Steps:
- Wedge the Clay: Knead to remove air bubbles and achieve a uniform consistency.
- Check Moisture: Clay should be soft and pliable but not sticky.
- Cut to Size: Use enough clay for the bowl and handle of your spoon.
💡 Pro Tip: Cover unused clay with a damp cloth to keep it workable throughout the process.
🛠️ Step 3: Shaping the Spoon
There are several techniques for shaping ceramic spoons, depending on your skill level and tools available.
A. Hand-Built Spoon
- Roll a small ball of clay.
- Flatten slightly and shape into the bowl using your thumb or modeling tools.
- Roll a coil of clay for the handle and attach using slip.
- Blend seams and smooth edges using a sponge.
B. Slab Method Spoon
- Roll a clay slab to about ¼-inch thickness.
- Cut the spoon shape using a template or freehand.
- Score and slip areas for the handle attachment.
- Smooth edges and refine the shape.
C. Wheel-Thrown Spoon (Advanced)
- Center small amounts of clay on the wheel.
- Pull thin walls to form the bowl.
- Use small coils for handles, attaching them carefully with slip.
💡 Pro Tip: Hollow out thick areas slightly to reduce drying stress and prevent cracking during firing.
⏳ Step 4: Drying the Ceramic Spoons
Slow, even drying is essential for preventing cracks and warping.
Steps:
- Place spoons on a flat, clean surface.
- Cover lightly with plastic to control moisture loss.
- Rotate or flip occasionally for even drying.
- Dry thin spoons in 12–24 hours; thicker spoons may take 2–3 days.
💡 Pro Tip: Avoid direct sunlight, which can dry spoons too quickly and cause cracks.
🔥 Step 5: Bisque Firing
Bisque firing strengthens the clay and prepares it for glazing.
Steps:
- Place fully dried spoons on kiln shelves.
- Fire according to clay type:
- Earthenware: cone 04–06
- Stoneware: cone 5–6
- Porcelain: cone 10
- Allow kiln to cool completely before handling.
💡 Pro Tip: Use kiln stilts for small spoons to prevent sticking or deformation.
🎨 Step 6: Glazing Your Ceramic Spoons
Glazing adds color, texture, and food-safe protection.
Steps:
- Choose a food-safe glaze appropriate for functional use.
- Apply glaze using brush, dip, or spray method.
- Avoid glazing the base if it will touch the kiln shelf.
- Fire according to glaze specifications.
💡 Pro Tip: Consider layered glazes or decorative patterns to create visually striking spoons.
🖌️ Step 7: Decorative Finishes
Enhance your spoons with artistic touches:
- Texturing: Carve, stamp, or impress patterns onto the handle or bowl.
- Underglaze Detailing: Paint designs before applying a clear glaze.
- Oxides and Pigments: Add subtle color variations or highlights.
- Engraving: Add initials or designs for personalization.
💡 Pro Tip: Test decorative techniques on scrap clay to ensure they transfer well after firing.
🧤 Step 8: Using and Maintaining Ceramic Spoons
To ensure longevity and functionality:
- Check Stability: Ensure handles are solid and bowl is smooth.
- Test Use: Try with liquids or semi-solids to ensure proper shape and comfort.
- Cleaning: Wash with mild soap and water; avoid metal scrubbers that can scratch glaze.
💡 Pro Tip: Avoid sudden temperature changes, such as putting a cold spoon into hot soup, to prevent cracking.
🌟 Tips for Professional-Quality Ceramic Spoons
- Uniform Thickness: Ensures even drying and firing.
- Smooth Edges: Refine rims and handles for comfort.
- Layered Glazes: Adds depth, color variation, and a professional finish.
- Practical Design: Ensure handles are ergonomic and bowls are functional.
- Personalization: Add unique textures, initials, or patterns for custom sets.
❌ Common Mistakes to Avoid
- Uneven thickness leading to cracks during drying or firing.
- Rushing drying, causing warping or breaking.
- Poorly applied glaze, leading to uneven finish or food safety issues.
- Weak handle attachment causing breakage during use.
- Using non-food-safe glazes on functional spoons.
💡 Pro Tip: Patience, attention to detail, and consistent technique are key for creating high-quality spoons.
🛠️ Advanced Techniques for Ceramic Spoons
- Multi-Part Construction: Combine separately made bowls and handles.
- Slip Decoration: Apply contrasting colored slip for patterns.
- Layered Glazing: Achieve gradients and artistic effects.
- Carved or Textured Handles: Add ergonomic or decorative designs.
- Mixed Media: Incorporate wood, metal, or acrylic details (for decorative spoons).
🌿 Eco
-Friendly Tips
- Reuse clay scraps for test pieces or small spoons.
- Use non-toxic, food-safe glazes.
- Plan batches to minimize waste.
- Properly recycle or compost any unusable clay.
This article now provides a comprehensive, step-by-step guide on how to make ceramic spoons, covering materials, tools, design, shaping, drying, firing, glazing, decorative techniques, usage tips, advanced techniques, and eco-friendly practices.
❓ Frequently Asked Questions (FAQs) About Making Ceramic Spoons
1. Can beginners make ceramic spoons?
Yes! Beginners can start with simple hand-built spoons using slab or coil techniques. Smaller projects are ideal for practicing shaping and glazing before moving on to more intricate designs.
2. What type of clay is best for ceramic spoons?
- Stoneware clay: Durable and heat-resistant, ideal for functional spoons.
- Porcelain clay: Smooth and refined, perfect for elegant or delicate spoons.
- Earthenware clay: Suitable for decorative spoons; ensure proper glazing for food safety.
3. Do I need a kiln to make ceramic spoons?
For functional, durable spoons, yes. Bisque and glaze firing in a kiln ensures heat resistance and longevity. Air-dry clay can be used for decorative spoons that won’t be exposed to heat.
4. How do I attach handles securely?
- Score the clay surfaces where the handle will attach.
- Apply slip (liquid clay) as an adhesive.
- Blend and smooth the joint for a seamless, strong bond before drying.
5. How do I prevent cracking during drying or firing?
- Maintain uniform thickness throughout the spoon.
- Dry slowly under a shaded area or lightly covered with plastic.
- Avoid rapid temperature changes during kiln firing.
6. Can ceramic spoons be used for cooking?
Yes, if made from stoneware or porcelain clay and coated with a food-safe glaze. Always start with low heat when testing new spoons.
7. Can I decorate ceramic spoons?
Absolutely! Use stamping, carving, underglazes, oxides, or layered glazes to add texture, patterns, or personalized details.
8. How long does it take to make a ceramic spoon?
- Shaping and drying: 12–72 hours depending on thickness.
- Bisque firing: 8–12 hours plus cooling.
- Glaze firing: 8–12 hours plus cooling.
9. Can I make multi-part or sculptural spoons?
Yes! Separate bowl and handle components can be joined with slip, allowing for sculptural or decorative spoons.
10. How do I maintain ceramic spoons?
- Wash with mild soap and water.
- Avoid sudden temperature changes to prevent cracking.
- Check handle stability periodically, especially for functional spoons.
🏁 Conclusion: Crafting Your Own Ceramic Spoons
Mastering how to make ceramic spoons combines creativity, functionality, and craftsmanship. From choosing the right clay and designing the spoon to shaping, drying, firing, glazing, and adding decorative touches, each step contributes to a durable and visually appealing utensil.
Hand-built or wheel-thrown techniques offer flexibility, allowing you to create spoons that are both practical and artistic. Attention to detail in thickness, handle attachment, and glazing ensures that your spoons are safe for food use, long-lasting, and visually striking.
By experimenting with textures, underglazes, and layered colors, you can craft unique spoons that are perfect for gifting, serving, or personal use. Each ceramic spoon you make becomes a functional piece of art, showcasing your skill, creativity, and dedication to the craft.