A ceramic base lamp is more than just a functional lighting piece — it’s a statement piece in your home décor. Painting a ceramic lamp allows you to personalize it, match your interior design, or create a stunning artistic feature. If you’ve ever wondered how to paint a ceramic base lamp, this guide will provide a complete, step-by-step approach, covering preparation, tools, paint types, techniques, finishing, and care.
Whether you’re a beginner in DIY décor or an experienced craft enthusiast, painting a ceramic lamp is an enjoyable way to bring personality and style into your living space.
🧱 Understanding Ceramic Base Lamps
Before starting, it’s important to understand the type of lamp you’re working with and why preparation is key.
What is a Ceramic Base Lamp?
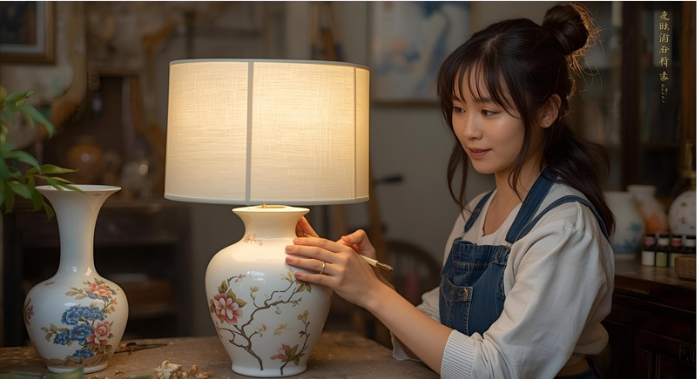
A ceramic base lamp consists of a ceramic body, usually with a glazed or unglazed surface, and a socket for the light bulb. The base may have smooth or textured finishes, curves, or geometric designs. Painting it allows you to refresh old lamps, create custom décor, or upcycle thrifted pieces.
Benefits of Painting a Ceramic Base Lamp:
- Personalization: Match colors and patterns to your home décor.
- Upcycling: Transform outdated or plain lamps into stylish, modern pieces.
- Artistic Expression: Create patterns, ombre effects, or hand-painted designs.
- Protective Layer: Certain paints can also seal the ceramic, protecting it from dust and moisture.
Types of Ceramic Lamp Bases:
- Unglazed Ceramic: Porous, easier for paint adhesion, often requires sealing.
- Glazed Ceramic: Smooth and shiny, may require sanding or primer for proper paint adhesion.
- Textured Ceramic: Patterns or reliefs require careful painting to avoid missing details.
💡 Pro Tip: Identify the type of ceramic before painting to select the right prep method and paint.
🧰 Tools and Materials Needed
Having the right tools ensures a professional-looking result and a smooth painting process.
Materials:
- Ceramic lamp base
- Acrylic paints or ceramic-specific paints
- Primer (optional, for glazed surfaces)
- Clear protective sealant (matte or glossy finish)
- Water (for cleaning brushes and thinning paint)
- Painter’s tape (for masking areas)
Tools:
- Fine and medium paintbrushes
- Foam brushes or sponges for blending
- Sandpaper (fine grit, 220–400)
- Palette or mixing tray
- Soft cloth or microfiber cloth for cleaning
- Protective gloves
💡 Pro Tip: Use non-toxic, heat-resistant paint if the lamp will be in contact with light bulbs or high temperatures.
⚗️ Step 1: Preparing the Ceramic Base Lamp
Proper preparation ensures your paint adheres well and lasts longer.
Steps:
- Clean the Lamp Base: Remove dust, grease, and grime using a damp cloth or mild soap solution.
- Remove Hardware: Detach the lamp socket, cord, or lampshade to prevent paint damage.
- Sanding (if needed): Lightly sand glazed surfaces to create a rougher texture for paint adhesion.
- Mask Areas: Use painter’s tape to cover areas that should not be painted, like the socket area or decorative trims.
💡 Pro Tip: A clean, dry surface is critical — any residue can prevent paint from adhering properly.
🔥 Step 2: Selecting the Right Paint
Choosing the correct paint is essential for durability and aesthetics.
Options:
- Acrylic Paint:
- Versatile and easy to use.
- Works well on unglazed and lightly sanded glazed surfaces.
- Requires a protective sealant for longevity.
- Ceramic-Specific Paints:
- Designed for ceramic surfaces.
- Often heat-resistant and durable.
- Can be baked or air-dried depending on brand.
- Spray Paint:
- Creates an even finish.
- Works well for smooth bases or gradient effects.
- Requires masking to avoid overspray.
Paint Finishes:
- Matte: Soft, contemporary look.
- Glossy: Vibrant, reflective, modern finish.
- Metallic: Adds luxury or accent details.
💡 Pro Tip: Test your paint on a small hidden area or scrap ceramic piece before starting the main project.
🖌️ Step 3: Applying Primer
Priming is optional but recommended for glazed or shiny ceramic bases.
Steps:
- Choose a ceramic-compatible primer.
- Apply a thin, even coat using a foam brush or spray.
- Let the primer dry completely according to the manufacturer’s instructions.
💡 Pro Tip: Primer improves paint adhesion, reduces chipping, and helps achieve more vibrant colors.
🛠️ Step 4: Painting Techniques
The painting technique depends on the desired look — solid colors, patterns, gradients, or hand-painted designs.
A. Solid Color Finish:
- Apply thin, even coats using a brush or sponge.
- Let each coat dry completely before applying the next.
- Sand lightly between coats if needed for smoothness.
B. Hand-Painted Designs:
- Use fine brushes for detailed patterns or motifs.
- Sketch designs lightly with a pencil before painting.
- Layer colors gradually for depth and vibrancy.
C. Ombre or Gradient Effect:
- Use a foam brush or sponge to blend two or more colors gradually.
- Work quickly while paint is still wet to achieve a seamless transition.
D. Stenciling:
- Secure stencil with painter’s tape.
- Apply paint lightly using a sponge or stippling brush.
- Remove stencil carefully after each layer dries.
💡 Pro Tip: Patience is key — multiple thin layers look better than one thick layer, which can cause drips or uneven textures.
⏳ Step 5: Drying and Curing
Drying is critical for a durable finish.
Steps:
- Let the paint dry for at least 24 hours.
- Avoid touching the surface during drying.
- Some ceramic-specific paints require baking in an oven for heat curing — follow manufacturer instructions.
💡 Pro Tip: Ensure the area is dust-free to avoid particles sticking to the wet paint.
🎨 Step 6: Applying a Protective Sealant
Sealants protect your painted ceramic lamp from scratches, dust, and moisture.
Steps:
- Choose a clear acrylic or ceramic-specific sealant.
- Apply thin, even coats using a brush or spray.
- Allow sealant to dry completely before reassembling the lamp.
- Optional: Apply a second coat for extra durability.
💡 Pro Tip: Sealants with UV protection prevent colors from fading over time.
🌟 Step 7: Finishing Touches
- Reattach the lamp socket and cord carefully.
- Reassemble the lampshade.
- Inspect the painted surface for touch-ups.
- Clean any masked areas or remove painter’s tape slowly to avoid pulling paint.
💡 Pro Tip: Use a microfiber cloth to gently wipe off dust without damaging the painted surface.
🖌️ Advanced Decorative Techniques
- Gold or Silver Leaf Accents: Adds luxury and elegance to your lamp.
- Textured Paint or Modeling Paste: Creates 3D designs on lamp bases.
- Splatter Technique: Use a toothbrush or stiff bristle brush for artistic splatter effects.
- Hand-Painted Illustrations: Floral, geometric, or abstract designs make your lamp a statement piece.
- Layered Glazes: Combine opaque and transparent layers for depth and dimension.
💡 Pro Tip: Always test advanced techniques on scrap ceramic pieces to perfect your method.
❌ Common Mistakes to Avoid
- Painting over dust or grease — prevents proper adhesion.
- Applying thick layers of paint — leads to drips or uneven drying.
- Rushing drying or curing time — increases risk of smudges and cracks.
- Skipping primer on glazed surfaces — paint may peel or chip.
- Neglecting a protective sealant — reduces durability and longevity.
💡 Pro Tip: Take your time and follow each step carefully — rushing often leads to mistakes that are hard to fix.
🌿 Eco-Friendly Tips
- Use water-based, non-toxic acrylic paints.
- Reuse leftover paint for other DIY projects.
- Recycle or repurpose old ceramic bases instead of discarding them.
- Use natural sponges or brushes with biodegradable handles.
This article now provides a comprehensive, step-by-step guide on how to paint a ceramic base lamp, covering materials, tools, preparation, painting techniques, finishing, decorative methods, and eco-friendly practices.
❓ Frequently Asked Questions (FAQs) About Painting a Ceramic Base Lamp
1. Can beginners paint a ceramic base lamp?
Yes! Even beginners can achieve professional-looking results by following proper preparation, using quality paints, and applying thin, even layers. Start with simple solid colors or basic patterns before attempting intricate designs.
2. What type of paint is best for ceramic lamps?
- Acrylic paint: Easy to use, water-based, and widely available; works on unglazed or lightly sanded glazed surfaces.
- Ceramic-specific paint: Durable, heat-resistant, and often does not require additional sealants.
- Spray paint: Useful for smooth bases and gradient finishes but requires careful masking.
3. Do I need to prime a ceramic lamp before painting?
Priming is recommended for glazed or shiny ceramic surfaces. A primer improves adhesion, reduces chipping, and enhances color vibrancy. Unglazed or porous ceramic may not require primer.
4. How many coats of paint should I apply?
Apply multiple thin coats rather than one thick coat. Thin layers dry evenly and prevent drips or uneven texture. Two to three coats are usually sufficient for solid colors, while hand-painted designs may require more layering.
5. Can I paint a lamp with detailed patterns?
Yes! Use fine brushes, stencils, or masking tape to create intricate designs. Sketching lightly with a pencil before painting helps maintain precision.
6. How do I seal a painted ceramic lamp?
Use a clear acrylic or ceramic-specific sealant to protect the paint from scratches, dust, and moisture. Apply thin, even coats and let each coat dry completely. Sealants with UV protection prevent colors from fading over time.
7. Can I paint a lamp with metallic or textured effects?
Yes. Metallic leaf, textured paints, or modeling pastes can add depth and a luxurious look. Test these techniques on a scrap piece of ceramic first to perfect your approach.
8. How long does it take for a painted ceramic lamp to dry and cure?
- Paint typically dries in 24 hours, but curing may take longer depending on the paint type.
- Some ceramic paints require heat curing in an oven according to manufacturer instructions.
- Sealants may require additional drying time.
9. Is it safe to paint a lamp near the socket?
Yes, if you carefully mask off the socket and cord. Use painter’s tape to avoid getting paint on electrical components, which could interfere with functionality.
10. Can I wash or clean a painted ceramic lamp?
Yes, but gently. Use a soft cloth or microfiber towel with mild soap and water. Avoid abrasive cleaners or scrubbers that can damage the paint or sealant.
🏁 Conclusion: Transform Your Space with a Painted Ceramic Lamp
Learning how to paint a ceramic base lamp is a creative and rewarding way to refresh your home décor. By carefully preparing the surface, selecting the right paint and primer, applying precise layers, and finishing with a protective sealant, you can transform a plain or outdated lamp into a stylish, custom piece.
Hand-painted designs, solid colors, or advanced decorative techniques such as metallic accents, gradients, or textures allow you to express your personal style. Proper preparation and patience ensure your painted lamp is durable, vibrant, and functional for years to come.
A painted ceramic lamp not only illuminates your space but also serves as a statement piece, showcasing your craftsmanship and creativity. Whether used in the living room, bedroom, or as a gift, your uniquely painted lamp combines functionality with artistry, making your home more inviting and personalized.