If you’ve ever asked yourself, “how do you put down ceramic tile,” you’re in the right place. Ceramic tile is one of the most popular choices for flooring, backsplashes, and wall coverings in homes across the United States. Its durability, water resistance, and aesthetic versatility make it ideal for kitchens, bathrooms, and high-traffic areas. However, achieving a professional-looking installation requires more than just laying tiles on the floor. From surface preparation to grouting and sealing, every step matters.
In this comprehensive guide, we’ll cover everything you need to know about putting down ceramic tile, including surface prep, layout planning, tools and materials, installation techniques, cutting tiles, grouting, sealing, and maintenance. By the end, you’ll be equipped to confidently take on your ceramic tile project, whether it’s a DIY job or a professional endeavor.
Understanding Ceramic Tile
Before you start laying tiles, it’s essential to understand what ceramic tile is and why it’s a top choice for many home improvement projects.
What is Ceramic Tile?
Ceramic tile is made from clay, minerals, and water, which is fired at high temperatures to create a hard, durable surface. Tiles can be glazed or unglazed:
- Glazed tiles: Have a protective, colored coating that adds shine and patterns. These tiles are easier to clean but can be slippery when wet.
- Unglazed tiles: Have a natural, matte finish, providing better traction but often requiring sealing to protect against stains and moisture.
Benefits of Ceramic Tile
- Durability: Resistant to scratches, wear, and general foot traffic.
- Water Resistance: Excellent for kitchens, bathrooms, and laundry rooms.
- Versatility: Available in countless colors, patterns, and sizes to fit any design style.
- Ease of Maintenance: Simple to clean with standard household cleaners.
- Longevity: Properly installed tiles can last decades with minimal upkeep.
Understanding these characteristics helps you choose the right tile type for your space and ensures proper installation.
Tools and Materials Needed
Proper tools and materials are essential for a smooth installation process. Here’s what you’ll need:
Tools:
- Tile cutter or wet saw for precise cuts
- Notched trowel for spreading adhesive
- Tile spacers to maintain consistent grout lines
- Level and straightedge to ensure flat installation
- Rubber mallet for tapping tiles into place
- Sponge and bucket for cleaning adhesive and grout
- Chalk line for layout and alignment
- Tile nippers for small or irregular cuts
- Measuring tape and pencil
Materials:
- Ceramic tiles
- Thin-set mortar or tile adhesive
- Grout (sanded or unsanded depending on joint width)
- Tile sealer (for unglazed tiles or grout)
- Primer or backer board (if needed for walls or uneven floors)
Having all tools and materials ready before starting makes the installation process faster and more efficient.
Preparing the Surface
A well-prepared surface is the foundation of a successful tile installation. Skipping this step can lead to uneven tiles, cracking, or adhesive failure.
Steps for Surface Preparation:
- Clean the Surface: Remove dirt, dust, grease, or old adhesive from the installation area.
- Check for Level: Ensure the floor or wall is level using a spirit level. Apply self-leveling compound if necessary.
- Repair Damages: Fill cracks, holes, or uneven spots with suitable filler.
- Install Backer Board: Cement backer boards provide a stable, water-resistant surface for tiles, especially on walls and subfloors.
- Prime the Surface: On porous or new surfaces, a primer improves adhesive bonding.
Proper preparation ensures your ceramic tiles adhere properly and remain durable over time.
Planning the Tile Layout
Planning your tile layout is critical for a visually appealing installation. Poor planning can lead to awkward cuts, uneven edges, and wasted materials.
Steps for Layout Planning:
- Measure the Area: Determine the length and width of the space to be tiled.
- Find the Center: Use a chalk line or laser level to mark the center of the area.
- Dry-Lay Tiles: Lay tiles without adhesive to see how they fit and to identify where cuts will be necessary.
- Adjust for Symmetry: Make sure edges and corners are balanced and that partial tiles aren’t too small along the walls.
- Mark Guidelines: Draw lines to guide tile placement and ensure straight, even rows.
A well-planned layout reduces mistakes and improves the overall appearance of your project.
Applying Adhesive and Setting Tiles
The next step is applying adhesive and setting the tiles. Choosing the right adhesive is important:
- Thin-set mortar: Standard for floors and walls; provides strong, long-lasting adhesion.
- Tile mastic: Suitable for dry walls; not recommended for wet areas or floors.
Step-by-Step Installation:
- Mix the Adhesive: Follow the manufacturer’s instructions for the correct consistency.
- Spread with Notched Trowel: Apply an even layer of mortar on the surface and comb it with the notched side to create grooves.
- Place Tiles: Press each tile firmly into the adhesive.
- Use Spacers: Ensure consistent spacing between tiles for grout lines.
- Check Level: Use a level to confirm tiles are flat and aligned; tap gently with a rubber mallet if needed.
Tip: Work in small sections to prevent adhesive from drying before tiles are set.
Cutting Tiles
Cutting tiles is necessary for edges, corners, and around obstacles like pipes and outlets.
Tools for Cutting Tiles:
- Tile cutter: For straight cuts on standard tiles.
- Wet saw: For precise, clean cuts, especially on larger or thicker tiles.
- Tile nippers: For small adjustments and curved cuts.
- Rotary tool with diamond bit: Useful for circular or irregular cuts.
Always measure accurately before cutting to minimize waste and ensure a professional finish.
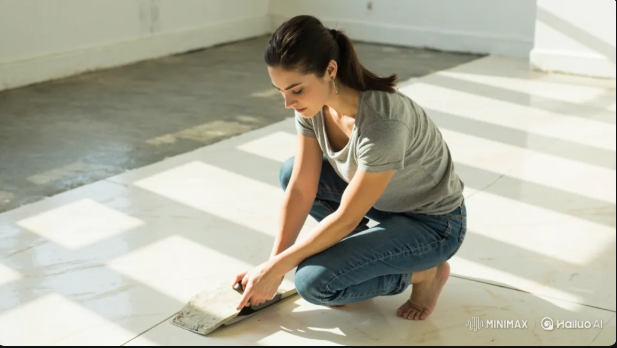
Grouting the Tiles
Grouting fills the gaps between tiles and provides a finished look while adding strength to the installation.
Steps for Grouting:
- Mix the Grout: Follow manufacturer instructions for the right consistency.
- Apply with Rubber Float: Spread grout diagonally across tiles to fill joints.
- Remove Excess Grout: Use the edge of the float to scrape off extra grout.
- Clean Tiles: Wipe with a damp sponge to remove grout haze.
- Cure and Seal: Let grout cure, then apply a sealer for unglazed tiles or porous grout.
Proper grouting ensures durable joints, water resistance, and a polished appearance.
Sealing Tiles and Grout
While glazed tiles are often naturally resistant to stains, sealing unglazed tiles and grout adds protection against moisture, dirt, and wear.
How to Seal:
- Clean the tiles and grout thoroughly.
- Apply sealer evenly with a brush or applicator.
- Let it penetrate, then wipe off excess.
- Follow manufacturer instructions for curing.
Sealing extends the life of your tile installation and reduces long-term maintenance.
Tips for a Professional Finish
- Invest in Quality Tools and Materials: High-quality mortar, grout, and tiles produce better results.
- Maintain Consistent Spacing: Uniform grout lines create a polished look.
- Work in Sections: Prevents adhesive from drying too quickly.
- Check Alignment Frequently: Ensures tiles remain straight and level.
- Clean as You Go: Remove excess adhesive or grout before it hardens.
- Allow Proper Curing Time: Avoid walking on tiles until adhesive and grout have fully set.
Common Mistakes to Avoid
- Skipping Surface Preparation: Leads to uneven tiles and poor adhesion.
- Incorrect Adhesive Application: Too much or too little mortar affects bonding.
- Inconsistent Spacing: Uneven grout lines create a sloppy appearance.
- Rushing Curing Time: Walking on freshly installed tiles can weaken the installation.
- Failing to Dry-Lay Tiles: Not planning layout can result in awkward cuts or misaligned tiles.
Maintaining Your Ceramic Tile
Ceramic tile is relatively low-maintenance but requires routine care:
- Sweep or vacuum regularly to remove dirt and debris.
- Mop with a mild, pH-neutral cleaner.
- Clean grout lines periodically with a soft brush.
- Avoid harsh chemicals that can damage tiles or grout.
- Repair any cracks or damaged grout promptly to prevent water damage.
Proper maintenance ensures your ceramic tile installation remains durable, functional, and visually appealing for years.
Advantages of Knowing How to Install Ceramic Tile
Learning how do you put down ceramic tile offers multiple benefits:
- Cost Savings: DIY installation saves professional labor costs.
- Creative Control: Customize patterns, colors, and layouts.
- Skill Development: Gain a valuable home improvement skill.
- Satisfaction: Completing a tile project is rewarding and boosts confidence.
- Increased Property Value: Professionally installed tile improves home appeal.
This guide provides a complete roadmap for putting down ceramic tile, from preparation to maintenance, ensuring a professional-looking, durable, and long-lasting installation. By following these steps, you can transform your floors, walls, or backsplashes into stunning, low-maintenance surfaces that stand the test of time.
FAQs About Putting Down Ceramic Tile
1. How do you put down ceramic tile correctly?
To install ceramic tile properly, begin by preparing the surface, planning the layout, applying adhesive, setting the tiles, and then grouting and sealing. Proper preparation and spacing are essential for a professional finish.
2. Do I need a special surface to install ceramic tile?
Yes. Tiles require a clean, level, and stable surface. Installing cement backer board or using a leveling compound ensures tiles adhere properly and remain durable over time.
3. Can I install ceramic tile over existing flooring?
It depends. Tiles can often be installed over vinyl, concrete, or secured tile, but the surface must be level, clean, and free of damage. Always check the manufacturer’s recommendations.
4. What adhesive should I use for ceramic tile?
Thin-set mortar is recommended for most floor and wall installations. For dry walls in non-wet areas, tile mastic is acceptable. Always follow manufacturer guidelines.
5. How do I cut ceramic tiles to fit edges and corners?
Use a tile cutter or wet saw for straight cuts. For curved or irregular cuts, use tile nippers or a rotary tool with a diamond bit. Always measure carefully before cutting to reduce mistakes.
6. How long should I wait before grouting tiles?
Wait at least 24 hours after setting tiles, or follow the adhesive manufacturer’s recommendations, to ensure the tiles are firmly bonded before grouting.
7. Do I need to seal ceramic tiles and grout?
Glazed tiles usually don’t require sealing. However, unglazed tiles and grout lines benefit from a sealer to protect against moisture, stains, and dirt.
8. How do I maintain ceramic tile after installation?
Sweep or vacuum regularly, mop with a mild, pH-neutral cleaner, and periodically clean grout lines. Avoid harsh chemicals that may damage tiles or grout.
9. Can I install ceramic tile myself or hire a professional?
DIY installation is possible with the right tools, preparation, and patience. For complex layouts, large areas, or uneven surfaces, hiring a professional may be the best choice for a flawless finish.
10. What common mistakes should I avoid when installing ceramic tile?
Avoid skipping surface prep, using incorrect adhesive, inconsistent spacing, rushing curing times, and failing to dry-lay tiles before installing. These errors can compromise the durability and appearance of your tiles.
Conclusion
Putting down ceramic tile is a highly rewarding home improvement project that can transform any space with style, durability, and easy maintenance. Understanding how to put down ceramic tile involves careful surface preparation, strategic layout planning, precise cutting, proper adhesive application, grouting, and sealing.
When done correctly, ceramic tile provides long-lasting durability, water resistance, and a visually stunning finish. Whether you choose to tackle the project yourself or hire a professional, following best practices ensures a professional-looking, low-maintenance, and beautiful surface that enhances the value and appeal of your home. With patience, attention to detail, and quality materials, your ceramic tile installation can stand the test of time while adding both functionality and elegance to your living spaces.