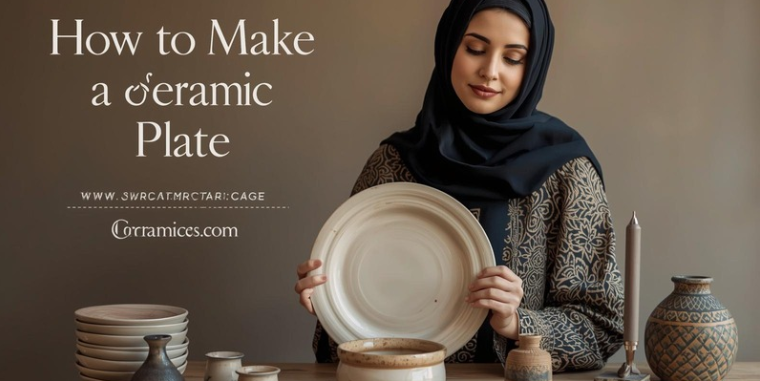
If you are searching for how to make ceramic plate, the process is easier to understand when you break it into simple stages. A ceramic plate may seem like a basic pottery form, but making one well takes more than flattening a piece of clay. A good plate needs the right thickness, a balanced shape, a stable base, smooth edges, and careful drying so it does not warp or crack before it ever reaches the kiln.
Making a ceramic plate is a great pottery project because it teaches several important clay skills at once. You learn how to control thickness, shape the rim, create a foot ring or base, manage drying, and think about function as well as appearance. Whether you want to make dinner plates, side plates, dessert plates, decorative wall plates, or handmade serving pieces, the same core steps apply.
The good news is that there is more than one way to make a ceramic plate. You can throw it on a pottery wheel, hand build it from a slab, shape it over or into a mold, or combine methods for a unique design. This ready-to-publish guide explains exactly how to make ceramic plate, what tools and materials you need, the most common methods, how to avoid warping, and how to finish your plate so it looks good and works well.
How to Make Ceramic Plate
To make a ceramic plate, start by choosing and preparing the clay, then shape the plate by wheel throwing, slab building, or using a mold. Form the flat center and rim carefully, compress the clay well, and create a stable base or foot ring. After that, let the plate dry slowly and evenly, trim and refine it if needed, bisque fire it, glaze it, and fire it again to the correct temperature. Even thickness, good compression, and slow drying are the keys to making a successful ceramic plate.
Quick Answer
The best way to make a ceramic plate is to shape evenly prepared clay into a flat form with a defined rim and base, compress the surface well, dry it slowly to prevent warping, then bisque fire, glaze, and glaze fire it.
Short Step-by-Step
- Choose the clay and plate size.
- Wedge the clay thoroughly.
- Shape the plate by wheel, slab, or mold.
- Form the rim and base.
- Compress the surface well.
- Let it dry slowly and evenly.
- Trim and smooth the plate.
- Bisque fire it.
- Glaze the plate.
- Glaze fire it to the correct temperature.
Why Making a Ceramic Plate Takes More Skill Than It Looks
A ceramic plate seems simple because it is broad and flat, but that shape creates its own challenges. Plates are especially prone to warping during drying and firing. If the clay is uneven, poorly compressed, or dried too quickly, the finished plate may twist, crack, or wobble.
A good plate should usually have:
- Even clay thickness
- A stable center
- A well-shaped rim
- A defined foot or base
- Smooth, compressed surfaces
- Balanced drying
That is why plate making is such a useful pottery exercise. It teaches control, patience, and good finishing habits.
What You Need to Make a Ceramic Plate
Before you begin, gather the tools and materials you may need.
- Pottery clay
- Wedging surface
- Rolling pin or slab roller
- Potter’s wheel, optional
- Rib tools
- Needle tool
- Wooden or metal trimming tools
- Sponge
- Wire cutter
- Fettling knife or clay knife
- Calipers, optional
- Plate mold or hump mold, optional
- Banding wheel, optional
- Kiln for firing
- Glaze suitable for your clay body
You do not need every tool at the start, but basic clay tools make the process easier and cleaner.
Choose the Right Clay for a Ceramic Plate
The clay body matters because plates are functional forms that should be durable and stable.
Stoneware Clay
Stoneware is one of the most common choices for handmade ceramic plates because it is durable and suitable for functional pottery.
Porcelain
Porcelain can make elegant plates, but it often requires more control because it can be more prone to warping.
Earthenware
Earthenware can also be used, especially for decorative plates or low-fire tableware, but it depends on the intended use and glaze fit.
For many beginners, a good stoneware clay is the easiest place to start.
Decide What Kind of Plate You Want to Make
Before touching the clay, think about the type of plate you want.
Dinner Plate
A larger plate needs good structure and even thickness so it does not warp.
Salad or Dessert Plate
Smaller plates are often easier for beginners to manage.
Serving Plate or Platter
These may be wider, flatter, or more oval depending on the design.
Decorative Plate
A wall plate or display plate may allow more freedom with shape and surface design.
Deep Plate
Some plates have a slightly raised wall or bowl-like center.
A quick sketch can help you think through size, profile, rim width, and base shape before you start.
Prepare the Clay Properly
Before shaping the plate, wedge the clay thoroughly. Wedging removes air pockets and creates a more even clay texture. This matters because uneven clay can lead to weak spots, cracking, or warping.
The better the clay is prepared, the easier it is to shape and finish the plate cleanly.
Three Common Ways to Make a Ceramic Plate
There is more than one good method. The best one depends on your tools, experience, and design style.
1. How to Make a Ceramic Plate on the Wheel
Wheel throwing is a classic method for plate making.
Center the Clay
Start with a suitable amount of wedged clay and center it on the wheel.
Open the Clay Wide
Unlike a tall cylinder or bowl, a plate begins as a wide, low form.
Pull the Base Outward
Carefully expand the flat center while keeping the clay even.
Define the Rim
Lift or shape the outer edge into the rim profile you want. The rim can be flat, gently raised, rounded, or slightly angled.
Compress the Surface Well
This is one of the most important steps. Use a rib or sponge to compress the plate bottom and rim thoroughly to reduce the risk of cracking and warping.
Let It Firm Before Trimming
A wheel-thrown plate is often trimmed later to refine the foot ring and clean up the underside.
Wheel-thrown plates can be beautiful, but they need good compression and careful drying.
2. How to Make a Ceramic Plate by Slab Building
Slab building is one of the easiest and most beginner-friendly methods.
Roll Out an Even Slab
Use a rolling pin or slab roller to create a flat slab with consistent thickness.
Cut the Plate Shape
Use a template or cut freehand into a circle, oval, square, or custom shape.
Shape the Plate
Place the slab into a slump mold or over a hump mold to create the profile you want.
Refine the Rim
Smooth the edge and shape the rim carefully so it feels intentional and balanced.
Add a Foot Ring if Desired
You can attach a foot ring made from a coil or trimmed strip of clay, or leave the plate with a simple flat base depending on the design.
Slab-built plates are great for both functional and decorative work, and they offer lots of design freedom.
3. How to Make a Ceramic Plate With a Mold
A mold helps create a more consistent shape and can reduce warping if used well.
Use a Hump Mold
A hump mold supports the clay from underneath. You drape the slab over the form.
Use a Slump Mold
A slump mold holds the clay inside a recessed shape so the slab settles downward.
Smooth the Clay Onto the Mold
Gently press the slab so it follows the mold shape without stretching unevenly.
Trim the Edge Cleanly
Once the clay is in place, trim the rim to the exact shape you want.
Molds are especially useful when you want to make matching plates in a set.
How Thick Should a Ceramic Plate Be?
A plate should be thick enough to stay stable but not so thick that it feels heavy or clumsy.
If it is too thin, it may warp, crack, or feel fragile. If it is too thick, it can become bulky and may dry unevenly. Even thickness matters more than any exact number. A plate with uneven thickness is much more likely to fail than one that is consistently shaped.
How to Shape the Rim of a Ceramic Plate
The rim affects both the look and function of the plate.
Flat Rim
A wide flat rim can look elegant and modern.
Raised Rim
A gently lifted rim helps hold food and gives the plate more definition.
Rounded Rim
A soft rounded rim feels more relaxed and handmade.
Decorative Rim
You can alter the edge with carving, scallops, faceting, or added texture.
Whatever style you choose, the rim should feel balanced with the center of the plate and should be smoothed well.
Why Compression Is So Important
Compression is one of the most important steps in plate making.
When the clay is compressed, the particles are aligned more evenly, which helps reduce stress and shrinkage problems. A well-compressed plate is less likely to crack in the base and less likely to warp during drying and firing.
Compression is especially important for:
- The flat center
- The transition from center to rim
- Any broad surface area
This is one reason plates demand more care than many people expect.
How to Make a Foot Ring on a Ceramic Plate
A foot ring gives the plate a more refined underside and helps it sit more cleanly on a table.
Wheel-Thrown Foot Ring
This is often trimmed from the clay after the plate firms up to leather hard.
Hand-Built Foot Ring
You can attach a coil or strip of clay to the underside, then blend and refine it.
No Foot Ring
Some plates use a simple flat base, especially in slab-built or rustic designs.
A good foot ring can make a plate feel lighter, more elegant, and more finished.
Dry the Plate Slowly to Prevent Warping
One of the most common problems in plate making is warping during drying.
Dry Flat and Evenly
Support the plate on a flat, absorbent surface if appropriate.
Cover Loosely With Plastic
This slows drying and helps the moisture leave the clay more evenly.
Turn the Plate if Needed
Some potters flip the plate carefully during drying once it is firm enough to handle.
Avoid Fast Drying at the Rim
The edges of a plate often dry faster than the center, which can lead to warping.
Slow, even drying is one of the best ways to protect your work.
When to Trim and Refine the Plate
Leather-hard clay is usually the best stage for trimming and refining.
Smooth the Underside
Clean up rough areas and refine the plate profile.
Trim the Foot Ring
If you are making a trimmed foot, this is the time to do it.
Refine the Rim
Smooth, compress, and tidy the edge so it looks intentional.
Check for Balance
Set the plate on a flat surface to see whether it sits properly before it becomes too dry.
This stage helps transform a basic form into a finished ceramic piece.
Bisque Fire the Ceramic Plate
Once the plate is bone dry, it is ready for bisque firing. Make sure there is no remaining moisture in the clay before it goes into the kiln.
A plate should be loaded carefully so it sits evenly and is not under stress. After bisque firing, it will be hard enough for glazing and surface finishing.
How to Glaze a Ceramic Plate
Because a plate is often functional ware, glaze choice matters.
Use a Suitable Food-Safe Glaze
For dinnerware or serving plates, choose glazes intended for functional use.
Glaze the Top Surface Carefully
The plate face is the main visual and functional surface, so even coverage matters.
Avoid Heavy Glaze on the Bottom
Too much glaze underneath can cause sticking in the kiln.
Keep the Foot Clean
The bottom or foot ring area usually needs to stay free of glaze where it touches the kiln shelf.
Test Glazes First
A glaze may look very different on a broad flat plate than on a test tile or vertical cup wall.
Glaze can completely change the final personality of the plate, so thoughtful testing is worth it.
Glaze Fire the Plate
After glazing, fire the plate to the correct temperature for the clay and glaze. Let it cool fully before handling.
Once cooled, check the plate for:
- Flatness
- Glaze fit
- Smoothness
- Stability on a flat surface
- Surface quality
A handmade plate does not need to be machine-perfect, but it should still feel functional and well finished.
Common Problems When Making a Ceramic Plate
Plates can be tricky, and even experienced potters deal with issues sometimes.
Warping
This is often caused by uneven thickness, poor compression, or fast drying.
S-Cracks in the Base
These can happen when the center is not compressed well enough.
Uneven Rim
This may come from rushed shaping or inconsistent trimming.
Heavy Plate
Too much clay can make the finished piece feel clunky.
Wobbly Base
A poorly shaped or uneven foot can make the plate rock on the table.
These problems improve a lot with careful technique and repetition.
Tips for Making Better Ceramic Plates
Start Smaller
A small plate is easier to control than a large dinner plate.
Use a Template
Templates help keep sizes and shapes more consistent.
Compress More Than You Think You Need To
This is especially important for broad flat forms.
Dry Slowly
Fast drying is one of the biggest causes of plate problems.
Make Several at Once
Repeating the form helps you improve faster and compare results.
Keep Notes
Record clay body, thickness, glaze, and firing results so you can repeat what works.
Plate making gets better with practice because each one teaches you something.
Can Beginners Make a Ceramic Plate?
Yes, beginners can absolutely make a ceramic plate. In fact, plates are excellent learning projects because they teach control, shaping, rim design, and drying awareness.
A beginner often does best by starting with:
- Small slab-built plates
- Simple round templates
- Hump or slump molds
- Smooth rims
- Basic glazes
Once you understand how clay behaves in a flat form, you can move on to larger or more advanced designs.
Common Snippet Answers
How do you make a ceramic plate?
You make a ceramic plate by shaping clay into a flat form with a rim and stable base, letting it dry slowly, then bisque firing, glazing, and glaze firing it.
What clay is best for making ceramic plates?
Stoneware is one of the best clays for making ceramic plates because it is durable and works well for functional pottery.
Why do ceramic plates warp?
Ceramic plates often warp because of uneven thickness, poor compression, or drying too quickly.
Can beginners make ceramic plates?
Yes, beginners can make ceramic plates, especially with slab-building or mold methods that help control shape and thickness.
FAQs About How to Make Ceramic Plate
1. What is the best clay for a ceramic plate?
Stoneware is a common and reliable choice because it is durable and well suited for functional pottery like plates.
2. Can I make a ceramic plate without a pottery wheel?
Yes, you can make a ceramic plate without a wheel by using slab-building methods or shaping clay with a mold.
3. Why does my ceramic plate warp?
Warping usually happens because the clay thickness is uneven, the plate was not compressed well, or it dried too quickly or unevenly.
4. How do I stop a ceramic plate from cracking?
Compress the clay well, keep the thickness even, and let the plate dry slowly and evenly to help reduce cracking.
5. Should a ceramic plate have a foot ring?
A foot ring is not required, but it can help the plate sit better, look more refined, and feel lighter.
6. How thick should a handmade ceramic plate be?
A handmade plate should be even in thickness and thick enough to stay stable without becoming heavy. Evenness matters more than making it extremely thin.
7. Can I use a mold to make ceramic plates?
Yes, molds are very helpful for making ceramic plates, especially if you want a controlled shape or a matching set.
8. Do ceramic plates need glaze?
Functional ceramic plates are usually glazed so they are easier to clean and more suitable for use with food.
9. How long does it take to make a ceramic plate?
The shaping may only take one session, but the full process including drying, bisque firing, glazing, and glaze firing takes much longer.
10. Is making a ceramic plate hard for beginners?
It can be challenging because plates often warp, but beginners can make successful plates by starting small and drying them carefully.
Conclusion
Learning how to make ceramic plate is a rewarding way to build real pottery skills. A good ceramic plate is not just flat clay shaped into a circle. It is a carefully made form with balanced proportions, an even surface, a thoughtful rim, and a stable base that can survive drying, firing, and everyday use.
Whether you choose to throw your plate on the wheel, hand build it from a slab, or use a mold for consistency, the same core principles matter every time. Prepare the clay well, keep the thickness even, compress the surface carefully, and dry the plate slowly so it stays true to shape.
With practice, patience, and attention to detail, making ceramic plates becomes much more natural. Over time, you can create plates that are not only functional, but also personal, beautiful, and uniquely handmade.