Painting glazed ceramic pots can be a fun and rewarding way to add a personal touch to your home decor, garden, or craft projects. Whether you’re looking to revamp old pots or give a new look to shiny ceramic planters, this guide will walk you through the entire process. Painting glazed ceramics can be a bit tricky due to the slick, non-porous surface, but with the right preparation, materials, and techniques, you can achieve beautiful, long-lasting results. Let’s see How to Paint Glazed Ceramic Pots….
In this comprehensive article, we’ll explore step-by-step instructions, recommended tools, tips to make your paint job last, and answers to frequently asked questions about painting glazed ceramic pots.
Why Paint Glazed Ceramic Pots?
Before diving into the process, it’s essential to understand why painting glazed ceramics can be a bit challenging. Glazed ceramics have a glossy finish that acts as a protective barrier, making it difficult for paint to adhere. However, with the proper surface preparation and the right type of paint, you can transform your pots into custom pieces of art.
Here are a few reasons why you might want to paint glazed ceramic pots:
- Personalization: Customize pots with your own color schemes or patterns to match your decor or style.
- Upcycling: Instead of buying new pots, painting old glazed ceramic pots allows you to give them a fresh, new look.
- Creativity: Painting allows you to express your creativity through different designs, textures, and techniques.
What You’ll Need to Paint Glazed Ceramic Pots

Before you begin, gather the following supplies to ensure you’re well-prepared for the project:
- Glazed ceramic pot(s): Any shape or size will work.
- Sanding paper (220-grit): To scuff the surface of the glaze for better paint adhesion.
- Primer: Choose a primer specifically designed for glossy surfaces or ceramic.
- Acrylic or enamel paint: Both types of paint work well on glazed ceramics. Enamel offers a more durable, glossy finish, while acrylic is easy to use and available in many colors.
- Paintbrushes: Various sizes for detailed work and larger areas.
- Painter’s tape: To protect areas you don’t want to paint.
- Clear sealer (optional): For extra protection and a durable finish.
- Rubbing alcohol or a degreaser: To clean the surface before painting.
- Cloth: For wiping down the pot after sanding and cleaning.
Step-by-Step Guide: How to Paint Glazed Ceramic Pots
Step 1: Clean the Pot Thoroughly
Before you start painting, make sure the ceramic pot is clean and free of dirt, dust, or grease. This is a crucial step because any debris on the surface can prevent the paint from adhering properly.
- Use rubbing alcohol or a degreaser to wipe down the pot thoroughly.
- Make sure to remove any residue, especially around the rim or decorative edges.
Allow the pot to dry completely before moving on to the next step.
Step 2: Sand the Surface
The key to painting glazed ceramic is to roughen up the slick surface so that the paint can adhere better. Here’s how to sand the pot:
- Use 220-grit sandpaper and lightly sand the entire surface of the glazed ceramic pot. Focus on creating a dull, matte surface rather than completely removing the glaze.
- Be sure to sand all areas, including edges and curves.
- After sanding, wipe off any dust with a clean cloth or tack cloth.
This step helps the primer and paint stick to the ceramic surface, giving you a long-lasting finish.
Step 3: Apply Primer
Priming is essential for painting glazed ceramics. It provides a base for the paint to adhere to and prevents the glossy glaze from showing through the final paint layers.
- Choose a primer designed for slick surfaces, such as a spray primer for glass or ceramics.
- Apply a thin coat of primer to the entire surface of the pot. Make sure it covers all areas evenly, and avoid drips by applying light, even layers.
- Allow the primer to dry completely before applying a second coat if needed.
Depending on the product, primer drying times can vary, so check the manufacturer’s instructions.
Step 4: Choose Your Paint
When painting glazed ceramic pots, it’s crucial to select the right type of paint. The two best options are:
- Acrylic Paint: Acrylic paint is water-based, making it easy to clean and widely available in various colors. It’s ideal for indoor pots or pieces that won’t experience a lot of wear and tear.
- Enamel Paint: Enamel paints are more durable and are perfect for outdoor pots or ceramics that will face exposure to moisture and sunlight. Enamel paints dry to a glossy, hard finish.
Choose your paint based on where the pot will be placed and the durability you require.
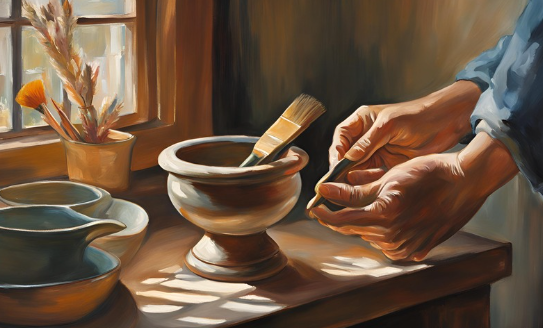
Step 5: Start Painting
Now comes the fun part—painting the pot! Follow these steps to ensure an even, beautiful finish:
- Use painter’s tape to cover any areas you don’t want to paint, like the rim or bottom of the pot.
- Begin by applying your chosen paint in thin, even coats. Avoid heavy applications to prevent drips.
- Use a small brush for detailed work and a larger brush for covering bigger areas.
- If you’re creating a design, plan your pattern before you start and use tape or stencils if necessary.
Let the paint dry according to the instructions on the bottle before applying additional coats.
Step 6: Add More Coats or Detailing
After the first coat of paint has dried, assess whether another coat is necessary. If you’re working with lighter colors, you may need 2-3 coats to get an even finish. Always allow each coat to dry completely before applying the next.
- If you want to add patterns or details (such as stripes, polka dots, or intricate designs), use painter’s tape or a stencil to ensure clean, sharp lines.
Step 7: Seal the Paint (Optional)
While sealing your painted ceramic pot isn’t always necessary, applying a sealer can provide added protection, especially if your pot will be outdoors or exposed to moisture.
- Use a clear acrylic or enamel sealer to protect the painted surface from chipping, water, and sun damage.
- Apply a light coat of sealer and allow it to dry completely before handling the pot.
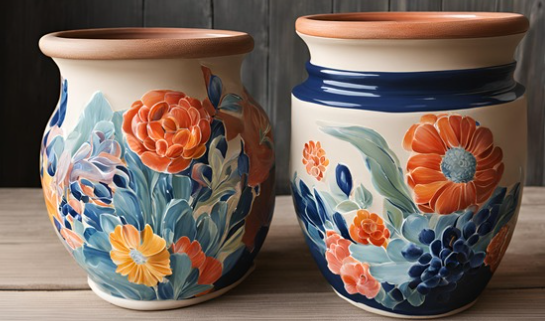
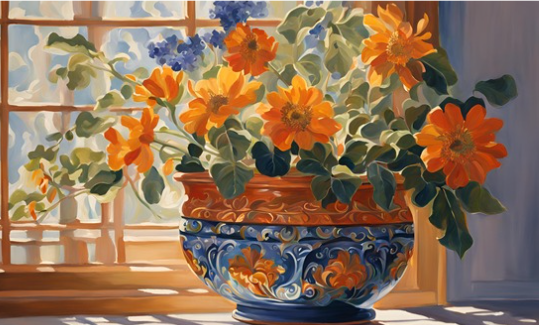
Design Ideas for Painted Glazed Ceramic Pots
Here are a few design ideas to inspire your project:
- Minimalist style: Paint the entire pot in a single matte or glossy color for a chic, modern look.
- Geometric patterns: Use painter’s tape to create sharp geometric shapes or stripes on the pot.
- Boho chic: Add intricate hand-painted designs with vibrant colors, such as mandalas or tribal patterns.
- Ombre effect: Blend two or more colors to create a gradient, fading from light to dark.
- Floral or botanical themes: Paint leaves, flowers, or vines for a nature-inspired look that complements your plants.
How to Make Paint Last on Glazed Ceramics
Ensuring your paint job lasts on glazed ceramic pots requires proper preparation and materials. Follow these tips for a long-lasting finish:
- Sand the surface well: Sanding is crucial for getting the paint to adhere to the slick glazed surface.
- Use high-quality paint: Opt for enamel or exterior-grade acrylic paint if your pots will be exposed to the elements.
- Seal the finish: Applying a clear sealant helps prevent chips, scratches, and damage from water or sunlight.
- Avoid heavy handling: Even with a durable finish, try not to handle the pots roughly, as the paint can chip over time.
FAQs About Painting Glazed Ceramic Pots
Can I paint directly on glazed ceramic without sanding?
While you can skip sanding, it is highly recommended. Sanding ensures that the paint adheres properly to the smooth, glazed surface. Without sanding, the paint may peel or chip off easily.
What kind of paint works best on glazed ceramic pots?
Acrylic and enamel paints are the most commonly used for glazed ceramic pots. Enamel is more durable and suitable for outdoor use, while acrylic is easier to work with and better for indoor projects.
Do I need to use primer on glazed ceramics?
Yes, using a primer helps the paint adhere better to the smooth surface of glazed ceramics. Primer also ensures that the final color looks even and vibrant.
Can I use spray paint on glazed ceramic pots?
Yes, spray paint works well on glazed ceramic pots, especially when using products specifically designed for ceramics or glossy surfaces. Just make sure to apply light, even coats for the best results.
How long does painted ceramic last?
With proper preparation, paint can last several years on glazed ceramic pots. Using the right type of paint and sealer, as well as protecting the pot from rough handling, can prolong the paint job’s life.
Can I use painted glazed ceramic pots outdoors?
Yes, but if the pot will be exposed to the elements, use durable, weather-resistant paint like enamel, and apply a protective sealer to prevent damage from water and sun exposure.
Is it possible to paint a glazed ceramic pot without using primer?
While it’s possible, skipping the primer may result in the paint peeling or chipping more easily. For best results, always prime the surface first.
Can I bake the ceramic pot to set the paint?
Some paints, like special ceramic paints, can be baked to set and harden them. However, not all paints are bake-safe, so always follow the manufacturer’s instructions. Baking the pot can help make the paint more durable, but it’s not required for most acrylic or enamel paints.
How do I clean painted ceramic pots?
To clean your painted ceramic pots, gently wipe them with a damp cloth. Avoid using abrasive cleaners or scrubbing, as this can damage the paint, especially if it’s not sealed.
Can I repaint a glazed ceramic pot that’s already been painted?
Yes, you can repaint an already painted ceramic pot. Just make sure to lightly sand the existing paint to create a rough surface for the new paint to adhere to. Apply primer and proceed with the painting process as described above.
Additional Tips and Tricks for Painting Glazed Ceramic Pots
To make your project even more successful, here are a few extra tips to keep in mind:
- Work in a well-ventilated area: If you’re using spray paints or sealers, make sure you’re working in a space with good airflow. This helps the paint dry properly and ensures you’re not inhaling fumes.
- Test the paint first: If you’re unsure how the paint will look on your ceramic pot, test it on a small, inconspicuous area before painting the entire pot.
- Use stencils for precision: If you want to create specific patterns, such as flowers, geometric shapes, or letters, using stencils can help you achieve clean, professional results.
- Layer your designs: If you’re going for a multi-color design, make sure to let each color dry completely before adding the next layer to avoid smudging.
- Consider texture: If you want a textured finish, you can experiment with adding sand to the paint or using a sponge to apply the paint in dabs, creating a rustic, handmade look.
Final Thoughts on Painting Glazed Ceramic Pots
Painting glazed ceramic pots is a fantastic way to add creativity, personality, and a pop of color to your home or garden. While the slick, glossy surface of glazed ceramics requires special preparation, the process is relatively simple with the right tools and techniques. Whether you’re using acrylic or enamel paint, adding a primer and sealer will ensure your masterpiece lasts for years to come.
By following this guide and taking your time to properly prepare and paint your ceramic pots, you can transform old, plain, or outdated planters into stunning decorative pieces that will enhance any space. With a little patience and creativity, the possibilities are endless!
Summary of Key Steps:
- Clean the pot thoroughly with rubbing alcohol or a degreaser.
- Sand the glazed surface with 220-grit sandpaper to roughen the surface.
- Apply primer specifically designed for glossy surfaces or ceramics.
- Paint with acrylic or enamel paint, using thin, even coats.
- Add more coats or details as needed, allowing each layer to dry completely.
- Seal the painted surface with a clear sealer for extra durability (optional).
By following these steps and using high-quality materials, you’ll have beautiful, painted ceramic pots that can stand the test of time.
Now that you have the knowledge to paint glazed ceramic pots, it’s time to get creative! Whether you’re sprucing up your garden or designing pots to match your interior, this DIY project offers endless possibilities. Happy painting!
Frequently Asked Questions (FAQs)
How long should I wait between paint coats?
It’s best to wait at least 1-2 hours between coats, but always follow the drying times specified by the paint manufacturer. Humidity and temperature can also affect drying times, so if you’re painting in a humid area, allow more time between coats.
Do I need a special sealer for outdoor pots?
Yes, if you’re painting pots that will be placed outdoors, make sure to use a clear, waterproof sealer designed for outdoor use. This will protect the paint from fading, chipping, and water damage.
Can I paint glazed ceramic pots without sanding?
You can, but the paint might not adhere as well and may peel over time. Sanding gives the surface “grip” for the primer and paint to stick, resulting in a more durable and long-lasting finish.
Is enamel paint better than acrylic for outdoor pots?
Yes, enamel paint is more durable and weather-resistant than acrylic paint, making it a better option for outdoor ceramic pots. Acrylic paint is suitable for indoor pots or projects that won’t be exposed to the elements.
How do I prevent brush strokes when painting ceramic pots?
To avoid brush strokes, use a high-quality synthetic brush and apply thin, even coats of paint. You can also use a foam brush or roller for a smoother finish. If using spray paint, apply it in light, even passes to prevent drips and streaks.
Can I add a pattern or design after painting the base color?
Yes! Once the base coat is completely dry, you can add designs, patterns, or stencils over it. Just make sure to use a steady hand and consider using painter’s tape or stencils for precise designs.
How long will painted glazed ceramic pots last?
With proper preparation and the use of durable paints and sealers, painted glazed ceramic pots can last several years. Pots that are kept indoors may last longer than those exposed to the elements outdoors.
Can I repaint glazed ceramic pots that were previously painted?
Yes, you can repaint pots. Be sure to lightly sand the surface of the previous paint layer to create a rough surface for the new paint to adhere to. Apply primer and proceed with your new design.
What happens if I don’t use a sealer?
While not always necessary, using a sealer can help protect your paint job, especially for outdoor use. Without a sealer, the paint may chip, fade, or wear away more quickly.
How do I ensure even paint coverage?
To ensure even paint coverage, apply the paint in thin, multiple layers instead of one thick coat. Allow each coat to dry completely before applying the next. Using spray paint or a foam roller can also help achieve a smooth, even finish without brush strokes.
By following these expert tips, your painted glazed ceramic pots will look professional, vibrant, and ready to stand out in any space!