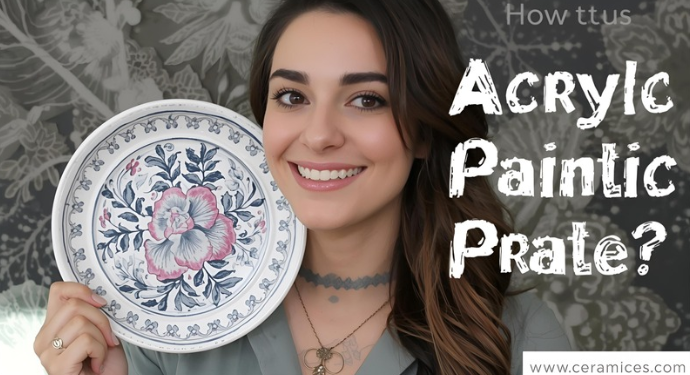
Painting ceramic plates with acrylic paint is a fun and creative way to make personalized home décor, gifts, or decorative art pieces. Acrylic paint is a favorite among crafters because it dries quickly, is easy to use, and comes in vibrant colors. However, one major challenge is ensuring that the paint remains durable and resistant to chipping, fading, or washing away. Proper sealing is crucial for long-lasting results, especially for functional plates that may occasionally come into contact with moisture or food.
Sealing acrylic paint on a ceramic plate protects your artwork, enhances its vibrancy, and ensures longevity. In this detailed guide, we’ll cover everything you need to know, from surface preparation, painting techniques, choosing the right sealer, and application methods, to advanced tips that help achieve a professional finish.
Understanding Acrylic Paint on Ceramic Plates
Before diving into sealing, it’s important to understand how acrylic paint interacts with ceramic surfaces.
Properties of Acrylic Paint
- Water-Based: Acrylic paint is water-soluble when wet but water-resistant once dry.
- Flexible Finish: Forms a thin, durable layer that adheres to non-porous surfaces like ceramic.
- Vibrancy: Retains bright, vibrant colors, but can fade if not properly sealed.
- Non-Food Safe: Unless sealed with a food-safe finish, painted surfaces should not contact food or liquids.
Challenges of Painting Ceramic Plates
- Non-Porous Surface: Smooth ceramic does not absorb paint, which can make adhesion tricky.
- Wear and Tear: Plates may be handled frequently or exposed to moisture, increasing the risk of paint chipping.
- Heat and Moisture Exposure: Functional plates can be exposed to hot or cold foods, which can affect unsealed paint.
Sealing your painted ceramic plate is key to solving these issues, protecting the artwork while maintaining color integrity.
Materials and Tools Needed
Gathering the proper supplies is essential for achieving a professional, long-lasting finish.
Painting Materials
- Ceramic plate: Preferably smooth and clean.
- Acrylic paint: High-quality, opaque paints designed for non-porous surfaces.
- Paintbrushes: Fine brushes for detailed designs and larger brushes for base coats.
- Rubbing alcohol or mild soap: To clean and prep the surface.
- Water and paper towels: For cleaning brushes and wiping surfaces.
Sealing Materials
- Acrylic spray sealer: Available in gloss, matte, or satin finishes.
- Brush-on acrylic sealer: Allows precise control for detailed areas.
- Food-safe epoxy resin (optional): For functional plates exposed to liquids.
- Masking tape: Protect areas that should remain unsealed.
- Soft cloth or sponge: For cleaning or applying sealers.
Safety Materials
- Gloves: To protect your hands from chemicals or paint.
- Protective eyewear: Recommended if using spray sealers or resin.
- Ventilated area: Essential for spray sealers or resin to avoid fumes.
Step-by-Step Guide to Sealing Acrylic Paint on Ceramic Plates
Sealing acrylic paint on a ceramic plate involves preparation, painting, curing, sealing, and finishing. Each step is critical for achieving durable, professional results.
Step 1: Clean and Prep the Plate
- Wash the ceramic plate thoroughly with mild soap and water to remove dust, oils, or grease.
- For stubborn residue, wipe the surface with rubbing alcohol.
- Dry the plate completely before painting.
Pro Tip: A clean and dry surface ensures the paint adheres properly and the sealer forms a strong protective layer.
Step 2: Paint Your Ceramic Plate
- Use high-quality acrylic paint for bright, long-lasting designs.
- Apply thin, even coats, allowing each layer to dry before adding another.
- For detailed patterns or intricate designs, use fine brushes or acrylic paint pens.
- Avoid painting the edge or rim if the plate will be used for food, unless you plan to use a food-safe sealer.
Pro Tip: Multiple thin layers provide better adhesion and prevent cracking or bubbling.
Step 3: Allow the Paint to Cure
- Let the painted plate cure for 24–72 hours at room temperature.
- Proper curing ensures the paint fully adheres to the ceramic surface before sealing.
Pro Tip: Rushing this step can compromise the durability of the sealer and cause peeling or chipping.
Step 4: Select the Right Sealer
Choosing the right sealer depends on whether your plate is decorative or functional.
- Acrylic Spray Sealer
- Provides a smooth, even coat.
- Available in gloss, matte, or satin finishes.
- Best for decorative plates.
- Brush-On Acrylic Sealer
- Offers more control for detailed or small designs.
- Can apply multiple coats for extra protection.
- Food-Safe Epoxy Resin
- Highly durable, waterproof, and safe for plates that will hold food.
- Creates a glossy, professional finish.
Pro Tip: Always use a food-safe sealer if the plate will be functional. Decorative sealers are not suitable for items that come in contact with food.
Step 5: Apply the Sealer
- Spray Sealer: Hold the can 6–12 inches from the plate. Apply in light, even coats, moving continuously to avoid drips. Let each coat dry before adding another.
- Brush-On Sealer: Use a soft brush to apply thin coats, following the contours of the design. Avoid over-brushing, which can cause streaks.
- Epoxy Resin: Mix according to manufacturer instructions, then pour or brush evenly onto the plate. Use a heat gun or torch lightly to remove air bubbles.
Pro Tip: Multiple thin coats produce a more durable finish than a single thick coat.
Step 6: Allow the Sealer to Cure
- Follow the manufacturer’s recommended curing time: 24–72 hours for acrylic sealers, up to 7 days for epoxy resin.
- Avoid handling or placing items on the plate until fully cured.
Pro Tip: Proper curing ensures maximum durability and water resistance.
Step 7: Optional: Baking for Extra Durability
- Some crafters bake painted plates to improve adhesion.
- Place the plate in a cold oven, then heat to 350°F (175°C) for 30 minutes.
- Allow the plate to cool completely in the oven before removing.
Pro Tip: Not all paints or sealers are oven-safe. Always check manufacturer guidelines before .
Frequently Asked Questions (FAQs)
1. Can I seal acrylic paint on a ceramic plate without a sealer?
No. Acrylic paint alone is not durable on non-porous surfaces like ceramic. Without sealing, the paint can chip, fade, or wash away, especially with handling or moisture exposure.
2. What types of sealers are best for ceramic plates?
- Acrylic spray sealers: Quick and easy; ideal for decorative plates.
- Brush-on acrylic sealers: Offer precise control for detailed designs.
- Food-safe epoxy resin: Durable, waterproof, and safe for plates that will contact food.
3. Can I eat from a painted plate after sealing?
Only if you use a food-safe sealer approved for direct contact with food. Decorative sealers are not safe for functional use.
4. How long should I wait before sealing painted plates?
Allow acrylic paint to cure for 24–72 hours. Proper curing ensures strong adhesion and prevents peeling or chipping when the sealer is applied.
5. Can I bake a painted plate to make it more durable?
Yes, baking at 350°F (175°C) for 30 minutes can enhance adhesion. Always verify that both the paint and sealer are oven-safe before baking.
6. How many coats of sealer should I apply?
Typically, 2–3 thin coats are recommended. Thin, even layers provide better protection than a single thick coat, which can cause drips or uneven texture.
7. Should I use gloss or matte sealer?
- Gloss: Enhances color vibrancy and adds shine.
- Matte: Creates a subtle, soft finish.
- Satin: Balances between gloss and matte finishes.
8. How do I maintain a sealed painted plate?
- Hand wash gently with mild soap and a soft sponge.
- Avoid abrasive cleaners or scrubbing pads.
- Keep away from sudden temperature changes to prevent cracking.
9. Can I seal metallic or glitter acrylic paints on a plate?
Yes. Sealing protects metallic, glitter, or textured paints, preserving the shine and preventing flaking.
10. What mistakes should I avoid when sealing painted plates?
- Applying thick coats of paint or sealer.
- Sealing before the paint is fully cured.
- Using non-food-safe sealers for functional plates.
- Skipping surface cleaning before painting or sealing.
Conclusion
Sealing acrylic paint on a ceramic plate is essential to protect your artwork, maintain vibrant colors, and ensure durability, whether the plate is decorative or functional. By following the correct steps—cleaning the surface, painting carefully, allowing proper curing, and choosing the right sealer—you can achieve long-lasting, professional-quality results.
Selecting the right sealer—whether it’s acrylic spray, brush-on sealer, or food-safe epoxy—and applying it in thin, even layers ensures a smooth, protective finish. Baking or applying multiple coats can further enhance adhesion, while careful maintenance—gentle hand washing and avoiding extreme temperatures—keeps your painted plates looking vibrant for years.
With these techniques, ordinary ceramic plates can be transformed into beautiful, durable works of art, perfect for gifts, home décor, or creative projects. Sealing your painted plates correctly ensures that your effort and creativity last, providing both visual appeal and long-term protection.