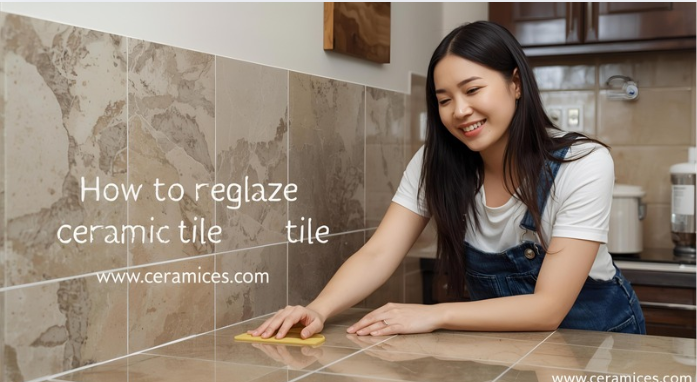
Why Reglazing? When & Why You Might Choose It
Before diving into steps, it’s important to understand why one would reglaze ceramic tile instead of ripping it out or doing a partial repair. Reglazing (also called refinishing, resurfacing, or re-enameling) means applying a new finish/coating over existing glazed or unglazed tile to refresh its appearance.
Pros and tradeoffs
Advantages
- Cost savings: Reglazing is typically far less expensive than full removal and retiling, especially when labor, substrate work, and disposal are factored in.
- Time saved: You avoid demolition, cleanup, and reinstallation latencies. Many reglazing jobs can be done in a few days.
- Less mess, less disruption: No dust and debris from chipping out tile, less structural stress on walls or floors.
- Design flexibility: You can change color, gloss level, or even surface texture (within limits) while preserving the base tile.
- Environmental benefit: Less waste, reuse of underlying tile substrate.
Drawbacks / limitations
- Durability concerns: A reglazed coating doesn’t always match the toughness of factory glaze, especially under heavy wear or impact.
- Adhesion risk: If surface prep is inadequate, the new coating can peel, blister, or delaminate.
- Compatibility issues: Some tile types, substrates, or existing damage (chips, deep cracks) may not support a good result.
- Altered surface feel: The gloss, slip resistance, or texture can differ from original tile, sometimes in undesirable ways.
- Maintenance and future repair constraints: Touch-ups may show, and if the coating fails, full replacement might become necessary.
In practice, reglazing works best when the existing tile is structurally sound (no large cracks, loose pieces, substrate movement) and the surface is relatively even. If many tiles are busted, or the substrate is failing, reglazing may only delay a full replacement.
“Reglazing involves applying a new finish to existing tiles rather than restoring the original glaze … the old surface is covered with a durable coating (typically epoxy-based).”
Some designers see reglazing as a transformative “makeover” move:
“Reglazing involves cleaning, then spraying a thin coat of enamel over the tile, tub, or sink.”
If you proceed, success depends heavily on preparation, selection of materials, and application technique.
Materials & Tools You’ll Need (And Why)
Getting the right materials and tools is critical — cutting corners here is the most common cause of failure.
Key materials / consumables
- Reglazing kit or coatings: Many kits combine primer, colorant, and topcoat (often epoxy, urethane, or polyaspartic formulations).
- Primer / adhesion promoter: Especially important if the existing tile surface is glossy or nonporous.
- Fine-grit sandpaper / sanding pads (400–600 grit or higher) or abrasive etching agents (acid etch) for surface scuffing.
- Cleaning agents / degreaser: Heavy-duty tile cleaner, acid or alkaline cleaners, phosphate-based cleaners (as recommended).
- Tack cloths / lint-free cloths: To remove dust after sanding.
- Painter’s tape, masking film, drop cloths / plastic sheeting: For masking adjacent surfaces (fixtures, walls, trim).
- Paint roller (foam or short-nap), small foam brushes (for edges), possibly a sprayer or HVLP gun (depending on product).
- Mixing containers (clean), stir sticks, measuring tools (especially for dual-component coatings).
- Respirator mask (organic vapor, appropriate grade), gloves, eye protection, ventilation equipment
- Vacuum (wet/dry shop vac) and/or air blower (to remove dust)
- Wet sanding pad or ultra-fine finishing pad (optional between coats or for smoothing)
If visible, some kits may also include colorants or tint agents to adjust shade.
Many “how-to reglaze” guides list nearly identical sets: cleaning, sanding, priming, applying coatings, drying/curing. (
One cost estimate from a renovation site: about $50–$80 per 100 sq ft for the materials portion, though labor and prep often dominate overall effort.
The Science of Surface Adhesion: What You Must Know
To achieve a long-lasting finish, you need to respect the underlying science of adhesion, stress, and substrate compatibility.
Surface energy and bonding
The original tile glaze is usually smooth, dense, and low-porosity, which is not naturally receptive to new coatings. For adhesion, you need to increase surface energy by roughening or etching, so the new material “grips.”
- Mechanical bonding: achieved by sanding or creating micro-scratches so the coating can physically “key” into the surface.
- Chemical bonding: in some systems, primers or adhesion promoters can chemically bond to the original glaze and also co-polymerize with the new finish.
- Interfacial compatibility: the coating must be compatible chemically and thermally (i.e. similar coefficients of expansion) with the tile and substrate to minimize stress.
Thermal and mechanical stress
Once applied, the new finish will expand, contract, and flex with temperature, humidity, and structural movement. Poor matching can lead to delamination or cracking.
- Overly thick coatings are more susceptible to stress because they generate internal stresses during cure.
- Sharp corners, abrupt changes in plane, or areas around fixtures concentrate stress — those are common failure points.
- Edges and seams (junction between tile and trim, grout gaps) need special attention — often masked or allowed slight flexibility (caulk rather than rigid coating).
Curing kinetics and moisture control
Epoxy / urethane coatings cure via crosslinking chemistry. If moisture or contaminants interfere during the cure, incomplete crosslinking occurs, weakening the bond. That’s why careful environmental control (temperature, humidity, ventilation) is critical.
Manufacturers of tile refinishing or reglazing products explicitly warn about humidity, temperature range, and cure times. (
Step-by-Step Process: How to Reglaze Ceramic Tile (Detailed)
Below is a thorough, sequential protocol. Don’t skip or rush steps — each builds toward long-term performance.
1. Planning, mask-out & staging
- Decide which areas will be reglazed (entire wall, bathtub surround, partial accent zone).
- Remove or mask off fixtures, faucets, trim, trimings, lights, outlets — anything that could be damaged or cause overspray.
- Lay down drop cloths or plastic sheeting to protect flooring, nearby walls, and surfaces.
- Ensure ventilation: open windows, put a fan downwind, plan for exhaust. Many reglazing coatings emit VOCs.
- Check environmental conditions: confirm the ambient temperature and humidity fall within the coating manufacturer’s required range (often 60–85 °F, RH < 60%).
- Be sure you have adequate time — reglazing can’t be rushed. Lowe’s describes it as a multi-day job with restricted use until fully cured.
2. Cleaning, degreasing, and existing surface assessment
- Start by removing old caulk, old sealants, soap scum, hard water deposits, mold, oils, or any surface contaminants using scrub brushes, strong cleaners, or even mild acid/alkali (per product recommendations).
- Rinse thoroughly and let fully dry. Residual cleaner residue or moisture is a common cause of bond failure.
- Inspect tile surface: look for hairline cracks, chips, flaking glaze, or loose tile. Decide whether to repair or replace problem tiles before finishing.
- Some guides emphasize that every bit of gloss must be removed — leaving tiny patches of gloss can lead to peeling. One DIY thread cautions: “Every single bit of gloss needs to be removed. It must be clean; no oils, soaps, dust or debris can be left.”
- Vacuum or blow off all dust. Follow with a tack cloth to pick up fine particles.
3. Surface sanding or etching
- Use 400–600 grit or finer sanding pads (orbital sander or by hand) to scuff the entire tile surface evenly. The goal is to remove gloss and produce micro-scratches, not to gouge or damage tile.
- Some coatings require acid etching (an etching acid that briefly reacts with the glaze) if sanding alone isn’t adequate. Always check your coating’s instructions.
- After sanding or etching, thoroughly vacuum and wipe again with tack cloth or lint-free damp cloth. Ensure the surface is spotless and dry before proceeding.
4. Primer / adhesion layer
- Apply the recommended primer or adhesion-promoting layer from your kit (or as specified by the glaze manufacturer).
- Use a small foam brush or angled brush to “cut in” along edges, fixtures, edges, or corners.
- Use a roller to apply the primer evenly on broad surfaces, maintaining a “wet edge” (so you don’t overlap prematurely).
- Avoid pooling or heavy buildup — the primer is a bridge, not a finish.
- Allow full cure or dry time for primer (often a few hours), following the manufacturer’s instructions exactly.
5. First coat of glaze / coating
- Mix the coating (often two-part) carefully in the clean mixing container. Follow exact ratios and mixing order (A into B or vice versa) as stated by the manufacturer.
- Let it rest or “slake” if required, then re-stir gently.
- Pour into a paint tray.
- Use the foam roller to apply a uniform coat; again, “cut in” edges and corners with the foam brush carefully.
- Maintain a consistent coating thickness. Avoid going too thick; also avoid going too thin.
- Always work from one wall outward so you don’t trap yourself under fresh coating later.
- Be mindful of “wet edge” transitions so you don’t get visible lap lines.
- If the coating is fast-curing, work in sections — don’t overextend across too wide an area.
- Track pot life / working time — once the coating begins to cure, fresh material shouldn’t be introduced.
6. Second coat (and optional third)
- Allow the first coat to cure just until it is appropriate to overcoat (often 45 minutes to a few hours, depending on product). If you wait too long, the surface may cure and bond poorly to the next coat; if too soon, you may get runs or mismatches.
- Lightly sand the first coat if required by instructions to improve intercoat adhesion (e.g. with very fine grit).
- Clean dust off thoroughly.
- Repeat the same application process: cut in, roll, maintain wet edges.
- Some jobs or strong color changes may require a third coat, but only if recommended by the manufacturer.
7. Edge cleanup, masking removal, touch-ups
- After the final coat has set enough that it won’t drip or smear, remove painter’s tape carefully (pull at a 45° angle).
- Touch up any small imperfections with a fine-brush (sometimes blending in with diluted coating).
- If you removed old caulk earlier, wait until full cure before re-caulking edges with a suitable flexible silicone (so the coating doesn’t bond to rigid elements).
8. Full cure, testing & redoing joints
- Allow the reglazed surface to fully cure (often 72 hours or more, sometimes longer) before any contact with water, moisture, or cleaning. Be patient — early traffic is a major source of failure.
- After cure, test edges, corners, and adhesion by gently probing discrete spots.
- Reapply new caulk where needed (expansion gaps, corners) using a neutral-cure or nonacidic silicone that is compatible with your coating.
- Clean the surface with only recommended nonabrasive cleaners.
Common Pitfalls & How to Avoid Them (Lessons from Failures)
Many failed DIY reglazing jobs can be traced to a handful of predictable mistakes. Knowing them in advance helps you avoid disaster.
- Inadequate prep (cleaning, degreasing, sanding): Most coatings fail at the interface — leftover soap, wax, oils, or glossy spots are the enemy.
- Poor environmental control: Humid, cold, or dusty conditions interfere with curing and adhesion.
- Mixing errors: Wrong ratios, incomplete mixing, or contaminating the mix kills performance.
- Over-thick coats: They cure unevenly, trap stress, and are prone to cracking or delamination.
- Too many interruptions / lap marks: Poor planning leads to visible seams.
- Ignoring expansion joints & edges: Rigid finishes without flexibility zones fail near trim or corners.
- Rushing cure time: Using the surface too early often results in marring or delamination.
- Not matching substrate movement: If the substrate shifts (thermal expansion, structural movement), rigid coatings will crack or peel.
- Using dissimilar materials: Coatings not compatible with tile or glaze may chemically reject bonding.
- Poor caulking / joint transitions: If the new finish binds rigidly to both tile and adjacent rigid structure, stress concentrates.
Interestingly, DIYers often lament how much time is needed for prep versus actual coating. One commenter put it bluntly:
“It should take four or five times as long to prepare it versus the actual glaze job.”
That’s not exaggeration — the real time sink is cleaning, assessing, sanding, curing, and masking.
Design Considerations & Creative Tips
Reglazing isn’t just about function — it’s an opportunity to refresh aesthetic direction. But the limited nature of coatings imposes constraints and opportunities.
Color, gloss, and finish levels
- You can often shift from one color to another (e.g. drab beige to crisp white), but going extremely dark or contrasting requires more coats and more risk.
- Gloss vs. satin vs. matte: high gloss is easier to clean but shows flaws; lower gloss hides defects but may show wear faster in high-use zones.
- Some kits allow subtle texture additives (micro particles) to add slip resistance or soft matte effect.
- Consider accent zones: you could reglaze only a stripe band, or do a two-tone transition (lighter up top, darker lower tiles). But you’ll need careful masking and transitions.
Edge treatments & transitions
- Use trim profiles or border lines to mask the margin between reglazed tile and other materials (paint, drywall, metal).
- The coating should not overlap onto other materials (wood, drywall) unless allowed — adhesive bond mismatch can cause peeling.
- Plan for flexible caulk joints at corners and trim so the rigid coating doesn’t abut rigid material and crack.
Patterns and masking
- For creative pattern work (e.g. stripes, stencil, ombré fade), use high-quality masking and gradual blending to avoid hard edges.
- Consider stencils or tape templates while coating — apply base coat over everything, then mask and add a second contrasting color in select areas. This can give a faux tile or decorative motif effect.
- If old grout lines are deep or distinct, use thin masking lines to preserve the look of lines (i.e. leave grout lines uncoated or lightly tinted for contrast).
Lighting & gloss interplay
- Keep in mind how the finish will show under your lighting — glossy surfaces can highlight minor surface waves or defects.
- If the reglazed wall is under strong direct lighting, less gloss or matte finishes may look more forgiving.
Comparing DIY vs Professional Reglazing
When deciding whether to tackle it yourself or hire a pro, here’s a side-by-side snapshot:
| Factor | DIY | Professional |
|---|---|---|
| Cost | Lower materials cost, but risk of waste or redo | Higher upfront cost, but expertise reduces risk |
| Control & customization | You control color, finish, mapping | Pros may have standard palettes, but better execution |
| Time & convenience | You need to block off space, manage fumes, and do all prep | Pros bring experience, tools, and speed |
| Warranty / longevity | No guarantee beyond product spec | Professionals often guarantee adhesion, durability |
| Risk of failure | Higher especially if inexperience | Lower, especially under complex zones or difficult surfaces |
If your job is small (a shower, a backsplash, a tub surround) and you’re confident with detail work, DIY makes sense. For large areas, high-traffic zones, or job sites with tricky surfaces, a professional reglazer is often worth the cost.
Frequently Asked Questions (FAQs)
Q1. How long does reglazed ceramic tile last?
With proper prep and good-quality products, a reglazed ceramic tile surface can last 7–10 years in low-to-moderate use areas. High-moisture or high-traffic zones (like shower walls or bathroom floors) may see reduced lifespan, closer to 3–5 years, depending on maintenance.
Q2. Can you reglaze tile that’s cracked or chipped?
Small chips or hairline cracks can usually be filled, sanded, and reglazed. But if tiles are structurally loose, deeply fractured, or hollow-sounding, reglazing won’t solve the underlying problem. In those cases, replacement is the only durable fix.
Q3. Is reglazing tile waterproof?
The reglazing coating itself creates a water-resistant layer, but only if applied correctly and paired with intact caulk and grout joints. If water seeps behind tiles due to poor sealing, the finish can peel. Think of reglazing as a skin—it resists water on the surface but doesn’t fix underlying moisture issues.
Q4. Can floor tiles be reglazed, or is it just for walls?
Yes, floor tiles can be reglazed, but durability is a bigger concern. Foot traffic, dropped objects, and furniture movement stress coatings far more than walls. If you reglaze floors, expect a shorter lifespan and be extra careful with heavy loads or abrasive cleaners.
Q5. Do I need special cleaners for reglazed tile?
Absolutely. Avoid harsh abrasives, scouring powders, steel wool, or acidic cleaners. Use non-abrasive bathroom or kitchen cleaners (pH-neutral is ideal) and soft cloths or sponges. This preserves the glossy finish and prevents premature wear.
Q6. Is it safe to reglaze tile myself, or should I hire a pro?
DIY is possible, especially with modern kits, but it requires patience, attention to detail, and safety precautions (ventilation and respirator use). If you’re sensitive to fumes or want a guaranteed, uniform finish, a professional refinisher may be worth the investment.
Q7. How much does it cost to reglaze ceramic tile?
DIY kits range from $50–$200 depending on brand and coverage. Professional reglazing services usually run $400–$1,200 depending on area size and complexity. Still, it’s generally cheaper than full replacement, which can run into several thousand dollars.
Conclusion
Reglazing ceramic tile is one of those projects that sits at the intersection of science and art. It’s not just rolling paint over tile—it’s about understanding adhesion chemistry, surface prep, curing times, and long-term durability. When done right, reglazing can transform a tired, outdated space into something fresh, modern, and polished without the demolition chaos or massive budget of full retiling.
The key takeaways are simple but powerful: prep longer than you glaze, follow the manufacturer’s instructions like gospel, and respect cure times. Whether you’re tackling a vintage bathroom in a fixer-upper or updating a backsplash in a rental, reglazing offers a cost-effective, eco-friendly, and stylish solution.
Think of it as hitting the “refresh” button on your ceramic tile. Done with patience and care, it delivers results that feel almost brand new—at a fraction of the time, cost, and hassle of a full renovation.