Here’s a polished introduction and buying guide for your article on “Best Ceramic Coating for RV”. I’ve written it in an SEO-friendly, engaging, and authoritative style tailored for readers who are actively looking to purchase.
Owning an RV is all about freedom—the freedom to hit the open road, explore new destinations, and create unforgettable adventures. But with all that travel comes exposure to harsh sun, rain, road grime, bird droppings, and even tree sap. Over time, these elements can dull your RV’s shine and compromise its protective clear coat. That’s where ceramic coatings for RVs come into play.
A high-quality ceramic coating doesn’t just make your RV look glossy and brand-new—it forms a durable protective barrier against UV rays, oxidation, dirt, and contaminants. Compared to traditional wax, ceramic coatings last significantly longer, often providing protection for years rather than months. For RV owners, this means less frequent detailing, easier cleaning, and long-term protection for the significant investment you’ve made in your motorhome.
But with so many options on the market, how do you choose the best ceramic coating for your RV? That’s exactly what this guide is here for. Below, we’ll walk through the most important factors to consider before buying, so you can find the right balance between durability, ease of application, and cost.
Buying Guide: How to Choose the Best Ceramic Coating for Your RV

When shopping for the best ceramic coating for your RV, don’t just grab the first product you see online. RVs are much larger than cars, and their surfaces—fiberglass, gel coat, or painted panels—require a coating that’s both strong and versatile. Here are the key factors to look for:
1. Surface Compatibility
- RVs often have different exterior materials compared to cars—like gel coat fiberglass or aluminum siding.
- Make sure the ceramic coating you choose is formulated for RV use or at least compatible with multiple surfaces, including painted panels, decals, and clear coat finishes.
2. Longevity & Durability
- Some coatings last 6–12 months (good for budget buyers), while premium options can last 3–5 years.
- Look for products that offer protection against UV rays, oxidation, bird droppings, acid rain, and road salt, as RVs often face diverse climates and conditions.
3. Ease of Application
- Since RVs are much bigger than passenger cars, you’ll want a product that’s user-friendly.
- Some coatings are spray-on and wipe-off, while others require multiple steps and curing time.
- Beginners may prefer DIY-friendly spray coatings, while advanced users might go for professional-grade kits.
4. Gloss & Finish
- A good ceramic coating doesn’t just protect—it makes your RV shine.
- If you want that deep, wet-gloss look, choose a coating known for enhancing color depth and reflective shine.
5. Hydrophobic Properties
- One of the best benefits of ceramic coating is its water-beading effect.
- Hydrophobic coatings make it easy for dirt, mud, and bugs to slide off, reducing cleaning time on the road.
6. UV & Oxidation Protection
- Constant sun exposure can fade your RV’s paint and cause chalky oxidation on fiberglass.
- A UV-resistant ceramic coating ensures your RV stays vibrant and prevents surface degradation.
7. Price vs. Value
- Entry-level spray coatings range from $20–$50, while premium ceramic kits can cost $100–$300+.
- Consider how long you want the protection to last and how much effort you’re willing to put into reapplications.
8. Professional vs. DIY Application
- Some coatings require professional installation for the best results. While this ensures long-lasting protection, it can cost anywhere from $800 to over $2,000 for a full RV.
- DIY coatings are much more affordable but may not last as long as professionally installed ones.
9. Brand Reputation & Reviews
- Stick to trusted brands with proven track records in automotive and RV care.
- Customer reviews can give you insight into real-world performance, especially from other RV owners.
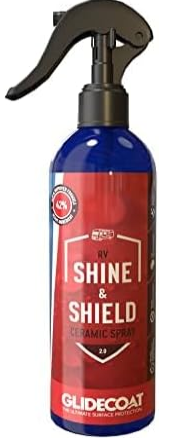
1. Glidecoat RV Ceramic Coating (250 ml)
Product Description
Glidecoat is a brand that specifically targets RVs, trailers, boats, and other large vehicles. Their “RV Ceramic Coating” aims to provide a durable SiO₂-based protective layer that helps repel dirt, bugs, road grime, and UV degradation. Because RVs have much larger surface area and different substrates (e.g. fiberglass, gelcoat, painted panels), Glidecoat often markets its coatings with extra volume and tailored support for the RV owner. According to user feedback, bugs tend to wash off more easily after applying Glidecoat, and cleaning becomes less laborious over time.
Key Features
- SiO₂ (silica) infused formula for hydrophobicity
- Designed for large surfaces (RV, boats)
- Resistant to road contaminants, UV rays, oxidation
- Long-lasting durability (with proper maintenance)
- Good customer support and instructions tailored for RV use
Pros
- Specifically formulated and marketed for RVs
- Easier cleaning and better bug-release behavior as reported by users
- Decent durability compared to thinner spray-on coatings
- More volume in package (helpful for bigger surface coverage)
Cons
- Still requires careful surface prep—mistakes lead to streaking, hazing
- May not last as long in very harsh climates (intense sun, extreme heat)
- More expensive per milliliter than smaller car coatings
- Some users may find it tricky to spread evenly over large, vertical surfaces
Recommendation
Glidecoat is a strong option for RV owners who want a product tailored for large vehicles rather than adapting a car-grade coating. It offers a balance of protection, ease of maintenance, and volume. Make sure you budget for extra applicators and take your time in prep.
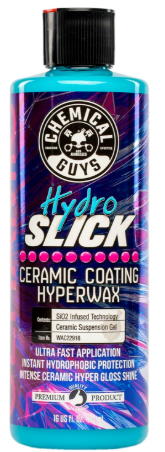
2. Chemical Guys HydroSlick SiO₂ Ceramic Coating
Product Description
Chemical Guys HydroSlick is a popular car detailing product that many DIYers adapt for RVs. It’s a thick gel-like SiO₂-based coating, often rated among the better consumer-level ceramic coatings. It’s designed for hydrophobicity, gloss, and moderate durability. In tests and reviews, it’s praised for being relatively user-friendly while offering decent protection for daily drivers.
Key Features
- Gel consistency, which tends to reduce dripping/sagging
- SiO₂-based for water beading and surface slickness
- Works on multiple surfaces (paint, clearcoat, wheels, glass)
- Good balance between performance and ease of use
Pros
- Manageable for DIY users
- Delivers noticeable gloss and slickness
- Versatile across vehicle surfaces
- Widely available and supported
Cons
- Durability is limited compared to pro-grade coatings (can degrade after repeated washes)
- Large vertical surfaces (RV sides) require careful technique to avoid runs
- Needs reapplication more often in extreme weather / high UV regions
Recommendation
If you want a general-purpose ceramic coating that can cover both your RV and other vehicles, HydroSlick is a sensible pick. Just be realistic about how often you’ll need to reapply when used on large surfaces.
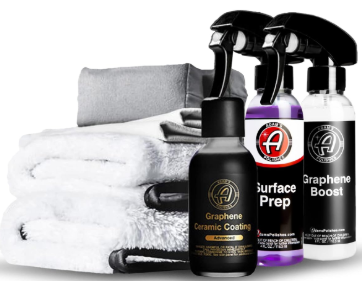
3. Adam’s Polishes Graphene Ceramic Coating Advanced
Product Description
Although technically branded as a “graphene” ceramic product, this coating is an advanced version of aerosol or liquid ceramic coatings, combining SiO₂ with graphene additives to boost durability, slickness, and hydrophobic behavior. Adam’s is known for good detailing support, accessories, and community reputation. It comes with application accessories, instructions, and often includes a maintenance spray for post-coating care. In independent reviews, it is among the more complete kits for users.
Key Features
- Graphene + SiO₂ formula to improve slickness and potential durability
- Comes with applicator pads, gloves, maintenance sprays (in many kits)
- Good gloss, slickness, and water dispersion
- Strong brand support and user community
Pros
- Good balance of performance and user-friendliness
- All-in-one kits help simplify the application process
- Strong brand and positive reputation in detailing communities
- Potential for extra durability from graphene additive
Cons
- Even advanced consumer kits are not as durable as professional coatings
- Cost per ml may be relatively high
- Requires precision—overlaps, streaks, or uneven coating can show on large panels
Recommendation
Adam’s Graphene Coating is a premium DIY option. For an RV owner who wants to do a higher-end job without hiring a pro, this kit offers many of the tools and support you’ll need. Just be cautious with application on massive surfaces.
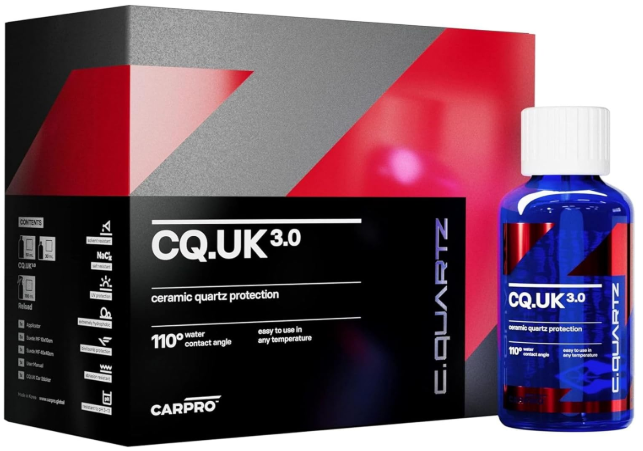
4. CarPro CQuartz UK 3.0
Product Description
CarPro’s CQuartz is a well-known name among detailing enthusiasts. The UK 3.0 is a further iteration aimed at durability, chemical resistance, and strong gloss performance. While often used on cars, it has been applied (by detailers) to larger vehicles as well. It’s not marketed exclusively for RVs, but it’s among the higher-end consumer coatings that many serious DIYers choose for tough protection.
Key Features
- High SiO₂ concentration for stronger protection
- Excellent chemical and environmental resistance
- High gloss finish and strong water repelling abilities
- Widely respected among detailing professionals
Pros
- Robust protection against contaminants, acids, oxidation
- Long-term performance (when properly applied and maintained)
- High-end finish and visual depth
Cons
- Steeper learning curve – more critical on large surfaces
- Needs precise environmental conditions during application (humidity, temperature)
- More expensive and lower volume than RV-specific coatings
Recommendation
If you are detail-savvy or willing to invest the time to apply correctly, CarPro CQuartz offers high-performance protection. For an RV, I’d reserve it for owners who are confident in their technique or intend to hire someone to apply it.
5. Turtle Wax Hybrid Solutions Ceramic Spray Coating
Product Description
This is more of a hybrid or spray-on top-coat style ceramic (or quasi-ceramic) product, sometimes marketed as a “spray-on ceramic coating.” It combines ease-of-use with moderate protection. Many RV owners use this as a maintenance topper over a base coating or for reapplication. In tests, it is praised for its DIY friendliness, though it does not match the longevity of thick, concentrated coatings.
Key Features
- Spray-on format, which is very user-friendly
- Quick curing time
- Good water-beading and gloss boost
- Suitable for follow-up or maintenance between full coatings
Pros
- Extremely easy to apply
- Good for topping up protection without reworking full coating
- Affordable and refillable
Cons
- Shorter lifespan — regular reapplication likely needed
- Might not provide deep protection on large surfaces on its own
- Less robust against extreme environmental conditions
Recommendation
Use Turtle Wax Hybrid as a supportive product (topper) rather than your only defense. It’s great for refreshing the surface of your RV between more durable coating applications.
6. Max’s RV One-Step Ceramic Polish & Sealant

Product Description
This is a niche product specifically aimed for RVs (and boats) that combines polish and ceramic sealing in one step. The idea is you can lightly correct minor surface imperfections and deposit a protective ceramic sealant layer in one go. This is appealing for RV owners who want to reduce the number of steps. The formulation is “sun-safe,” meaning it can be applied in direct sunlight, which is convenient for large vehicles that are often working outdoors.
Key Features
- One-step formulation (polish + sealant)
- UV-stable and usable in sunlight conditions
- Adds ceramic-like protection and gloss
- Designed for large surfaces like boats and RVs
Pros
- Saves time by combining polishing and sealing
- Good for moderate surface correction in addition to protection
- Useful for RV owners who don’t want multi-stage processes
Cons
- For deeper defects, separate polishing may still be needed
- The ceramic protection may not match pure coatings in durability
- Care must be taken not to overdo polishing on clearcoat
Recommendation
This product is attractive for those wanting a simpler process with fewer steps. It’s best suited for RV owners who do regular maintenance and don’t have deep defects to correct. Use it when your RV is in good condition and just needs a “refresh.”
Summary & My Recommendation
| Use Case | My Pick |
|---|---|
| RV-specific, balanced option | Glidecoat RV Ceramic Coating |
| DIY versatileness across vehicles | Chemical Guys HydroSlick |
| Premium DIY kit with accessories | Adam’s Graphene Ceramic Coating |
| High-end durability & chemical resistance | CarPro CQuartz UK 3.0 |
| Easy spray-on maintenance | Turtle Wax Hybrid Solutions |
| Simplified polish + seal for RVs | Max’s RV One-Step |
If I were choosing one to start with for a typical RV, my leaning would be Glidecoat RV Ceramic Coating, because it is made for the specific challenges of RVs (surface area, materials, etc.). But if you already have experience or confidence in detailing, and want something more premium, combining a high-end coating (e.g. CarPro or Adam’s) with a maintenance spray (like Turtle Wax) can give you the best long-term results.
Here’s a comparison table for the six ceramic (or hybrid) coatings we discussed. After the table, I’ll include some notes to help interpret the data (especially since “durability” is often conditional).
| Product | Estimated Durability / Warranty | Ease of Application | Hydrophobic / Water-Beading Performance | Volume / Coverage for RV Use | Surface Compatibility & Versatility | Pros | Cons | Best Use Case / Recommendation |
|---|---|---|---|---|---|---|---|---|
| Glidecoat RV Ceramic Coating | ~ 24 months warranty by some installers / marketed for 2 years (CGI Detailing) | Moderate — must apply carefully over large surfaces | Strong hydrophobic behavior claimed | Larger volume (e.g. 250 ml) helps with coverage for bigger surfaces (Amazon) | Designed especially for RVs, gelcoat, painted panels, trailers | RV-specific formula, good warranty backing, easier maintenance long term | Requires careful prep over big surfaces; extreme climates may shorten life | Solid all-round choice for RV owners wanting a dedicated product |
| Chemical Guys HydroSlick | (Manufacturer claims vary; consumer reports suggest ~1 year or less under heavy conditions) | Fairly user-friendly (gel form reduces runs) | Good water beading / slick feel | Standard bottles; may require multiple units for full RV coverage | Suitable for paint, clearcoat, some plastics | Balanced performance, easier to handle than ultra-hard coatings | Doesn’t match premium coatings in longevity | Use where you want a middle ground between performance and usability |
| Adam’s Polishes Graphene Ceramic Coating Advanced | (Claims vary; may approach 1–2 years under good conditions) | Moderate; kits come with accessories | Strong gloss & slick surface reported in reviews | Kit size enough for many vehicles, but RVs may need extras | Meant for paint / clearcoat / mixed surfaces | Good kit support, attractive finish, user community backing | More expensive per volume; requires care on large surface | For RV users wanting a premium DIY kit with support |
| CarPro CQuartz UK 3.0 | 18–24 months (some users see longer with maintenance) (carpro.global) | More challenging than spray-ons; timing / flashing critical | Excellent hydrophobic performance (high contact angle) (carpro-us.com) | Small kit sizes (e.g. 30 ml); may need multiples or careful rationing (Amazon) | Paint, metal, plastics; less often marketed for gelcoat but usable | Very high performance, strong chemical resistance, gloss depth | Steep learning curve, small volume, must strictly observe application conditions | Best for detailers or experienced DIYers who want high-end protection |
| Turtle Wax Hybrid Solutions Ceramic Spray | Typically lasts several months to ~1 year as a coating or topper | Very easy — spray & wipe form | Good beading / gloss boost, though less “hard” | Spray size easy to apply over large surfaces | Works as a topper or standalone on paint, clearcoat | Simple, fast, good for maintenance | Not as durable as concentrated coatings | Best used as a maintenance topper or for lighter-duty protection |
| Max’s RV One-Step Ceramic Polish & Sealant | Moderate (likely less than full dedicated coatings under demanding conditions) | Easier than full multi-step coatings (combined polish + seal) | Decent hydrophobic / slick behavior | Kit sized for larger surfaces (RV / boat orientation) | Designed for RV / marine surfaces, mixed surfaces | Saves time by combining steps, UV-safe | May not match pure coatings in durability or deep protection | Ideal when you want a simpler process with fewer steps |
Notes & Tips on Interpreting the Table
- Durability is conditional
The “durability” numbers are manufacturer claims or empirical observations under ideal conditions (proper prep, mild climate, careful washing). In real-world RV use—sun exposure, road grime, grit, dust—durability will often be lower. For example, CarPro CQuartz UK 3.0 is marketed for 18–24 months under good care. (carpro.global) Some users report that hydrophobic properties weaken over time but structural protection remains. (carproforum.com) - Volume / coverage is critical for RVs
Many consumer coating kits are sized for ordinary cars, not large RV surfaces. If your product is small (e.g. 30 ml), you’ll need multiple bottles or very careful application to cover the sides, roof, and large panels. - Ease of application becomes harder on big surfaces
Vertical panels, curvature, long stretches—these make consistent, streak-free application challenging. Coatings that are more “forgiving” (spray-ons, gels) tend to be easier to manage. Hard coatings require more discipline with thin layers and precise wipe-off timing. - Maintenance & topping
No coating lasts forever; periodic maintenance (topper sprays, gentle cleaning) greatly influences long-term performance. Some coatings pair well with proprietary “reload” or maintenance sprays. - Match to substrate
Gelcoat (on many RVs) is more porous and behaves differently than automotive paint. A coating that bonds well to gelcoat is valuable. Glidecoat positions itself specifically for RV/gelcoat surfaces. (CGI Detailing)
How to Use Ceramic Coating on an RV
Step 1: Preparation
- Wash Thoroughly – Use a pH-neutral car/RV shampoo to remove dirt, dust, bugs, and road grime. Don’t use dish soap—it can strip protective layers unevenly.
- Decontaminate – If your RV has embedded contaminants (tree sap, tar, road film), use a clay bar or chemical decontaminant to ensure the surface is perfectly smooth.
- Dry Completely – Water spots can interfere with bonding. Use microfiber towels or a blower.
- Polish if Needed – Ceramic coatings lock in the surface they are applied to. If your RV’s paint or gelcoat is oxidized or dull, polish it first to restore gloss.
Step 2: Surface Prep
- Panel Wipe / IPA Wipe Down – Use an isopropyl alcohol (IPA) mixture or panel prep spray to remove oils, wax, or polish residue.
- Work in small sections (2×2 feet or manageable panels) since RVs have large surfaces.
Step 3: Application of Ceramic Coating
- Shake the bottle well before use.
- Apply a few drops of ceramic coating onto the supplied applicator pad or microfiber applicator block.
- Spread in a crosshatch pattern (left-to-right, then up-and-down) to ensure even coverage.
- Allow the coating to flash (this can be anywhere from 30 seconds to 2 minutes depending on product and temperature). You’ll usually see a rainbow effect or slight hazing.
- Use a clean microfiber towel to buff off excess product gently. Have a second microfiber towel handy to ensure no streaks are left.
Step 4: Curing Time
- Avoid exposing the RV to water, rain, or washing for at least 24–48 hours (depending on product).
- Some coatings require a full cure of 5–7 days before they reach maximum hardness and hydrophobicity.
- Keep your RV in a shaded, dust-free environment during curing if possible.
Step 5: Maintenance After Coating
- Wash using pH-neutral shampoos. Avoid harsh detergents or abrasive brushes.
- Use microfiber towels and mitts to prevent scratches.
- Consider using a ceramic “booster” spray every few months to extend life.
Safety Guide When Using Ceramic Coating on an RV
Ceramic coatings contain solvents and chemicals that can be hazardous if handled improperly. Here’s a safety checklist:
Personal Safety
- Wear gloves (nitrile or chemical-resistant) to prevent skin irritation.
- Wear safety goggles to avoid splashes in your eyes.
- Use a respirator mask if working indoors or in poorly ventilated spaces, since many coatings emit strong vapors.
Work Environment
- Work in a shaded, cool, and dust-free area. Direct sunlight can cause the coating to dry too fast, leading to streaks.
- Avoid windy conditions outdoors—dust and debris can get trapped in the coating.
- Ensure proper ventilation if working in a garage or covered space.
Handling the Product
- Shake well before use, but don’t open near open flames (most ceramic coatings are flammable).
- Store coatings in a cool, dry place out of direct sunlight.
- Do not mix with other products unless specifically designed as toppers.
During Application
- Don’t rush. Ceramic coating requires methodical application. Working in too large an area at once can lead to uneven bonding and streaking.
- Check lighting. Use good inspection lights or sunlight at an angle to see if you’ve left high spots (unbuffed areas).
- Have multiple clean microfiber towels—once they become saturated, they can harden after the coating cures and may scratch surfaces.
After Use
- Dispose of applicators and towels properly. Once the coating hardens, they cannot be reused.
- Wash your hands thoroughly after handling.
- Keep coatings away from pets and children.
✅ Pro Tip for RV Owners: Since RVs are massive, consider splitting the application into multiple sessions (e.g., one side per day). Trying to coat an entire RV in one go can lead to fatigue, mistakes, and uneven coverage.
Frequently Asked Questions (FAQs)
1. Is ceramic coating worth it for an RV?
Yes, ceramic coating is worth it for RVs because it protects against UV rays, oxidation, bugs, dirt, and water spots. Considering the cost of repainting or restoring faded gelcoat, ceramic coating is a cost-effective investment in the long run.
2. How long does ceramic coating last on an RV?
Durability depends on the product and maintenance. Spray-on ceramics may last 6–12 months, while premium coatings can last 2–5 years with proper care. Professional-grade applications often last longer than DIY versions.
3. Can I apply ceramic coating to RV decals and graphics?
Yes, most ceramic coatings are safe for decals and vinyl graphics. In fact, they help protect against UV fading and make cleaning easier. Just avoid over-saturating edges to prevent lifting.
4. Do I still need to wax my RV after ceramic coating?
No, ceramic coatings eliminate the need for traditional wax. In fact, applying wax over ceramic coating can reduce its effectiveness. Instead, use ceramic boosters or toppers designed for maintenance.
5. Can I apply ceramic coating myself, or should I hire a professional?
DIY application is possible, especially with spray-on coatings, but professional installation ensures longer-lasting results. For very large RVs, many owners hire detailers due to the time and precision required.
6. What surfaces can I apply ceramic coating on my RV?
Ceramic coatings can be applied to painted panels, gelcoat, fiberglass, decals, metal trim, and even glass (depending on product). Always check the label for compatibility.
7. How do I maintain my RV after ceramic coating?
- Wash with pH-neutral soap
- Use microfiber mitts and towels
- Avoid harsh brushes or automatic car washes
- Apply booster sprays every few months for maximum longevity
Conclusion
Ceramic coating is one of the best upgrades you can make to your RV’s exterior. It transforms the way you maintain your motorhome, reducing cleaning time while enhancing gloss and protecting against harsh elements like UV rays, dirt, bugs, and road grime.
Choosing the best ceramic coating for your RV depends on your priorities:
- For maximum durability and RV-specific protection: Glidecoat RV Ceramic Coating is a top pick.
- For a user-friendly, all-around solution: Chemical Guys HydroSlick or Adam’s Graphene Ceramic Coating are excellent.
- For easy maintenance and budget-friendly care: Turtle Wax Hybrid Spray Coating is unbeatable.
No matter which product you choose, proper surface prep, careful application, and consistent maintenance are the keys to getting the best results. Treat your RV with the same care as your home, and ceramic coating will reward you with years of shine, protection, and pride on the open road.