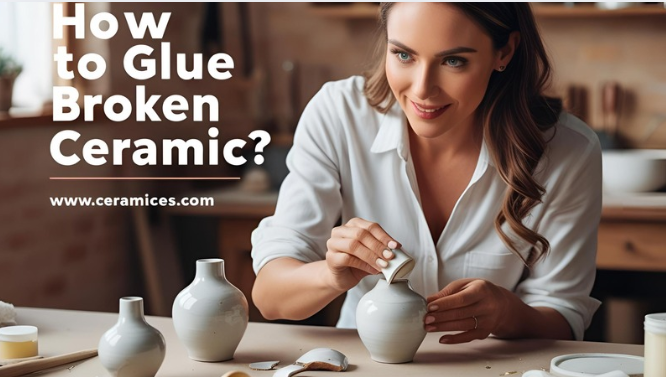
Ceramics are a staple in homes—whether as cherished heirloom dishes, decorative vases, or beloved coffee mugs. But accidents happen, and a slip of the hand can leave you staring at a shattered keepsake. Before you consider tossing it out, know that learning how to glue broken ceramic can restore your item to near-original condition. With the right adhesive, technique, and patience, even badly damaged ceramics can be salvaged.
In this detailed guide, we’ll walk you through:
- The best types of glue for ceramic repairs (and which to avoid)
- Step-by-step instructions for a seamless fix
- Pro tips for making the bond stronger and longer-lasting
- Common mistakes that ruin ceramic repairs
- 10 FAQs answered by restoration experts
By the end, you’ll have all the knowledge needed to tackle ceramic repairs like a pro—saving money and preserving sentimental items.
1. The Best Glue for Ceramic Repairs: Choosing the Right Adhesive
Not all glues are created equal, especially when it comes to ceramics. The best adhesive must be strong, durable, and resistant to moisture and heat. Here’s a breakdown of the top options:
A. Epoxy Resin (Best for Heavy-Duty Repairs)
- Strength: Extremely strong, ideal for load-bearing or frequently handled items.
- Drying Time: 5–30 minutes to set, 24 hours for full cure.
- Best For: Large breaks, figurines, plates, and kitchenware.
- Recommended Brands: J-B Weld, Devcon 2-Ton Epoxy
B. Cyanoacrylate (Super Glue – Best for Quick Fixes)
- Strength: Fast bond but less durable than epoxy.
- Drying Time: Bonds in seconds, fully cures in 2–4 hours.
- Best For: Small cracks, non-stress repairs (e.g., decorative pieces).
- Recommended Brands: Gorilla Super Glue, Loctite Ultra Gel
C. Polyurethane Adhesive (Best for Waterproof Repairs)
- Strength: Flexible and waterproof, good for outdoor ceramics.
- Drying Time: 1–2 hours to set, 24 hours to cure.
- Best For: Garden pots, bathroom tiles, or items exposed to moisture.
- Recommended Brands: Gorilla Polyurethane Glue
D. Ceramic Repair Kits (Best for Professional Results)
- Strength: Specialized for ceramics, often include fillers for missing pieces.
- Drying Time: Varies by product (usually 24+ hours).
- Best For: High-value or antique ceramics needing invisible repairs.
- Recommended Brands: Loctite Repair Putty, Sugru Moldable Glue
Adhesives to Avoid
- White glue or school glue – Too weak for ceramics.
- Hot glue – Doesn’t hold up to heat or moisture.
- Silicone adhesive – Flexible but not strong enough for rigid repairs.
2. Step-by-Step Guide: How to Glue Broken Ceramic Like a Pro

Follow these steps carefully for a seamless, long-lasting repair.
Step 1: Clean the Broken Pieces Thoroughly
- Wash with warm, soapy water to remove dirt, grease, or old adhesive.
- Use rubbing alcohol for a final wipe to ensure no residue remains.
- Let pieces dry completely before gluing (moisture weakens bonds).
Step 2: Dry Fit the Pieces Before Gluing
- Test how the edges align—this prevents misalignment later.
- If needed, use masking tape to hold pieces temporarily.
Step 3: Apply the Glue Correctly
- For epoxy: Mix resin and hardener, then apply a thin layer with a toothpick.
- For super glue: Use sparingly—too much weakens the bond.
- For large breaks: Apply glue to both edges for better adhesion.
Step 4: Press and Hold Firmly
- Press pieces together firmly for 30 seconds to 2 minutes.
- Use rubber bands, clamps, or weights to keep pressure while drying.
Step 5: Remove Excess Glue Immediately
- Wipe away spills with a damp cloth (for epoxy) or acetone (for super glue).
- For epoxy, sand lightly after curing for a smooth finish.
Step 6: Let It Cure Fully Before Use
- Most adhesives need 24–48 hours for full strength.
- Avoid washing or stressing the repair before then.
3. Pro Tips for a Stronger, Longer-Lasting Repair
Want your ceramic repair to last years? Follow these expert tips:
✔ Sand the Edges for Better Adhesion
- Lightly sand broken edges with 220-grit sandpaper to create a rougher surface for glue to grip.
✔ Use Baking Soda + Super Glue for an Ultra-Strong Bond
- Sprinkle baking soda over super glue—it creates an instant, rock-hard bond.
✔ Reinforce with a Ceramic Filler for Missing Pieces
- If chunks are missing, use epoxy putty to rebuild the shape before gluing.
✔ Avoid Water Exposure for at Least 72 Hours
- Even waterproof glue needs time to fully cure before getting wet.
✔ Store Repaired Ceramics Properly
- Avoid extreme temperatures (e.g., don’t put a glued mug in the microwave).
4. Common Mistakes That Ruin Ceramic Repairs
🚫 Using the Wrong Glue (e.g., school glue for a heavy vase).
🚫 Not Cleaning the Surface Properly (dust or grease prevents bonding).
🚫 Applying Too Much Glue (excess adhesive weakens the bond).
🚫 Rushing the Drying Process (using the item too soon causes re-breaks).
🚫 Ignoring Reinforcement (large breaks need clamps or tape while drying).
5. 10 FAQs About Gluing Broken Ceramic
Q1. Can I use regular super glue to fix a broken ceramic plate?
Yes, but only for small, non-stress cracks. For plates that will hold food, food-safe epoxy is better. Super glue can become brittle over time and may not withstand dishwashing.
Q2. How long should I wait before using a repaired ceramic mug?
Wait at least 24 hours, but 48 hours is ideal for full strength. If using epoxy, check the label—some take longer to cure.
Q3. Will a glued ceramic vase hold water again?
If sealed properly with waterproof epoxy or polyurethane glue, yes. Test by filling it with water and letting it sit for a few hours before trusting it with valuables.
Q4. Can I put a repaired ceramic dish in the dishwasher?
Most adhesives aren’t dishwasher-safe. Handwashing is recommended to preserve the bond.
Q5. What’s the best way to fix a ceramic figurine with tiny broken pieces?
Use tweezers and a strong, quick-setting glue like gel super glue. Work in small sections and hold each piece for 30 seconds.
Q6. Why does my repaired ceramic keep breaking in the same spot?
Possible reasons:
- The glue wasn’t strong enough (switch to epoxy).
- The pieces weren’t aligned properly.
- The item was used before full curing.
Q7. Can I paint over a glued ceramic repair?
Yes! After the glue fully cures, use acrylic or ceramic paint. For a seamless look, sand lightly before painting.
Q8. Is epoxy stronger than super glue for ceramics?
Yes, by far. Epoxy creates a rigid, durable bond, while super glue is better for quick, small fixes.
Q9. How do I remove old glue before making a new repair?
Use acetone (for super glue) or sandpaper (for epoxy) to clean off residue before regluing.
Q10. Can I repair a ceramic teapot handle so it’s safe to use?
Yes, but use a high-strength epoxy and let it cure fully. Avoid using it for hot liquids until you’re confident in the repair.
Conclusion: Save Your Ceramics with the Right Repair Technique
Learning how to glue broken ceramic properly can mean the difference between a flawless repair and a failed fix. By choosing the right adhesive, prepping surfaces correctly, and allowing ample drying time, you can restore broken ceramics to their former glory.
Whether it’s a favorite mug, a decorative vase, or an antique dish, these techniques will help you salvage what might have seemed beyond repair. So before you toss that shattered treasure, grab the right glue and give it a second life!
Have you successfully repaired a broken ceramic? Share your tips in the comments below!
Read more
1 Best Glue For Ceramic Repair | Top 10 Best Ceramic Glue