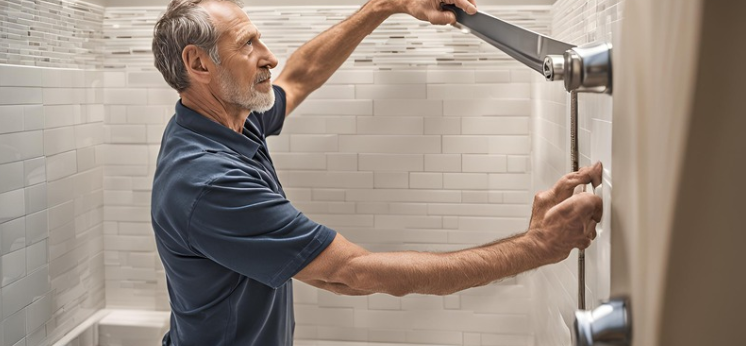
Installing a grab bar in a ceramic tile shower is an essential safety measure, especially for seniors, individuals with mobility challenges, or anyone looking to prevent slips and falls. However, the process can seem daunting if you’re unsure how to drill into ceramic tile without cracking it or how to securely anchor the grab bar. In this comprehensive guide, we’ll walk you through how to install a grab bar in a ceramic tile shower safely and effectively. From choosing the right tools to ensuring a sturdy installation, this article covers everything you need to know to complete the project with confidence.
Why Install a Grab Bar in a Ceramic Tile Shower?
Grab bars are a simple yet highly effective way to enhance bathroom safety. Here are some reasons why installing a grab bar in your ceramic tile shower is a smart idea:
- Prevent Accidents: Grab bars provide stability and support, reducing the risk of slips and falls.
- Accessibility: They make the shower safer and more accessible for seniors, children, and individuals with disabilities.
- Peace of Mind: Knowing you have a secure handhold can make showering less stressful.
- Increased Home Value: Safety features like grab bars can make your home more appealing to potential buyers.
Learning how to install a grab bar in a ceramic tile shower is a valuable skill that can improve both safety and functionality in your bathroom.

Tools and Materials You’ll Need
Before you begin, gather the following tools and materials:
- Grab Bar: Choose a bar designed for wet environments, preferably made of stainless steel or another rust-resistant material.
- Measuring Tape: For accurate placement.
- Pencil or Marker: To mark drill points.
- Level: To ensure the grab bar is straight.
- Tile Drill Bit: A carbide-tipped or diamond-tipped bit for drilling through ceramic tile.
- Drill: A power drill with variable speed settings.
- Masking Tape: To prevent the drill bit from slipping.
- Anchors and Screws: Typically included with the grab bar, but ensure they are suitable for tile and wall studs.
- Stud Finder: To locate wall studs for a secure installation.
- Safety Gear: Safety glasses and gloves to protect yourself during the installation.
Step-by-Step Guide to Installing a Grab Bar in a Ceramic Tile Shower
Follow these steps to ensure a safe and secure installation:
Step 1: Choose the Right Location
- Determine where the grab bar will be most useful. Common locations include:
- Vertical bars near the shower entrance.
- Horizontal bars on the side or back wall for support while standing.
- Use a stud finder to locate wall studs. Grab bars must be anchored to studs for maximum stability.
Step 2: Measure and Mark
- Measure the desired height and position of the grab bar. Use a level to ensure it will be straight.
- Mark the drill points on the tile with a pencil or marker. If the grab bar has multiple mounting points, ensure they align with the studs.
Step 3: Prepare the Tile for Drilling
- Place a small piece of masking tape over each marked drill point. This helps prevent the drill bit from slipping and reduces the risk of cracking the tile.
- Put on safety glasses and gloves to protect yourself during drilling.
Step 4: Drill Pilot Holes
- Use a tile drill bit to create pilot holes at the marked points. Start drilling at a low speed to avoid cracking the tile. Gradually increase the speed as the bit penetrates the tile.
- Once through the tile, switch to a wood drill bit to drill into the wall stud.
Step 5: Install Wall Anchors (If Needed)
- If the grab bar’s mounting points do not align with studs, use wall anchors designed for tile. Insert the anchors into the pilot holes.
Step 6: Attach the Grab Bar
- Align the grab bar with the pilot holes and insert the screws. Tighten them securely, but avoid over-tightening, as this could damage the tile or strip the screws.
Step 7: Test the Grab Bar
- Once installed, test the grab bar by applying gentle pressure to ensure it is securely anchored and can support weight.
Tips for Installing a Grab Bar in a Ceramic Tile Shower
- Choose the Right Grab Bar: Select a bar that is long enough to provide adequate support and made of rust-resistant materials.
- Use a Stud Finder: Always anchor the grab bar to wall studs for maximum stability.
- Drill Carefully: Start drilling at a low speed to avoid cracking the tile.
- Check Local Building Codes: Some areas have specific requirements for grab bar installation in bathrooms.
- Consider Professional Help: If you’re unsure about drilling into tile or locating studs, consult a professional for assistance.
Common Challenges and Solutions
1. Cracking the Tile
- Solution: Use a tile drill bit, start at a low speed, and apply gentle pressure. Masking tape can also help prevent slipping.
2. Misaligned Drill Holes
- Solution: Double-check measurements and use a level to ensure the grab bar is straight before drilling.
3. Weak Anchoring
- Solution: Always anchor the grab bar to wall studs. If studs are not available, use high-quality wall anchors designed for tile.
10 Long-Answer FAQs About Installing a Grab Bar in a Ceramic Tile Shower
1. Can I install a grab bar without drilling into tile?
While some suction cup grab bars are available, they are not as secure as permanently installed bars. Drilling into tile and anchoring to studs is the safest method.
2. What type of drill bit should I use for ceramic tile?
Use a carbide-tipped or diamond-tipped tile drill bit designed for ceramic tile. These bits are strong enough to penetrate the hard surface without cracking it.
3. How do I find wall studs behind tile?
Use a stud finder to locate studs. If you don’t have one, you can tap the wall lightly and listen for a solid sound, which indicates a stud.
4. Can I install a grab bar on a tiled wall without studs?
If studs are not available, use high-quality wall anchors designed for tile. However, anchoring to studs is always the most secure option.
5. What height should I install the grab bar?
The ideal height depends on the user’s needs, but a horizontal bar is typically installed 33–36 inches above the shower floor. Vertical bars should be within easy reach.
6. How much weight can a grab bar support?
A properly installed grab bar anchored to studs can support up to 250–300 pounds. Always check the manufacturer’s specifications.
7. Can I install a grab bar on a tiled shower bench?
Yes, but ensure the bench is sturdy and the grab bar is securely anchored to the wall or bench frame.
8. Do I need to seal the holes after installation?
Yes, apply a waterproof sealant or silicone caulk around the screws to prevent water from seeping behind the tile.
9. Can I reuse an existing grab bar hole?
If the existing holes align with the new grab bar and are securely anchored to studs, you can reuse them. Otherwise, drill new holes.
10. What should I do if I crack the tile during installation?
If the crack is small, you can fill it with waterproof epoxy or silicone caulk. For larger cracks, you may need to replace the tile.
Conclusion
Learning how to install a grab bar in a ceramic tile shower is a practical and rewarding project that can significantly enhance bathroom safety. By following the steps outlined in this guide, you can ensure a secure and professional-looking installation. Whether you’re improving accessibility for a loved one or adding a safety feature to your own home, a properly installed grab bar provides peace of mind and reduces the risk of accidents.
Remember to choose the right tools, drill carefully, and always anchor the grab bar to wall studs for maximum stability. With a little patience and attention to detail, you can complete this project with confidence and enjoy the benefits of a safer, more functional shower. So, grab your tools and get started—your bathroom will thank you!