Kintsugi, the Japanese art of repairing broken pottery with gold, is more than just a method of restoration—it’s a philosophy that embraces imperfections and celebrates the beauty of brokenness. If you’ve ever wondered how to kintsugi ceramic, this guide will walk you through the process, tools, and techniques needed to transform your broken ceramics into stunning works of art. Whether you’re a seasoned artist or a beginner, this article will inspire you to embrace the art of kintsugi and create something truly unique.
What Is Kintsugi?
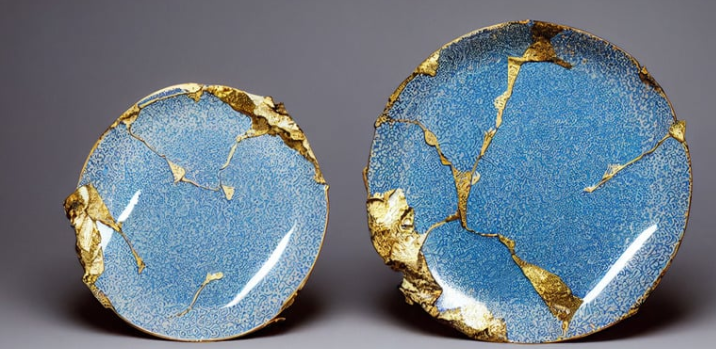
Kintsugi, which translates to “golden joinery,” is a centuries-old Japanese technique for repairing broken ceramics. Instead of hiding the cracks, kintsugi highlights them using gold, silver, or platinum powder mixed with lacquer. This practice not only restores the object’s functionality but also adds a new layer of beauty and meaning, symbolizing resilience and the acceptance of imperfection.
The Philosophy Behind Kintsugi
Kintsugi is deeply rooted in the Japanese philosophy of wabi-sabi, which finds beauty in imperfection and impermanence. By repairing broken objects with gold, kintsugi transforms flaws into features, reminding us that brokenness is a natural part of life and that healing can create something even more beautiful.
Tools and Materials Needed for Kintsugi
Before diving into how to kintsugi ceramic, gather the following tools and materials:
- Broken Ceramic Piece: The item you wish to repair.
- Epoxy Resin or Urushi Lacquer: Traditional kintsugi uses urushi lacquer, but epoxy resin is a more accessible alternative.
- Metal Powder: Gold, silver, or platinum powder for the decorative finish.
- Mixing Tools: Small bowls, sticks, and brushes for mixing and applying the adhesive.
- Clamps or Tape: To hold the pieces together while the adhesive dries.
- Sandpaper: For smoothing rough edges.
- Protective Gear: Gloves and a mask to protect against fumes and dust.
Step-by-Step Guide: How to Kintsugi Ceramic
Follow these steps to repair your broken ceramic using the kintsugi technique:
Step 1: Prepare the Broken Pieces
- Clean the broken ceramic pieces thoroughly to remove any dirt or debris.
- Allow the pieces to dry completely.
Step 2: Mix the Adhesive
- If using epoxy resin, mix the resin and hardener according to the manufacturer’s instructions.
- For traditional kintsugi, mix urushi lacquer with a small amount of rice flour to create a paste.
Step 3: Apply the Adhesive
- Use a small brush to apply the adhesive to the edges of the broken pieces.
- Press the pieces together firmly, ensuring a tight fit.
Step 4: Secure the Pieces
- Use clamps or tape to hold the pieces in place while the adhesive dries.
- Allow the adhesive to cure for the recommended time (usually 24–48 hours).
Step 5: Sand the Surface
- Once the adhesive is fully cured, use fine-grit sandpaper to smooth any rough edges or excess adhesive.
Step 6: Apply the Metal Powder
- Mix the metal powder with a small amount of adhesive to create a paste.
- Use a fine brush to apply the paste along the cracks, highlighting them with gold, silver, or platinum.
Step 7: Let It Dry
- Allow the metal powder to dry completely. This may take several hours or overnight.
Step 8: Polish and Finish
- Gently polish the repaired areas with a soft cloth to enhance the shine of the metal powder.
- Admire your beautifully restored ceramic piece!
Tips for Successful Kintsugi
- Work in a Well-Ventilated Area: Adhesives and metal powders can release fumes, so ensure proper ventilation.
- Take Your Time: Kintsugi is a meticulous process that requires patience and precision.
- Experiment with Designs: Use different metal powders or patterns to create unique designs.
- Practice on Broken Items: Before working on a cherished piece, practice on broken items to hone your skills.
- Embrace Imperfections: Remember, the beauty of kintsugi lies in its imperfections.
FAQs
Q: What is kintsugi?
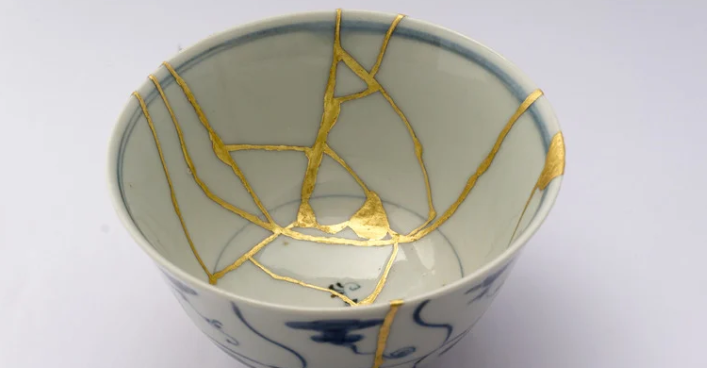
A: Kintsugi is a Japanese art form that repairs broken ceramics using gold, silver, or platinum powder, highlighting the cracks instead of hiding them.
Q: How to kintsugi ceramic?
A: Clean the broken pieces, apply adhesive, secure them, sand the surface, and apply metal powder to highlight the cracks.
Q: Can I use epoxy resin for kintsugi?
A: Yes, epoxy resin is a more accessible alternative to traditional urushi lacquer.
Q: What metal powders can I use for kintsugi?
A: Gold, silver, and platinum powders are commonly used for kintsugi.
Q: Is kintsugi food-safe?
A: Traditional kintsugi using urushi lacquer is food-safe once fully cured. Epoxy resin may not be food-safe, so check the product specifications.
Q: How long does kintsugi take?
A: The process can take several days, depending on drying times for the adhesive and metal powder.
Q: Can I kintsugi any type of ceramic?
A: Yes, kintsugi can be used on most types of ceramics, including porcelain, stoneware, and earthenware.
Q: Is kintsugi difficult to learn?
A: Kintsugi requires patience and precision but is accessible to beginners with practice.
Q: Where can I buy kintsugi supplies?
A: Kintsugi supplies can be found online or at specialty art stores.
Q: Can I use kintsugi to repair other materials?
A: While traditionally used for ceramics, kintsugi techniques can be adapted for glass, wood, or other materials.
Additional Information
The History of Kintsugi
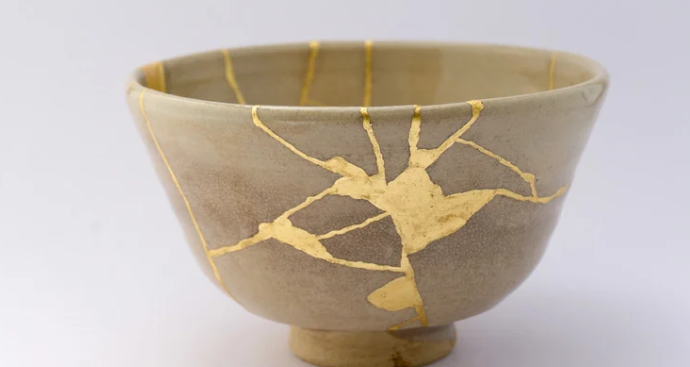
Kintsugi originated in Japan during the 15th century when a shogun sent a broken tea bowl to China for repair. Dissatisfied with the metal staples used to fix it, Japanese artisans developed the kintsugi technique, which not only repaired the bowl but also enhanced its beauty.
Comparing Traditional and Modern Kintsugi
| Feature | Traditional Kintsugi | Modern Kintsugi |
|---|---|---|
| Adhesive | Urushi lacquer | Epoxy resin |
| Metal Powder | Gold, silver, or platinum | Gold, silver, or platinum |
| Drying Time | Several weeks | 24–48 hours |
| Food-Safe | Yes | Depends on adhesive |
| Accessibility | Requires specialized materials | Easier to find materials |
Tips for Beginners
- Start Small: Practice on small, less valuable items before tackling larger or sentimental pieces.
- Use Quality Materials: Invest in good-quality adhesives and metal powders for the best results.
- Be Patient: Kintsugi is a slow and deliberate process—don’t rush it.
- Learn from Mistakes: Each repair is a learning opportunity to improve your skills.
Conclusion
Learning how to kintsugi ceramic is not just about repairing broken objects—it’s about embracing imperfections and finding beauty in the process. This ancient Japanese art form teaches us to value resilience, transformation, and the stories behind our belongings.
By following the steps and tips outlined in this guide, you can create stunning kintsugi pieces that are both functional and meaningful. Whether you’re restoring a cherished heirloom or experimenting with a new craft, kintsugi offers a unique way to connect with history, art, and the philosophy of wabi-sabi. So, gather your tools, embrace the cracks, and let the golden lines of kintsugi tell a story of beauty and renewal.