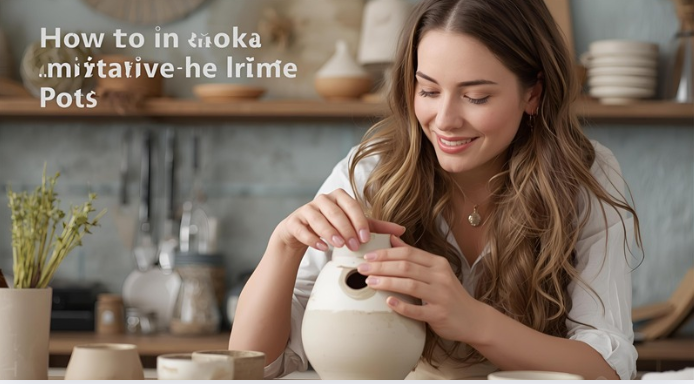
Proper drainage is essential for healthy plants. If you’ve ever wondered how to make a drainage hole in a ceramic pot, you’re not alone — many ceramic pots come without pre-drilled holes, which can lead to overwatering, root rot, and unhealthy plants. Creating a drainage hole in your ceramic pot is a manageable task with the right tools, techniques, and safety precautions.
This guide will cover everything: from selecting the right tools and understanding your ceramic type to drilling methods, safety tips, and finishing touches. Whether you are a gardening enthusiast, a DIY hobbyist, or a ceramic craft lover, mastering this process ensures your plants thrive while keeping your pots intact and beautiful.
🧱 Understanding the Importance of Drainage
Before drilling a hole, it’s important to understand why drainage is essential.
Why Drainage Matters:
- Prevents Waterlogging: Excess water can drown plant roots.
- Promotes Healthy Root Growth: Well-drained soil encourages roots to spread properly.
- Reduces Risk of Root Rot: Standing water leads to fungal and bacterial infections.
- Enhances Soil Aeration: Drainage allows oxygen to reach the roots, supporting plant health.
💡 Pro Tip: Even if a ceramic pot looks beautiful, a lack of drainage can turn it into a plant hazard. Creating a drainage hole ensures longevity for both the plant and the pot.
🧰 Tools and Materials Needed
Having the right tools makes drilling a drainage hole efficient, safe, and precise.
Materials:
- Ceramic pot
- Water (for cooling while drilling)
- Tape (masking or painter’s tape)
- Optional: Rubber or silicone grommet to protect edges
Tools:
- Drill with variable speed control
- Diamond-tipped drill bit (ideal for ceramics)
- Carbide-tipped masonry drill bit (alternative for thicker or harder ceramics)
- Safety goggles
- Dust mask
- Clamps or a non-slip surface to secure the pot
💡 Pro Tip: Diamond-tipped bits are preferred because ceramic is brittle, and these bits reduce chipping or cracking.
⚗️ Step 1: Choosing the Right Pot
Not all ceramic pots are suitable for drilling.
Considerations:
- Thickness: Thicker pots require more patience and slower drilling.
- Type of Ceramic:
- Earthenware: Softer and easier to drill but may chip more easily.
- Stoneware or Porcelain: Harder, requires diamond or carbide bits.
- Shape and Size: Ensure the base is flat or stable for drilling.
💡 Pro Tip: Inspect the pot for cracks or weaknesses; drilling over damaged areas may cause breakage.
🛠️ Step 2: Preparing the Pot for Drilling
Proper preparation reduces risk and ensures precision.
Steps:
- Clean the Pot: Remove soil, dust, or residue to avoid interference.
- Mark the Hole Location: Use a pencil or marker to indicate the center of the base.
- Apply Tape: Place masking tape over the drill point to prevent chipping.
- Secure the Pot: Use clamps or a non-slip surface to keep the pot stable.
💡 Pro Tip: Double-layering tape provides extra protection against chipping around the hole.
🔥 Step 3: Selecting the Right Drill Bit
Choosing the correct drill bit is crucial for clean, smooth holes.
Options:
- Diamond-Tipped Drill Bits:
- Best for porcelain and stoneware.
- Provides precise drilling and reduces cracking.
- Carbide-Tipped Masonry Bits:
- Suitable for thicker or harder ceramic surfaces.
- Slower drilling is required to avoid shattering.
- Size Selection:
- ¼ inch is standard for most drainage needs.
- Larger holes can be drilled with step bits or multiple passes.
💡 Pro Tip: Always start with a smaller bit and gradually increase the size if a larger hole is required.
🛠️ Step 4: Drilling the Drainage Hole
Drilling ceramic requires patience, steady hands, and the right technique.
Steps:
- Position Drill: Hold the drill perpendicular to the base.
- Start Slowly: Begin at low speed with gentle pressure.
- Use Water as Lubricant: Continuously drip water on the drill point to keep the area cool.
- Pause Often: Allow the drill and ceramic to cool to prevent cracking.
- Increase Speed Gradually: Once the hole starts, gently increase speed.
- Finish Smoothly: Reduce pressure as you break through to avoid chipping the bottom edges.
💡 Pro Tip: Avoid forcing the drill; let the bit do the work. Slow and steady ensures a clean hole.
⏳ Step 5: Finishing the Hole
After drilling, proper finishing ensures safety and longevity.
Steps:
- Smooth Edges: Use sandpaper or a diamond file to remove sharp edges.
- Optional Grommet: Insert a rubber or silicone grommet to protect plant roots from sharp ceramic edges.
- Clean the Pot: Remove ceramic dust and residue.
💡 Pro Tip: Smoothing the edges prevents cuts and improves water flow from the pot.
🌿 Step 6: Alternative Methods
If drilling is not an option, there are alternative ways to create drainage.
1. Using a Ceramic Drill Kit:
- Kits often include guide bits, templates, and water cooling systems for precision drilling.
2. Layered Drainage:
- Add a thick layer of pebbles or gravel at the base of the pot.
- Works for decorative pots but does not replace true drainage.
3. Heat or Laser Techniques:
- Advanced method for professional ceramic workshops.
- Requires specialized equipment.
💡 Pro Tip: For DIY gardeners, diamond-tipped drilling remains the safest and most effective method.
🧤 Step 7: Safety Precautions
Drilling ceramic can be risky without proper precautions.
Safety Tips:
- Wear Safety Goggles: Protects eyes from ceramic dust and shards.
- Use a Dust Mask: Prevents inhalation of fine ceramic particles.
- Secure Pot Properly: Prevents slipping and accidental injury.
- Use Water: Keeps ceramic cool and reduces airborne dust.
- Avoid Overheating Drill Bit: Prevents breakage and reduces risk of cracking.
💡 Pro Tip: Always drill in a well-ventilated area, and keep children and pets away during the process.
🌟 Tips for Perfect Drainage Holes
- Consistent Drilling Pressure: Avoid jerky movements that cause cracking.
- Pre-Drill Shallow Indent: Start with a small pilot hole to guide the larger bit.
- Check for Hairline Cracks: Inspect pot before and after drilling.
- Gradual Drilling: Especially for thick or high-fired ceramics, patience is key.
- Test Water Flow: After drilling, pour water to ensure proper drainage.
❌ Common Mistakes to Avoid
- Skipping Tape: Leads to chipping around the hole.
- Drilling Too Fast: Causes cracks and uneven holes.
- Incorrect Drill Bit: Carbide bits on delicate porcelain can shatter the pot.
- No Water Lubrication: Increases friction, heat, and risk of breakage.
- Unstable Pot: Movement during drilling can cause injury or uneven holes.
💡 Pro Tip: Take your time and follow safety guidelines to avoid costly mistakes.
🛠️ Advanced Techniques for Professional Results
- Step Drill Bits: For creating larger or multiple drainage holes.
- Diamond Hole Saw: Useful for thick, heavy ceramic planters.
- Laser-Cut Holes: In professional settings, precise and minimal chipping.
- Custom Templates: For multiple pots, ensures consistent hole placement.
🌿 Eco-Friendly Tips
- Reuse ceramic dust in small craft projects.
- Opt for water-efficient drilling methods.
- Recycle broken pots creatively in garden pathways or as pot fillers.
This article now provides a comprehensive, step-by-step guide on how to make a drainage hole in a ceramic pot, covering preparation, tools, drilling techniques, safety, finishing, alternatives, and advanced methods.
❓ Frequently Asked Questions (FAQs) About Making Drainage Holes in Ceramic Pots
1. Can I drill a drainage hole in any ceramic pot?
Most ceramic pots can be drilled, but check for cracks, thin areas, or delicate designs. Pots made of stoneware, porcelain, or thick earthenware are ideal for drilling. Fragile or very thin decorative pots may crack.
2. What is the best drill bit for ceramic pots?
- Diamond-tipped bits: Best for porcelain and hard ceramics, providing precise and clean holes.
- Carbide-tipped masonry bits: Suitable for thicker or earthenware pots.
- Step bits or hole saws: Ideal for larger holes.
3. Do I need a special drill?
A variable-speed electric drill works best. Slower speeds with gentle pressure reduce the risk of cracking. Professional ceramic drilling tools can improve precision but aren’t required for most DIY projects.
4. Should I use water while drilling?
Yes! Water acts as a coolant, reduces friction, and minimizes ceramic dust. Continuous dripping or soaking the area while drilling is recommended.
5. Can I make a drainage hole without drilling?
Yes, alternatives include:
- Using a layer of pebbles or gravel at the pot’s base.
- Professional laser-cutting (for high-end or commercial ceramic pots).
However, drilling provides true drainage, which is more effective for healthy plant growth.
6. How big should the drainage hole be?
A standard drainage hole is about ¼ inch (6 mm). Larger pots may require multiple holes to ensure adequate drainage.
7. How do I prevent chipping around the hole?
- Apply masking tape over the drill point.
- Start with a small pilot hole.
- Drill slowly with gentle, consistent pressure.
- Use water to keep the ceramic cool.
8. Can I insert a grommet in the hole?
Yes, rubber or silicone grommets protect plant roots and reduce sharp edges. They also improve water flow and prolong pot life.
9. Is it safe to drill a ceramic pot indoors?
Yes, if you follow safety precautions:
- Wear goggles and a dust mask.
- Keep the area well-ventilated.
- Secure the pot to prevent movement.
10. How do I maintain a ceramic pot after drilling?
- Clean debris from the hole.
- Test water drainage before planting.
- Avoid sudden temperature changes, which could cause cracks.
- Inspect the hole edges periodically, especially if the pot is moved often.
🏁 Conclusion: Ensuring Healthy Plants with Proper Drainage
Mastering how to make a drainage hole in a ceramic pot is a simple yet transformative skill for plant enthusiasts and gardeners. Proper drainage ensures that water flows efficiently, preventing overwatering, root rot, and unhealthy plants. By carefully selecting the right pot, using the appropriate drill bit, and following a slow, steady drilling technique, you can create a clean, durable hole that enhances both plant health and pot longevity.
Adding protective measures, such as masking tape or rubber grommets, minimizes the risk of chipping while ensuring safe and effective water flow. Whether you’re working with a small indoor pot or a large decorative planter, drilling your own drainage hole allows you to use beautiful ceramic pots for practical, everyday gardening.
With the proper tools, patience, and attention to detail, your handmade or store-bought ceramic pots can become ideal homes for thriving plants, combining style, functionality, and long-lasting durability. Creating drainage holes not only improves plant health but also allows you to enjoy the full aesthetic and practical potential of your ceramic planters.