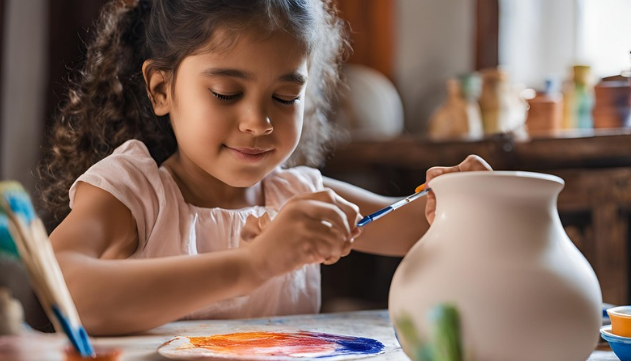
Painting a ceramic vase can be a fun and rewarding project that allows you to add a personal touch to your home décor. Whether you’re looking to update an old vase or create a custom piece from scratch, painting ceramics requires some special techniques and materials to ensure a beautiful, lasting finish. This guide will walk you through everything you need to know about how to paint a ceramic vase—from preparation to the final protective coat. We’ll also answer some of the most frequently asked questions to help you avoid common pitfalls.
Why Paint a Ceramic Vase?
Before diving into the process, it’s worth considering why you might want to paint a ceramic vase. Here are a few reasons:
1. Personalization
- Unique Design: Painting allows you to create a one-of-a-kind piece that reflects your style and preferences.
- Color Coordination: Match the vase to your room’s color scheme or make it a statement piece.
2. Upcycling
- Refresh Old Items: Give new life to an old or outdated vase with a fresh coat of paint.
- Sustainable Creativity: Upcycling is an eco-friendly way to create new décor without buying new items.
3. Gifting
- Handmade Gifts: A painted ceramic vase makes for a thoughtful and personalized gift.
- Special Occasions: Customize vases for weddings, anniversaries, or holidays.
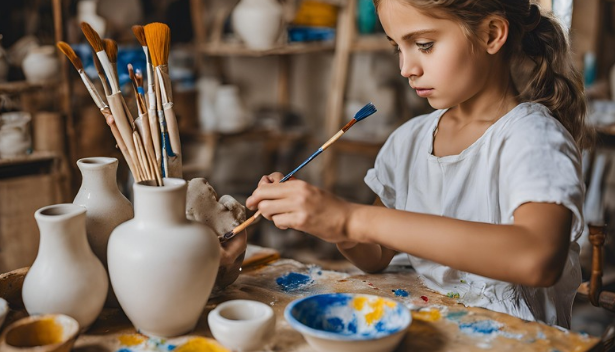
Materials You’ll Need to Paint a Ceramic Vase
Before you start painting, gather all the necessary materials. Here’s what you’ll need:
- Ceramic Vase: Choose a vase that suits your project, whether it’s new or something you already own.
- Paints: Acrylic paints or ceramic-specific paints are ideal for this project. Acrylics are versatile, while ceramic paints are designed to adhere to glazed surfaces.
- Primer: A good primer helps the paint adhere better, especially on glossy surfaces.
- Brushes: Use a variety of brush sizes for different details. Soft-bristled brushes are best for smooth application.
- Painter’s Tape: For masking off areas where you don’t want paint.
- Sealant: A clear sealant protects your painted design and gives it a finished look.
- Sandpaper (optional): For roughing up glossy surfaces to help the paint stick better.
- Cleaning Supplies: Soap, water, and rubbing alcohol for cleaning the vase before painting.
- Palette and Water Cup: For mixing paints and cleaning brushes.
Step-by-Step Guide: How to Paint a Ceramic Vase
1. Prepare the Vase
1.1. Clean the Surface
- Remove Dust and Dirt: Clean the vase with soap and water to remove any dust, dirt, or grease. Allow it to dry completely.
- Rubbing Alcohol: Wipe the surface with rubbing alcohol to remove any remaining oils that could prevent the paint from sticking.
1.2. Sanding (If Necessary)
- Rough Up the Surface: If your vase has a glossy finish, lightly sand it with fine-grit sandpaper. This will help the primer and paint adhere better.
- Wipe Clean: After sanding, wipe the vase with a damp cloth to remove any dust.
2. Apply Primer
2.1. Choose the Right Primer
- For Glossy Surfaces: Use a primer specifically designed for ceramics or glossy surfaces.
- For Matte Surfaces: A general-purpose primer will work if the surface is already matte.
2.2. Application
- Even Coat: Apply a thin, even coat of primer using a soft-bristled brush. Allow it to dry completely before applying paint.
- Multiple Coats: If necessary, apply a second coat of primer for better coverage, allowing each coat to dry thoroughly.
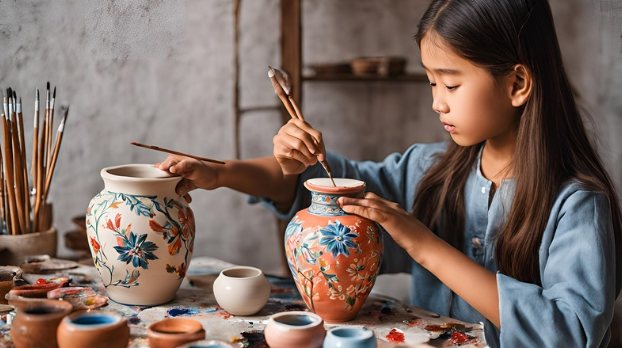
3. Plan Your Design
3.1. Sketch Your Design
- Freehand or Stencils: Decide if you want to freehand your design or use stencils for more precise patterns.
- Test Colors: Use a piece of paper or a small area of the vase to test your colors and ensure they work well together.
3.2. Mask Off Areas
- Painter’s Tape: Use painter’s tape to mask off areas you don’t want to paint, especially if you’re creating a geometric or striped design.
- Secure Edges: Press the edges of the tape down firmly to prevent paint from bleeding underneath.
4. Start Painting
4.1. Base Coat
- First Layer: Apply the base color of your design using a larger brush for even coverage. Allow it to dry before adding more details.
- Multiple Coats: Depending on the paint’s opacity, you may need to apply multiple coats, allowing each to dry before adding the next.
4.2. Adding Details
- Small Brushes: Use smaller brushes for detailed work like lines, dots, or intricate patterns.
- Layering Colors: If your design involves multiple colors, ensure each layer is dry before adding the next to prevent smudging.
4.3. Blending and Shading
- Blend Colors: For more depth, you can blend colors while they’re still wet. Use a dry brush or sponge to soften edges and create gradients.
- Add Texture: Experiment with different brushstrokes or tools like sponges to add texture to your design.
5. Seal the Design
5.1. Choose a Sealant
- Acrylic Sealant: Use a clear acrylic sealant for a durable finish. This can be in spray form or brush-on, depending on your preference.
- Ceramic Glaze: For a more professional finish, use a ceramic glaze that can be cured in a kiln if you have access to one.
5.2. Apply the Sealant
- Even Coating: Apply the sealant in thin, even layers. Avoid applying too thickly, as this can cause drips or an uneven finish.
- Drying Time: Allow the sealant to dry completely between coats. Typically, two to three coats provide good protection.
6. Curing the Paint (Optional)
6.1. Oven Curing
- For Added Durability: Some ceramic paints can be cured in an oven to increase their durability. Check the paint manufacturer’s instructions for details.
- Baking Process: If oven curing is recommended, place the vase in a cool oven, heat it to the specified temperature, and bake for the recommended time. Allow it to cool in the oven to prevent cracking.
6.2. Air Drying
- For Non-Curable Paints: If your paint isn’t oven-curable, simply let the vase air dry in a well-ventilated area. This process can take several days to fully harden.
Tips for Success
- Practice First: If you’re new to painting ceramics, practice your design on a test piece before working on the vase.
- Use Quality Materials: Invest in good quality paints, brushes, and sealants for the best results.
- Be Patient: Allow each layer of paint to dry fully before moving on to the next step to avoid smudging.
- Creative Freedom: Don’t be afraid to experiment with colors, patterns, and textures. Painting ceramics is an art form, so let your creativity flow.
FAQs About Painting a Ceramic Vase
1. What kind of paint should I use on a ceramic vase?
- Answer: Acrylic paints and ceramic-specific paints are the best options. Acrylics are versatile and widely available, while ceramic paints are designed to adhere to glazed surfaces.
2. Do I need to prime a ceramic vase before painting?
- Answer: Yes, priming helps the paint adhere better, especially on glossy surfaces. A primer creates a smooth, even base for the paint.
3. Can I paint a glazed ceramic vase?
- Answer: Yes, you can paint a glazed ceramic vase. However, you’ll need to sand the surface lightly and use a primer to help the paint stick.
4. How do I prevent the paint from chipping off?
- Answer: To prevent chipping, make sure to use a primer, apply multiple thin coats of paint, and finish with a clear sealant.
5. Can I bake the vase to set the paint?
- Answer: Some paints can be oven-cured to increase durability. Check the paint’s instructions to see if this is an option. If so, bake the vase according to the manufacturer’s guidelines.
6. How long should I let the paint dry between coats?
- Answer: Allow at least an hour for each coat to dry, though drying times may vary depending on the paint and thickness of application.
7. What if I make a mistake while painting?
- Answer: If you make a mistake, quickly wipe it off with a damp cloth if the paint is still wet. For dry paint, you may need to sand the area and repaint.
8. Can I use watercolors or oil paints on a ceramic vase?
- Answer: Watercolors are not recommended for ceramics as they won’t adhere properly. Oil paints can be used, but they require a long drying time and should be sealed properly.
9. How can I add a glossy finish to my vase?
- Answer: To achieve a glossy finish, use a high-gloss acrylic sealant or ceramic glaze. Apply in thin coats and allow each to dry thoroughly.
10. Is it necessary to seal the painted vase?
- Answer: Yes, sealing is important to protect the paint and ensure it lasts for a long time. A sealant adds a protective layer that shields the paint from moisture, scratches, and fading, making your painted ceramic vase more durable and long-lasting.
Advanced Techniques for Painting a Ceramic Vase
Once you’ve mastered the basics, you might want to explore more advanced painting techniques to take your ceramic vase to the next level. Here are a few methods to consider:
1. Ombre Effect
Step 1: Choose Your Colors
- Select two or more colors that blend well together. For an ombre effect, it’s best to choose colors within the same family (e.g., different shades of blue).
Step 2: Apply the Base Color
- Paint the entire vase with the lightest color and let it dry completely.
Step 3: Blend the Colors
- Starting from the bottom, apply the darkest color and blend it upward into the lighter base color using a dry brush or sponge. Work quickly while the paint is still wet to achieve a smooth gradient.
Step 4: Adjust as Needed
- You can go over areas with more paint or a clean brush to perfect the blend. Let each layer dry before moving on to avoid muddying the colors.
2. Stenciling
Step 1: Choose a Stencil
- Select or create a stencil with your desired pattern. Common designs include floral motifs, geometric shapes, or intricate patterns.
Step 2: Secure the Stencil
- Position the stencil on the vase and secure it with painter’s tape to prevent movement.
Step 3: Apply Paint
- Use a small stencil brush or sponge to apply paint over the stencil. Dab the paint gently to avoid bleeding under the stencil.
Step 4: Remove the Stencil
- Carefully remove the stencil while the paint is still wet to avoid smudging. Allow the paint to dry before repeating the process with other parts of the vase.
3. Hand-Painting Details
Step 1: Plan Your Design
- Sketch your design lightly with a pencil if you’re freehanding detailed patterns or images.
Step 2: Use Fine Brushes
- Utilize fine-tipped brushes to paint intricate details. This technique works well for painting flowers, leaves, or other delicate designs.
Step 3: Build Layers
- Add depth by layering colors, allowing each layer to dry before adding the next. Use lighter colors first and add darker shades for shadowing and contrast.
4. Splatter Painting
Step 1: Prepare the Area
- Cover your work area with newspaper or a drop cloth to protect it from paint splatters.
Step 2: Choose Your Colors
- Select contrasting or complementary colors for a dynamic effect.
Step 3: Splatter the Paint
- Dip a brush into the paint and flick it onto the vase to create random splatter patterns. You can control the intensity by adjusting the amount of paint on the brush and the force of your flick.
Step 4: Layer and Dry
- Allow the splattered paint to dry before adding more colors to build layers of texture and interest.
Troubleshooting Common Issues
Even with careful planning and execution, you might encounter some challenges while painting your ceramic vase. Here’s how to address common issues:
1. Paint Not Sticking
- Solution: Ensure the vase is thoroughly cleaned and primed before painting. If the paint still isn’t sticking, try sanding the surface lightly or using a different type of paint.
2. Uneven Paint Coverage
- Solution: Apply multiple thin coats of paint, allowing each coat to dry completely before adding the next. Use a high-quality brush or sponge for even application.
3. Paint Smudging
- Solution: Let each layer of paint dry fully before adding another color or detail. If working with multiple colors, consider using a hairdryer on a low setting to speed up the drying process.
4. Bleeding Under Stencils
- Solution: Ensure the stencil is firmly secured to the vase, and use a small amount of paint with a dabbing motion. Remove the stencil carefully before the paint dries.
5. Bubbles in the Sealant
- Solution: Apply the sealant in thin layers and avoid shaking the sealant bottle, as this can create bubbles. If bubbles do appear, lightly sand the area once dry and reapply the sealant.
Conclusion: Crafting a Beautiful Ceramic Vase
Painting a ceramic vase is a creative and enjoyable way to personalize your home décor. By following the steps outlined in this guide, you can transform an ordinary vase into a stunning piece of art that reflects your unique style. Whether you’re a beginner or an experienced painter, there are endless possibilities for customization, from simple color changes to intricate designs.
With proper preparation, the right materials, and a bit of patience, your painted ceramic vase will be a beautiful, lasting addition to your space. Don’t forget to experiment with different techniques and have fun with the process. Happy painting!
Additional FAQs About Painting a Ceramic Vase
11. Can I use spray paint on a ceramic vase?
- Answer: Yes, spray paint can be used on ceramic vases, especially if you’re looking for an even coat or a specific finish like metallic or matte. Ensure the vase is primed and use light, even coats to prevent drips.
12. Is it possible to remove paint from a ceramic vase if I don’t like the result?
- Answer: Yes, you can remove acrylic paint with rubbing alcohol or acetone. However, removing baked or cured paints can be more challenging and might require sanding or using a commercial paint remover.
13. How long does it take for the paint to fully cure?
- Answer: Paint can feel dry to the touch within hours, but full curing can take up to 24-48 hours, depending on the paint type and environmental conditions. Oven curing can speed up this process for certain paints.
14. Can I use the painted vase to hold water for flowers?
- Answer: If you plan to use the vase for fresh flowers with water, make sure to use waterproof sealant and paints. Without proper sealing, water can damage the paint over time.
15. What’s the best way to clean a painted ceramic vase?
- Answer: Clean the vase with a soft, damp cloth. Avoid abrasive cleaners or scrubbing pads, as they can damage the paint. If the vase is sealed properly, it should withstand light cleaning.
16. Can I use the painted vase outdoors?
- Answer: Yes, but ensure you use outdoor-safe paints and a weather-resistant sealant to protect the vase from the elements. Sunlight, moisture, and temperature changes can affect unprotected paint.
17. How do I store leftover paint for future touch-ups?
- Answer: Store leftover paint in airtight containers, away from direct sunlight and extreme temperatures. Label the containers with the color and date for easy reference.
18. Is it safe to use painted ceramic vases for food or drink?
- Answer: No, painted ceramics should not be used for food or drink unless the paint and sealant are food-safe. Most paints and sealants are not designed for contact with food.
19. Can I paint a ceramic vase that’s already been glazed?
- Answer: Yes, but you’ll need to sand the glaze lightly and use a primer to help the paint adhere. Ceramic-specific paints are also recommended for glazed surfaces.
20. What’s the best way to display my painted ceramic vase?
- Answer: Display your vase in a spot where it can be admired, such as on a mantel, shelf, or table. Consider grouping it with other vases or decorative items for a curated look.