Removing ceramic tile flooring from a concrete subfloor can be a challenging task, but it’s often necessary for renovations, repairs, or upgrades. Whether you’re preparing to install new flooring or addressing damage, knowing how to remove ceramic tile flooring from concrete is essential. In this comprehensive guide, we’ll walk you through the tools, techniques, and tips to make the process as smooth and efficient as possible. Whether you’re a DIY enthusiast or a homeowner tackling a renovation project, this article will provide you with all the information you need.
Why Remove Ceramic Tile Flooring?
There are several reasons why you might need to remove ceramic tile flooring:
- Outdated Design: The tiles no longer match your aesthetic preferences.
- Damaged Tiles: Cracked, chipped, or loose tiles need to be replaced.
- Subfloor Issues: Moisture or mold problems require access to the concrete subfloor.
- New Flooring: You’re planning to install a different type of flooring, such as hardwood or carpet.
Tools and Materials Needed
Before starting, gather the following tools and materials:
- Safety Gear: Safety goggles, gloves, knee pads, and a dust mask.
- Chisel and Hammer: For prying up tiles.
- Floor Scraper: To remove adhesive residue.
- Electric Demolition Hammer: For large areas or stubborn tiles.
- Grout Removal Tool: To remove grout between tiles.
- Pry Bar: For lifting tiles and baseboards.
- Shop Vacuum: To clean up dust and debris.
- Drop Cloths or Plastic Sheets: To protect surrounding areas.
- Trash Bags: For disposing of broken tiles and debris.
Step-by-Step Guide: How to Remove Ceramic Tile Flooring from Concrete
Follow these steps to remove ceramic tile flooring from a concrete subfloor:
Step 1: Prepare the Area
- Clear the room of furniture and other obstacles.
- Cover doorways and vents with plastic sheets to contain dust.
- Remove baseboards and trim using a pry bar.
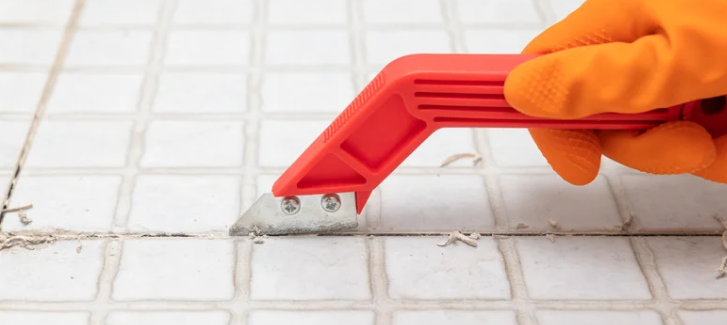
Step 2: Remove Grout
- Use a grout removal tool or oscillating tool to remove the grout between the tiles. This will make it easier to pry up the tiles.
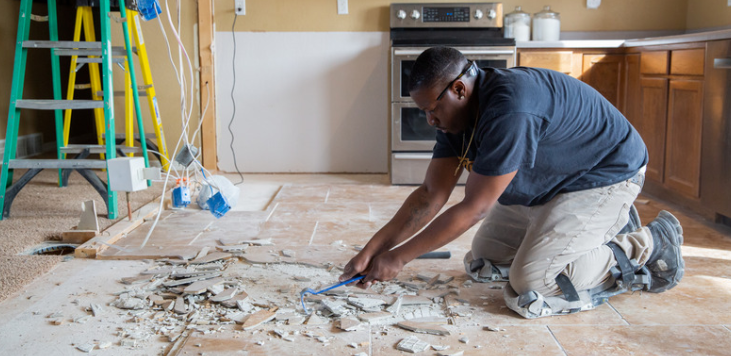
Step 3: Start Removing Tiles
- Begin at a corner or edge of the room. Insert a chisel or pry bar under a tile and gently tap it with a hammer to loosen the tile.
- Work your way across the floor, removing one tile at a time. For stubborn tiles, use an electric demolition hammer.
Step 4: Remove Adhesive Residue
- Once all the tiles are removed, use a floor scraper to remove any remaining adhesive from the concrete subfloor.
- For stubborn adhesive, a heat gun or adhesive remover can help soften the material.
Step 5: Clean the Subfloor
- Use a shop vacuum to remove dust and debris from the subfloor.
- Inspect the concrete for cracks or damage and repair as needed.
Step 6: Dispose of Debris
- Collect all broken tiles and debris in trash bags and dispose of them according to local regulations.
Tips for Removing Ceramic Tile Flooring

- Work in Sections: Tackle the floor in small sections to avoid feeling overwhelmed.
- Protect Yourself: Wear safety gear to protect against sharp edges and dust.
- Use the Right Tools: An electric demolition hammer can save time and effort for large areas.
- Be Patient: Removing tiles can be time-consuming, so take breaks as needed.
- Inspect the Subfloor: Check for damage and repair the concrete before installing new flooring.
FAQs
Q: How to remove ceramic tile flooring from concrete?
A: Use a chisel and hammer to pry up tiles, remove adhesive residue with a floor scraper, and clean the subfloor thoroughly.
Q: Do I need special tools to remove ceramic tiles?
A: Basic tools like a chisel, hammer, and floor scraper are sufficient, but an electric demolition hammer can make the job easier for large areas.
Q: Can I remove ceramic tiles without damaging the concrete?
A: While some minor damage is possible, working carefully and using the right tools can minimize harm to the concrete subfloor.
Q: How do I remove stubborn adhesive from the concrete?
A: Use a floor scraper, heat gun, or adhesive remover to soften and scrape off stubborn adhesive.
Q: Is it necessary to remove the grout before removing the tiles?
A: Yes, removing the grout makes it easier to pry up the tiles and reduces the risk of damaging the subfloor.
Q: Can I reuse the tiles after removing them?
A: Most tiles will break during removal, but if they come off intact, you can clean and reuse them.
Q: How long does it take to remove ceramic tile flooring?
A: The time depends on the size of the area and the adhesive used. On average, it takes 1–2 days for a standard room.
Q: Do I need to wear protective gear?
A: Yes, wear safety goggles, gloves, knee pads, and a dust mask to protect against sharp edges and dust.
Q: Can I remove ceramic tiles myself, or should I hire a professional?
A: If you’re comfortable with DIY projects, you can remove the tiles yourself. However, hiring a professional ensures a faster and cleaner job.
Q: What should I do with the debris after removing the tiles?
A: Collect the debris in trash bags and dispose of it according to local regulations. Some areas may require special disposal for construction waste.
Additional Information
Repairing the Concrete Subfloor
After removing the ceramic tiles, inspect the concrete subfloor for damage. Common issues include:
- Cracks: Fill cracks with a concrete patching compound.
- Uneven Surfaces: Use a self-leveling compound to create a smooth base for new flooring.
- Moisture Problems: Address any moisture issues before installing new flooring to prevent mold or warping.
Choosing a New Flooring Option
Once the tiles are removed, you can choose a new flooring option that suits your style and needs. Popular choices include:
- Hardwood: Adds warmth and elegance to any space.
- Laminate: Affordable and easy to install.
- Vinyl: Durable and water-resistant, ideal for kitchens and bathrooms.
- Carpet: Provides comfort and insulation for bedrooms and living areas.
Tips for a Smooth Removal Process
- Work in Small Sections: Focus on one area at a time to avoid feeling overwhelmed.
- Use a Demolition Hammer: For large areas or stubborn tiles, an electric demolition hammer can save time and effort.
- Protect Surrounding Areas: Cover walls, doorways, and vents to contain dust and debris.
- Stay Organized: Keep tools and materials within reach to streamline the process.
Conclusion
Learning how to remove ceramic tile flooring from concrete is a valuable skill for any homeowner or DIY enthusiast. While the process can be labor-intensive, following the steps and tips outlined in this guide will make it manageable and efficient. By preparing the area, using the right tools, and working carefully, you can remove your old tiles without causing unnecessary damage to the concrete subfloor.
Once the tiles are removed, take the time to inspect and repair the subfloor before installing new flooring. Whether you’re upgrading to hardwood, laminate, or another material, a smooth and well-prepared subfloor is essential for a successful installation. With patience and attention to detail, you can transform your space and enjoy a fresh, new floor for years to come.