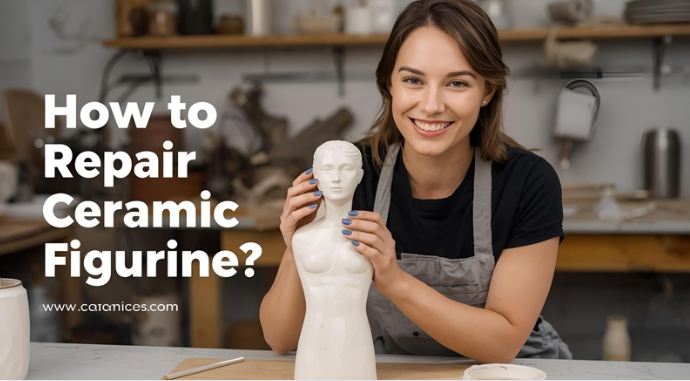
Ceramic figurines have been cherished for centuries, adorning homes, shelves, and display cases with beauty, elegance, and sentimental value. From delicate collectibles to handmade artistic creations, these pieces are often more than decoration—they are keepsakes, heirlooms, and investments.
But accidents happen. A figurine might fall, get knocked over, or suffer chips and cracks. Repairing a broken ceramic figurine is not only possible but can be a rewarding project if done carefully. With the right materials, tools, and techniques, you can restore your figurine to near-original condition—or even turn the repair into a creative enhancement.
This guide will provide a comprehensive, step-by-step approach on how to repair ceramic figurines, including tools, adhesives, painting techniques, advanced restoration tips, and safety measures.
Understanding Ceramic Figurine Damage
Ceramic figurines can break in several ways, and understanding the type of damage is key to effective repair.
Types of Ceramic Figurines
- Porcelain Figurines – Smooth, glossy, and often delicate; common in collectible figures.
- Earthenware Figurines – Softer, more porous; often handmade or hand-painted.
- Stoneware Figurines – Denser and more durable; may have intricate textures or glazes.
Common Types of Damage
- Cracks – Hairline fractures that may worsen over time.
- Chips – Small surface pieces broken off, often on edges or protruding features.
- Broken Fragments – Complete separation of parts, like arms, heads, or decorative elements.
- Missing Pieces – Areas where part of the figurine is lost, requiring reconstruction.
Understanding the type and extent of damage helps determine whether a simple adhesive repair is sufficient or if more advanced reconstruction techniques are needed.
Tools and Materials for Ceramic Figurine Repair
To repair a ceramic figurine properly, gather the following supplies:
- Epoxy adhesive – Two-part clear epoxy is strong and durable. Food-safe epoxy is optional but generally unnecessary for figurines.
- Super glue – Suitable for small, non-structural repairs.
- Epoxy putty or polymer clay – For rebuilding missing sections.
- Sandpaper – Fine-grit (400–800) for smoothing repaired areas.
- Sculpting tools – Toothpicks, dental tools, or small knives for shaping putty.
- Paints and brushes – Acrylic, ceramic touch-up, or enamel paints for color matching.
- Clear sealant or varnish – Protects painted repairs and restores shine.
- Masking tape and clamps – Hold pieces in place while adhesive sets.
- Protective gloves and safety glasses – Essential when working with adhesives or tools.
Optional tools for advanced repairs:
- Dremel or rotary tool – For precision sanding or shaping.
- Magnifying glass or lamp – Helps with detailed restoration.
- Kintsugi gold repair kit – For artistic highlighting of cracks.
Step-by-Step Guide: How to Repair a Ceramic Figurine
Repairing a figurine is a multi-step process requiring care, patience, and precision.
Step 1: Examine and Prepare the Figurine
- Lay out the figurine and all broken fragments.
- Clean each piece gently with warm water and mild soap. Avoid harsh chemicals that could damage paint or glaze.
- Dry thoroughly before proceeding.
Tip: Keep track of tiny fragments in a container to prevent loss.
Step 2: Dry Fit the Pieces
- Before applying adhesive, assemble the fragments on a flat surface.
- Ensure each piece fits correctly.
- Take note of the order of assembly, especially for complex figurines with multiple small parts.
Dry-fitting prevents misalignment and ensures a smoother repair process.
Step 3: Select and Apply Adhesive
- For most figurines, two-part clear epoxy is ideal.
- Apply a thin layer to the broken edges of each piece.
- Press fragments together gently and hold for several minutes.
- Use clamps or masking tape to maintain alignment during curing.
Pro Tip: Avoid over-applying adhesive to prevent excess from seeping out and affecting the paint surface.
Step 4: Rebuilding Missing Pieces
- For figurines with missing parts (e.g., fingers, noses, decorative elements), use epoxy putty or polymer clay.
- Mold the putty to approximate the original shape of the missing piece.
- Use sculpting tools to refine details while the material is still pliable.
- Allow curing according to manufacturer instructions (usually 12–24 hours).
This step is critical for maintaining the figurine’s integrity and appearance.
Step 5: Sanding and Surface Preparation
- Once adhesive or putty has hardened, sand the repaired areas with fine-grit sandpaper.
- Smooth edges and surfaces to match the surrounding ceramic.
- Remove all dust before painting.
Proper sanding ensures the repair blends seamlessly with the original figurine.
Step 6: Painting and Color Matching
- Mix paints carefully to match the original colors.
- Apply thin layers, letting each layer dry before adding the next.
- Use small brushes for detailed areas, especially on faces, clothing, or intricate designs.
- For glossy finishes, apply a clear varnish or sealant after painting.
Advanced Tip: For antiques or valuable figurines, test color matching on a small inconspicuous area first.
Step 7: Sealing and Finishing
- Apply a protective clear coat or varnish to seal painted repairs.
- This enhances durability and restores the figurine’s shine.
- For purely decorative repairs, consider adding artistic touches like metallic highlights or Kintsugi-style gold accents.
Specialized Techniques for Fragile or Valuable Figurines
For collectors or high-value items, additional techniques can improve results:
1. Kintsugi Repair
- Emphasizes cracks with gold, silver, or metallic resin.
- Turns damage into a feature, creating a visually striking, artistic piece.
- Works best for decorative figurines rather than functional items.
2. Structural Reinforcement
- For large or heavy figurines, consider using thin wires or internal supports embedded in epoxy to reinforce fragile areas.
- This prevents future breaks, especially on protruding elements like arms, wings, or accessories.
3. Professional Restoration
- High-value antiques may require kiln firing, professional glazes, or slip casting to reconstruct missing pieces accurately.
- Professionals use specialized adhesives, pigments, and tools unavailable to most DIYers.
Common Mistakes to Avoid
- Rushing Adhesive Curing – Handling pieces too soon can weaken bonds.
- Overusing Glue or Putty – Excess adhesive can be unsightly and interfere with painting.
- Skipping Cleaning or Sanding – Adhesives won’t bond properly to dirty or rough surfaces.
- Mismatched Paint – Poor color matching draws attention to repairs.
- Ignoring Safety – Gloves, ventilation, and eye protection are essential when using epoxy or putty.
Safety Tips
- Always work in a well-ventilated area.
- Wear gloves and safety glasses when handling adhesives, putty, or paints.
- Keep small fragments and tools out of reach of children and pets.
- Avoid direct contact with epoxy while curing to prevent skin irritation.
Creative Alternatives for Broken Figurines
Even if a figurine cannot be fully restored, you can repurpose broken pieces creatively:
- Miniature Planters – Use hollowed bases or open pieces to hold small plants.
- Candle Holders – Broken figurines can hold tea lights or small candles.
- Mosaics – Fragments can be used in mosaics for decorative tables or wall art.
- Decorative Accents – Repainted or gold-highlighted fragments can serve as unique art pieces.
Repurposing adds value and preserves the beauty of broken ceramic while reducing waste.
Repairing Figurine Features
Some figurines have delicate features that require extra attention:
Fragile Hands or Fingers
- Use epoxy putty for missing digits.
- Sculpt small details carefully, using fine tools like toothpicks.
Facial Details
- Hair, eyes, or nose may require careful painting after repair.
- Use a magnifying glass to ensure precision.
Accessories
- Hats, wings, or small props may require internal reinforcement before gluing.
- Lightweight putty can help restore their shape without adding excessive weight.
Preventing Future Damage
Once repaired, you can extend your figurine’s life by taking these steps:
- Place on stable, padded surfaces.
- Avoid high-traffic areas or shelves prone to bumps.
- Keep away from direct sunlight or heat, which may weaken adhesive over time.
- Consider a protective glass display case for valuable figurines.
- Handle with care when cleaning; avoid abrasive brushes or strong detergents.
Frequently Asked Questions (FAQs)
1. What is the best adhesive for repairing a ceramic figurine?
The most reliable option is two-part clear epoxy. It provides a strong, long-lasting bond and can be used for both structural repairs and cosmetic touch-ups. Super glue is suitable for very small chips but isn’t ideal for fragile or weight-bearing parts.
2. Can I repair a broken figurine without the original pieces?
Yes. Epoxy putty or polymer clay can be used to reconstruct missing sections. Careful sculpting, sanding, and painting allow you to recreate details even if fragments are lost.
3. How do I match the colors when painting repaired areas?
Use acrylic or ceramic touch-up paints. Mix gradually to match the original shades, and apply in thin layers. A clear glaze or varnish can restore shine and protect the paint.
4. Can I repair a figurine that has sentimental or monetary value at home?
For valuable or antique figurines, it’s often best to consult a professional ceramic restorer. They have specialized adhesives, paints, and tools to maintain structural integrity and authenticity.
5. How long should I let epoxy or putty cure?
Curing times vary by product:
- Two-part epoxy: 12–24 hours
- Epoxy putty: 24 hours or more for thicker areas
Follow manufacturer instructions to ensure maximum strength.
6. Can I repair tiny, delicate features like fingers or hair?
Yes, but it requires precision tools, a steady hand, and careful layering of epoxy putty or sculpting material. A magnifying glass can help with intricate details.
7. What is Kintsugi, and can I use it for figurines?
Kintsugi is a Japanese art form that repairs ceramics with gold or metallic resin, highlighting cracks instead of hiding them. It’s ideal for decorative pieces and can turn damage into a visually striking feature.
8. How can I prevent future damage to repaired figurines?
Store on stable, padded surfaces, avoid high-traffic areas, limit exposure to direct sunlight or heat, and consider a protective display case. Handle carefully when dusting or cleaning.
9. Can broken figurines be repurposed creatively?
Absolutely. Broken or irreparable figurines can be used for planters, candle holders, mosaics, or decorative art, preserving their beauty in a new form.
10. Is sanding necessary after using epoxy or putty?
Yes. Sanding ensures the repair blends smoothly with the original ceramic, removes excess material, and prepares the surface for painting or glazing. Fine-grit sandpaper (400–800) works best.
Conclusion
Repairing a ceramic figurine requires patience, precision, and the right materials. Whether your figurine is a collectible, a decorative piece, or a sentimental keepsake, following proper steps—cleaning, dry-fitting, applying adhesive, reconstructing missing sections, sanding, and painting—can restore both structure and appearance.
For small chips or cracks, simple adhesive repairs may suffice, while missing pieces or fragile features often require epoxy putty or polymer clay and careful sculpting. Advanced techniques like Kintsugi offer artistic flair, turning repairs into a feature rather than a flaw.
By taking the time to repair and protect your figurines, you preserve their value, beauty, and sentimental meaning. Careful handling, proper storage, and regular maintenance ensure these cherished pieces can be enjoyed for generations. With the right approach, even the most damaged ceramic figurine can be revived into a strong, beautiful, and long-lasting treasure.