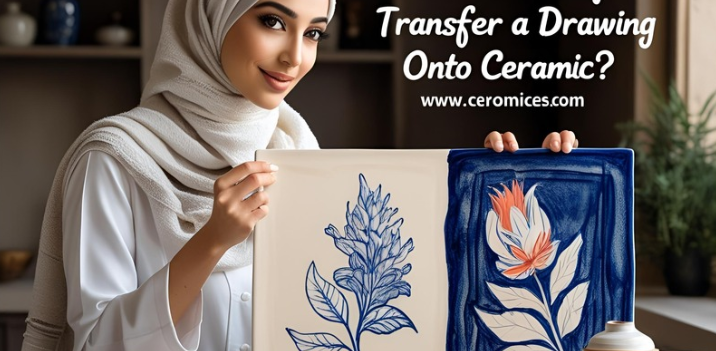
Transferring your artwork onto a ceramic surface can elevate any piece from plain pottery to personalized artistry. Whether you’re a hobbyist, ceramic artist, or looking to create custom ceramic gifts or products, learning how to transfer a drawing onto ceramic is a valuable skill. This technique bridges hand-drawn designs with the permanence of ceramics, giving you endless creative possibilities.
From pencil tracing to advanced transfer papers and image transfer mediums, there are multiple ways to imprint a design onto mugs, plates, tiles, or vases. In this comprehensive guide, we will explore all the methods, materials, and expert techniques that show you how to transfer a drawing onto ceramic with clarity, accuracy, and artistic flair.
Why Transfer Drawings to Ceramic Instead of Freehand Painting?
Freehand drawing directly on a ceramic surface is challenging—especially if precision is crucial. Most artists prefer to work out their designs on paper first and then transfer the drawing onto the ceramic for the following reasons:
- Accuracy: You maintain the exact proportions of your design.
- Reproducibility: The same drawing can be used multiple times across different ceramic surfaces.
- Time efficiency: It saves time, especially for complex or symmetrical designs.
- Cleaner results: Tracing reduces mistakes, especially for lettering or fine details.
If you’re wondering how to start, don’t worry—there are both basic and professional methods available depending on your budget and tools.
Materials You’ll Need to Transfer a Drawing Onto Ceramic
Before diving into the process, it’s essential to gather the correct supplies. The type of transfer method you choose will determine what you need, but here’s a general list of commonly used items:
- Tracing paper or graphite paper
- Pencil (HB or 2B works best)
- Tape (painter’s tape or masking tape)
- Bone folder or stylus
- Clear glaze or underglaze
- Ceramic-safe image transfer medium (if using printed designs)
- Access to a kiln (for permanent designs)
- Laser printer (for toner-based image transfers)
- Burnishing tools
- Fine-tip ceramic pens or brushes for touch-ups
Each method of how to transfer a drawing onto ceramic will require slight variations in these materials, but this list covers nearly all approaches.
Method 1: Pencil Transfer Technique (Ideal for Beginners)
This is the most straightforward method for learning how to transfer a drawing onto ceramic, perfect for hand-drawn designs and line art.
Step-by-Step Process:
- Draw or print your design on regular paper.
- Flip the paper over and shade the backside of the design with a pencil (use 2B for darker lines).
- Place the paper onto the ceramic surface (right side up), securing it with tape.
- Trace the drawing with a pencil or stylus. The graphite on the back transfers a faint outline to the ceramic.
- Remove the paper and touch up the transferred lines using underglaze pencils or fine ceramic pens.
- Fire or glaze as desired after completing your artwork.
This method is easy, cost-effective, and doesn’t require special tools.
Method 2: Using Graphite or Carbon Transfer Paper
For more professional results with darker lines, you can use graphite or carbon paper.
How It Works:
- Position the graphite transfer paper (dark side down) on the ceramic.
- Place your design on top of the transfer paper.
- Trace your design using a pen or stylus.
- Remove both papers, and you’ll see a clean transferred outline on the ceramic surface.
This method gives better precision and works on most unglazed ceramics. For best results, use on bone-dry greenware or bisque-fired pieces.
Method 3: Laser Toner Image Transfer (Advanced Technique)
If you want to transfer a printed image or photo, this technique uses a toner-based laser printer (not inkjet).
Materials Required:
- Ceramic transfer medium (like Mod Podge or a specialized decal medium)
- Laser-printed mirror image on paper
- A soft brush and sponge
- Burnishing tool
Steps:
- Print your image in reverse using a laser printer.
- Apply ceramic transfer medium to the image.
- Position it on the ceramic surface with the image side down.
- Burnish the image with a bone folder to ensure contact.
- Let it dry completely (some methods require 24 hours).
- Soak and rub off the paper backing, leaving the toner embedded in the medium.
- Fire the ceramic if using a kiln-safe medium or seal with a topcoat if not.
This method allows complex images, typography, and detailed patterns to be transferred cleanly.
Method 4: Using Underglaze Transfer Sheets
Pre-made underglaze transfer sheets are printed with ceramic-compatible pigment and can be cut to shape and applied to bisque-fired surfaces.
Application Process:
- Cut the transfer sheet to match your design.
- Moisten the ceramic surface lightly with a sponge.
- Place the sheet face-down and press it onto the ceramic.
- Smooth out air bubbles and let it sit for 10–20 minutes.
- Peel off the paper backing, leaving the pigment behind.
- Apply a clear glaze and fire in the kiln to complete.
Underglaze transfer sheets are great for repeated patterns and commercial-quality designs.
Method 5: Freezer Paper and Alcohol Transfer
A less common, yet effective technique using freezer paper and rubbing alcohol to transfer printed images.
Instructions:
- Print your image onto shiny freezer paper using a laser printer.
- Place the printed side down on the ceramic surface.
- Dab 91% isopropyl alcohol onto the back using a cotton ball or sponge.
- Apply pressure and rub to transfer the image.
- Remove the paper and seal or fire as needed.
While not as precise as some other methods, this technique is budget-friendly and effective for textured designs.
How to Touch Up Transferred Drawings on Ceramic
Once your design is transferred, you may need to go over the lines with an underglaze pencil, ceramic ink, or fine brush for better visibility and permanence.
- Use ceramic pens for easy detail work.
- For painting, choose underglaze or china paint depending on the firing temperature.
- Avoid regular ink or non-ceramic paint, as they won’t survive the kiln firing process.
Always seal with a clear glaze before firing if you want a glossy finish.
When to Transfer: Greenware vs. Bisqueware vs. Glazed Ceramic
The timing of when to transfer your design plays a critical role.
Greenware (unfired clay):
- Soft and fragile, but easy to draw on.
- Best for pencil transfers and sgraffito.
Bisqueware (once-fired ceramic):
- Smooth, absorbent surface.
- Ideal for underglaze transfers and decals.
Glazed Ceramic:
- Non-porous and shiny.
- Best suited for overglaze transfers or decal work.
- Requires enamel or china paint for proper adhesion.
Knowing how to transfer a drawing onto ceramic based on the ceramic stage helps ensure success.
How to Prepare Your Ceramic Surface Before Transfer
A clean, dust-free, and appropriate surface is key to a successful transfer.
Tips:
- Wipe the surface with a damp sponge to remove dust or debris.
- If using carbon or graphite paper, the ceramic must be dry.
- For decals and image transfers, a slightly moist surface helps adherence.
- Avoid transferring on cracked, warped, or oily ceramic surfaces.
Preparation is often overlooked but critical for clean results.
Fixing Mistakes: What to Do If the Transfer Smudges
Even professionals make mistakes. Fortunately, some quick fixes can save your piece.
- Use a damp Q-tip to erase graphite or pencil lines.
- For smudged ink, use alcohol wipes or a fine scraper.
- If using underglaze, gently scrape with a loop tool and reapply.
- Always test on a sample tile first to avoid ruining a larger piece.
Fixing errors is part of the learning curve when mastering how to transfer a drawing onto ceramic.
Tips for Scaling and Mirroring Your Designs Before Transfer
Depending on the transfer technique, your image may need to be mirrored, especially when using printed transfers or text.
Design Tips:
- Use software like Photoshop or Canva to flip images horizontally before printing.
- For tiled designs, break down the image into segments and reassemble on the ceramic.
- Use tracing paper to sketch and resize before final transfer.
Scaling your drawing beforehand helps fit the artwork perfectly on irregular or curved ceramic surfaces.
How to Preserve and Finish the Design After Transfer
Your design needs protection—whether it’s a one-time display piece or a functional ceramic item.
Finishing Steps:
- Apply a clear glaze over underglaze designs before kiln firing.
- For low-fire techniques, use a brush-on clear sealant to protect your transfer.
- Ensure even glaze coverage to avoid dull spots or uneven textures.
- Always fire according to the glaze manufacturer’s instructions.
Finishing adds shine, depth, and durability to your artwork.
Common Mistakes to Avoid When Transferring Drawings Onto Ceramic
- Skipping surface cleaning.
- Forgetting to mirror your image before printing.
- Applying uneven pressure during transfer.
- Using non-ceramic-safe materials.
- Firing with unstable pigments or paper residue still attached.
Learning how to transfer a drawing onto ceramic is about consistency and experimentation—avoiding these mistakes will take your craft to the next level.
Final Thoughts
Mastering the art of how to transfer a drawing onto ceramic opens up a world of creative possibilities. Whether you’re designing custom mugs, intricate tile murals, or heirloom-quality gifts, knowing how to accurately apply your design is the foundation of ceramic artistry.
From pencil tracing to high-definition laser transfers, the method you choose will depend on your skill level, materials, and artistic goals. With practice and attention to detail, your drawings can become permanent pieces of ceramic art.
So gather your tools, select your technique, and bring your creativity to life—one plate, mug, or tile at a time.
✅ 10 Frequently Asked Questions About How to Transfer a Drawing Onto Ceramic
1. Can I use regular printer paper to transfer a drawing onto ceramic?
Yes, you can use regular printer paper for basic pencil transfer or tracing techniques. However, if you’re using laser toner or image transfer methods, you’ll get better results with freezer paper, decal paper, or special transfer paper.
2. Do I need to mirror my design before transferring?
Yes, if your design includes text or you’re using toner-based transfers (like laser printer images or decals), mirroring the image is essential to ensure it appears correctly on the ceramic.
3. Can I use inkjet printers for image transfers onto ceramic?
Inkjet printers generally don’t work well for ceramic transfers because their ink doesn’t bond to ceramic surfaces properly. Laser printers with toner-based ink are the industry standard for image transfers.
4. What surfaces work best for transferring drawings—greenware, bisque, or glazed ceramic?
- Greenware: Ideal for sgraffito and pencil transfers.
- Bisque: Best for most transfers, especially underglaze.
- Glazed ceramics: Require decal transfers or enamel paints.
Choose based on your firing method and desired finish.
5. Will the transferred design stay after firing?
Yes—if you use underglaze or compatible ceramic transfer materials and fire at the recommended temperature. Pencil or graphite alone will burn off in the kiln unless painted over with underglaze or oxide.
6. Can I seal the design without a kiln?
If you’re working on a decorative, non-functional piece, you can seal the design with clear ceramic spray sealant. For food-safe or durable results, firing in a kiln with a proper glaze is necessary.
7. How do I prevent smudging when transferring a pencil sketch?
- Secure the paper tightly with tape
- Use a firm, even pressure while tracing
- Go over the lines lightly afterward with a fine ceramic pencil or pen
Smudging often occurs when the ceramic surface is too smooth or dusty.
8. What’s the difference between carbon paper and graphite paper for ceramic use?
- Graphite paper is lighter and erasable, ideal for bisque or greenware.
- Carbon paper gives darker lines but is harder to remove and can burn in the kiln if not cleaned.
Always test both on a sample before applying to your final ceramic piece.
9. Can I transfer a full-color image onto ceramic?
Yes, using ceramic decal paper or commercial transfer paper designed for full-color laser prints. These require careful application and are often fired onto glazed ceramics for durability.
10. Is tracing considered cheating in ceramic art?
Absolutely not. Tracing is a widely accepted technique in the ceramics and fine art communities, especially when accuracy, consistency, or scaling is important. It’s a tool—just like any brush or pen.
🏁 Conclusion
Learning how to transfer a drawing onto ceramic opens up exciting creative pathways. Whether you’re tracing a simple design with pencil or using advanced decal transfers, this skill transforms your ceramic projects into polished, personalized pieces.
Each method—pencil tracing, carbon paper, toner image transfer, or underglaze decals—has its place, depending on your desired outcome, skill level, and tools available. With proper preparation, clean surfaces, and attention to detail, your drawings will adhere beautifully to mugs, tiles, vases, and more.
Always test your method on a sample tile before committing to a final project, and don’t hesitate to combine techniques to achieve complex results. In ceramics, the journey is just as fulfilling as the outcome.
So sketch, trace, transfer, and fire—your art deserves a permanent place on ceramic.