Ceramic coating has become one of the most popular ways to protect a vehicle’s paint, add gloss, and make washing easier. But while the results can look impressive, the application process is often misunderstood. Many people think ceramic coating works like wax or spray detailer. It does not. Ceramic coating requires careful preparation, controlled application, and proper curing if you want the finish to look good and last.
That is why learning how to use ceramic coating correctly matters so much. Done right, it can give your car a cleaner, slicker, more protected finish. Done badly, it can leave streaks, high spots, uneven gloss, and a lot of unnecessary correction work. The product itself is only part of the job. The real difference comes from the preparation and the way you apply it.
This guide explains exactly how to use ceramic coating step by step. You will learn what ceramic coating actually does, what supplies you need, how to prep the paint, how to apply the coating panel by panel, how to level it correctly, how curing works, and what mistakes to avoid.
Short Answer
To use ceramic coating properly, first wash, decontaminate, and polish the vehicle so the paint is clean and defect-free. Then wipe the surface with a prep spray, apply the coating in small sections using an applicator, level and buff it before it dries too long, and let it cure fully while keeping the vehicle away from water and contamination.
What Ceramic Coating Actually Does
Before applying it, it helps to understand what ceramic coating is and what it is not.
Ceramic coating is a liquid protective layer that bonds to the paint surface. Once cured, it creates a harder, more chemically resistant layer than a traditional wax or sealant. It is mainly used to improve:
- gloss
- slickness
- water beading
- resistance to dirt
- easier washing
- protection from some environmental contamination
What it does not do is make the car scratch-proof or maintenance-free. A ceramic-coated car still needs regular washing and proper care. The coating makes maintenance easier, but it does not remove the need for it.
When Ceramic Coating Makes Sense
Ceramic coating is a good choice if you want:
- longer-lasting paint protection
- easier cleaning
- stronger water behavior
- more gloss and clarity
- better resistance to grime and chemicals than wax
It makes the most sense when the paint is already in good condition or after you have corrected it. If the paint is full of swirls, scratches, or oxidation, ceramic coating will not hide those defects. It will usually make them more noticeable by locking in the finish exactly as it is.
That is why paint preparation is such a big part of learning how to use ceramic coating the right way.
What You Need Before You Start
You do not need a giant workshop, but you do need the right products and environment.
Basic supplies
- pH-neutral car shampoo
- wash mitt
- microfiber drying towels
- iron remover
- tar remover if needed
- clay bar or clay mitt
- panel prep spray
- ceramic coating kit
- suede applicators or coating applicator pads
- multiple clean microfiber towels
- nitrile gloves
Helpful extras
- dual-action polisher
- polishing pads
- polish or compound
- inspection light
- masking tape
- indoor garage or shaded workspace
The cleaner and more controlled your setup, the easier the coating process becomes.
The Best Place to Apply Ceramic Coating
The environment matters a lot.
Ideal conditions
- indoors or under cover
- cool surface
- no direct sunlight
- low dust
- low wind
- stable temperature
Avoid applying coating
- in strong sun
- on hot panels
- in high humidity without experience
- outside in dusty or windy conditions
- when rain is likely soon after application
Ceramic coating flashes and cures based on product chemistry, temperature, and humidity. Too much heat or poor conditions can make it difficult to level correctly.
Step 1: Wash the Vehicle Thoroughly
The first real step is a complete wash.
Why this matters
You cannot coat over dirt, road film, or old residue and expect proper bonding. The surface has to be truly clean.
How to wash
Use a safe wash method and remove all visible dirt, dust, and grime. Pay special attention to:
- lower panels
- behind wheels
- badges and trim edges
- mirrors
- door jamb edges if coating there
Once washed, rinse thoroughly and dry the vehicle completely.
A clean surface is the foundation of everything that follows.
Step 2: Decontaminate the Paint
After washing, the paint may still have bonded contamination that you cannot see easily.
Use iron remover
Spray iron remover on the paint to dissolve embedded iron particles.
Use tar remover if needed
If the car has tar spots, road glue, or sticky contamination, remove it now.
Clay the paint
Use a clay bar or clay mitt with proper lubrication to remove bonded contamination left behind after chemical decontamination.
Why this step matters
If contamination remains in the paint, the coating may not bond properly and the finish may not feel or look smooth.
After claying, rinse or rewash the vehicle if needed and dry it again.
Step 3: Polish the Paint if Needed
This is one of the most important steps, and also the one many people try to skip.
Why polishing matters
Ceramic coating locks in the appearance of the paint. If the paint has:
- swirls
- hazing
- oxidation
- water spots
- light scratches
- dullness
the coating will not fix them. It will usually preserve or even highlight them.
When polishing is needed
In most cases, at least a light polish is a very good idea before coating.
When polishing may not be needed
If the vehicle is brand new and the paint is already in excellent condition, you may choose a minimal correction or finishing polish only.
Even a simple finishing polish can improve gloss and prepare the paint for coating.
Step 4: Wipe Down With Panel Prep
After polishing, the paint usually has leftover oils and residue that must be removed.
Use a panel prep spray
Spray the product onto a microfiber towel or directly onto the panel as directed, then wipe the surface clean.
Why this matters
Polishing oils can hide defects and interfere with coating bonding. Panel prep helps reveal the true finish and gives the coating a clean surface to bond to.
This is one of the most important steps in the entire process. Do not skip it.
Step 5: Choose a Small Starting Area
Do not start by coating a whole hood at once. Ceramic coating is usually applied panel by panel or even half-panel by half-panel.
Good beginner starting areas
- upper part of a door
- fender
- small section of the hood
Why this helps
It lets you learn how the coating behaves:
- how fast it flashes
- how easy it wipes
- how much product you need
- how lighting affects visibility
Once you understand the product on a small section, the rest becomes much easier.
Step 6: Prime the Applicator
Most ceramic coatings are applied with a small applicator block wrapped in suede or a dedicated foam coating pad.
How to prepare it
Add several drops or a short line of coating to the applicator until it is evenly primed.
Why this matters
A dry applicator can apply unevenly. Priming helps the first section go on more smoothly.
After the applicator is primed, you usually need only a few drops more between sections.
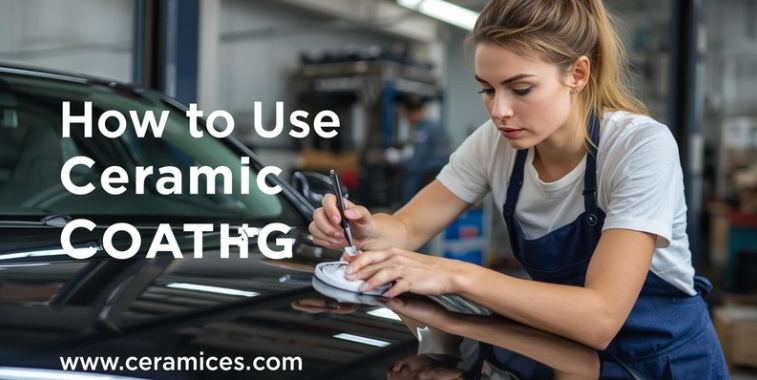
Step 7: Apply the Coating in a Crosshatch Pattern
This is the standard application method.
How to do it
Apply the coating in overlapping lines in one direction, then go back over the same section in the opposite direction. This creates a crosshatch pattern.
Why this works
It helps distribute the coating evenly and reduces missed spots.
Use light, even pressure
You are laying down a thin wet film, not scrubbing the paint.
Work in small sections so you can control the application and see the coating flash properly.
Step 8: Watch for the Coating to Flash
After application, the coating usually begins to flash. This means it starts reacting and changing appearance on the surface.
What flashing looks like
Depending on the product, it may appear as:
- slight rainbowing
- oily-looking movement
- haze
- a visible change in the wet film
Why timing matters
If you wipe too early, you may remove too much product. If you wait too long, the coating may become difficult to level and leave high spots.
This is why starting with a small section is important. Every coating behaves a little differently depending on conditions.
Step 9: Level and Buff the Coating
Once the coating reaches the right stage, level it with a microfiber towel.
First towel
Use the first towel to gently level the coating and spread away excess product.
Second towel
Use a second clean towel to buff the surface lightly and remove any leftover residue.
Goal
You want the panel to look:
- clear
- even
- streak-free
- high-gloss
- free of smears or dark patches
Do not press too hard. Gentle, controlled leveling is better than aggressive buffing.
Step 10: Inspect for High Spots Immediately
A high spot is an area where too much coating remains and cures unevenly.
What high spots look like
- darker patches
- smeary shiny areas
- rainbow residue
- uneven gloss
- streak-like marks that do not wipe clean easily
Why they matter
If high spots cure fully, they often need polishing to remove.
Use good lighting and inspect each section right after leveling. Catching high spots early is much easier than fixing them later.
Step 11: Repeat Panel by Panel
Once you are happy with your first section, keep moving around the car one manageable section at a time.
Good workflow
- roof
- hood
- trunk
- upper sides
- lower sides
- rear bumper
- front bumper
This helps you stay organized and prevents missed areas.
Change towels as they become loaded with coating residue. Using saturated towels makes leveling harder and increases the chance of smearing.
Step 12: Let the Coating Cure
Once application is complete, curing becomes the priority.
What curing means
The coating continues hardening and bonding after you finish wiping it off.
During the first cure period
Keep the vehicle away from:
- rain
- washing
- heavy moisture
- dust
- tree sap
- bird droppings if possible
Why this matters
Fresh coating is more vulnerable before full cure. Exposure too early can affect the finish or weaken durability.
Follow the coating’s recommended cure window as closely as possible.
How Long Before the Car Can Get Wet?
This depends on the product, but in general, fresh ceramic coating should be kept dry for the initial cure period.
If unexpected water hits the vehicle early, some products allow a quick wipe-down or use of a maintenance topper, but the best approach is always prevention.
If possible, keep the vehicle indoors or covered until the first cure phase is complete.
How Long Before You Wash the Car?
Do not wash the car too soon after coating.
Even if the coating feels dry, it may still be curing underneath. Washing too early can interfere with the bonding and hardening process.
Follow the recommended waiting period from the coating manufacturer. In general, it is wise to give the coating proper time before the first wash.
How to Use a Ceramic Coating Spray vs True Ceramic Coating
Some people mean different products when they say ceramic coating.
True ceramic coating
This is the more durable product that:
- requires full prep
- comes in a small bottle
- is applied carefully section by section
- cures into a longer-lasting protective layer
Ceramic spray sealant
This is easier and faster to use. It:
- sprays onto paint
- wipes on and off more simply
- lasts less time
- is better for maintenance or quick protection
If you are using a real ceramic coating bottle, the process in this guide applies. If you are using a ceramic spray, the application is much easier, but the durability is also lower.
How Much Ceramic Coating Should You Use?
Less than many beginners expect.
Common mistake
Using too much product.
Too much coating can:
- make leveling harder
- increase smearing
- create high spots
- waste product
You usually only need enough to form a light, even film over each section. Once the applicator is primed, only a few drops at a time are often needed.
Thin, controlled application is better than heavy application.
Common Mistakes to Avoid
A lot of ceramic coating problems come from a few predictable mistakes.
Skipping polishing or proper prep
This leaves defects under the coating and can reduce bonding quality.
Coating in direct sun
This makes flashing too fast and leveling much harder.
Using too much product
Heavy application often creates streaks and high spots.
Waiting too long to level
This can make residue difficult to remove.
Not using enough clean towels
Loaded towels smear coating instead of leveling it cleanly.
Missing high spots
These often require polishing later.
Letting water hit the car too soon
This can affect early curing.
Avoiding these mistakes is just as important as following the main steps.
Can You Layer Ceramic Coating?
Some coatings allow layering, but not all require it.
Possible reasons to layer
- added gloss
- additional coverage confidence
- product instructions recommend a second layer
Important point
Layering only makes sense if:
- the first layer was applied correctly
- the second layer goes on within the product’s recommended window
If the product is not designed for layering, do not assume more coats automatically mean better protection.
How to Maintain a Ceramic-Coated Car
Once the coating is on, maintenance is still important.
Best habits
- wash regularly with pH-neutral shampoo
- avoid automatic brush washes
- remove bird droppings quickly
- use proper wash towels and mitts
- apply ceramic-compatible maintenance products if desired
Ceramic coating makes maintenance easier, but it does not eliminate the need for careful washing.
Is Ceramic Coating Hard to Apply?
It depends on the product and your experience.
Easier if:
- the paint is already in good shape
- you work indoors
- you have good lighting
- you use a beginner-friendly coating
- you understand prep and towel management
Harder if:
- you rush prep
- you work outside in heat
- you try to coat huge sections at once
- you ignore flashing behavior
- you have no way to inspect high spots
It is absolutely possible to apply ceramic coating yourself, but it rewards patience and attention to detail.
Frequently Asked Questions
1. What is the correct way to use ceramic coating?
The correct way is to wash, decontaminate, polish, and prep the paint first, then apply the coating in small sections, level it properly, and let it cure fully.
2. Do I need to polish before ceramic coating?
In most cases, yes. Polishing improves the finish and helps ensure the coating bonds to clean, corrected paint.
3. Can I apply ceramic coating without clay barring the car?
You can, but it is not ideal. Claying removes bonded contamination that washing alone often misses.
4. How long do you leave ceramic coating before wiping?
It depends on the product, temperature, and humidity. Watch for the coating to flash and follow the product’s behavior rather than guessing.
5. How many towels do I need for ceramic coating?
You need several clean microfiber towels because fresh towels make leveling easier and help prevent smearing.
6. Can ceramic coating go on in direct sunlight?
It is not recommended. Hot panels and strong sun make the coating harder to apply correctly.
7. What happens if I leave high spots?
If high spots cure fully, they often need polishing to remove.
8. How long after ceramic coating can the car get wet?
You should keep the car dry during the initial cure period according to the product instructions.
9. Is ceramic coating the same as ceramic spray?
No. Ceramic spray is easier and faster to use but usually offers less durability than a true ceramic coating.
10. Can beginners use ceramic coating?
Yes, but success depends on proper prep, small test sections, good lighting, and careful leveling.
Conclusion
Learning how to use ceramic coating the right way is really about understanding that the coating itself is only one part of the job. The real success comes from the full process: washing, decontaminating, polishing, wiping down the paint properly, applying the product in small controlled sections, leveling it at the right time, and allowing it to cure without interruption.
Ceramic coating can give excellent results, but it rewards patience and punishes rushed work. If you treat it like wax, you will likely be disappointed. If you treat it like a precise finishing step, you can achieve a glossy, slick, easy-to-maintain finish that lasts much longer than traditional protection.
For most people, the biggest keys are simple: prep the paint well, use less product than you think, inspect constantly, and do not rush the curing stage. When those basics are handled properly, ceramic coating becomes much easier to use and much more satisfying to live with.