If you’re curious about ancient pottery traditions or simply want a low-tech, artistic way to finish clay pieces, you’ve probably looked up how to pit fire ceramics. Pit firing is one of the earliest—if not the earliest—forms of transforming raw clay into hardened, functional pottery. Long before electric kilns, propane kilns, or wood kilns existed, people used the earth itself as the firing chamber. And today, this method remains beloved among ceramic artists in the USA because it produces unpredictable, organic, and breathtaking surface patterns that no modern kiln can replicate.
This guide goes far beyond basic instructions. Here, you’ll learn exactly how pit firing works, how to prepare your clay, what materials you need, different pit-firing variations, heat-control strategies, troubleshooting tips, and how to get those dramatic smokey flashes and color markings that pit firing is famous for. Whether you’re a beginner or an experienced potter, this deep dive will give you more detail and nuance than the usual online tutorials.
Let’s get into the dirt—literally.
What Is Pit Firing and Why It’s Still Popular Today
Pit firing is a primitive method in which pottery is fired in a shallow pit in the ground, using combustible materials like wood, sawdust, leaves, paper, or animal dung as fuel. Unlike modern kilns, pit firing involves:
- No temperature control
- No programmable cycles
- No enclosed refractory structure
- No mechanical burners or elements
It’s entirely dependent on how you build your pit, how you arrange your fuel, and how the fire burns.
So why do people still use it?
1. Unmatched natural patterns
Pit firing creates surface effects like:
- Smoky black flashes
- Fire clouds
- Speckled ash deposits
- Earthy gradients
- Red, orange, and brown coloration
No glaze or modern kiln can duplicate this look.
2. Low-cost firing method
You don’t need a kiln. You need:
- A shovel
- A hole
- Some fuel
- Fire safety measures
That’s it.
3. Deep connection to ancient pottery traditions
Pit firing makes you feel connected to the roots of human craft—like you’re participating in something thousands of years old.
4. Artistic unpredictability
You can guide the process, but you can’t completely control it. That’s part of the magic.
Choosing the Right Clay for Pit Firing
Not all clay bodies work well for primitive firing. Because pit firing produces rapid temperature changes and often reaches lower temperatures than a kiln, the clay must be strong, groggy, and thermally tolerant.
Here’s what to look for:
Clay Type
- Raku clay – often the best choice
- Sculptural clay bodies with grog
- Hand-building clay designed for thermal shock resistance
- Low-fire earthenware (with added grog if possible)
Avoid:
- Porcelain
- Stoneware without grog
- Smooth or fine clays
These tend to crack under rapid heating and cooling.
Grog Content
Grog is pre-fired crushed ceramic. It adds:
- Strength
- Structural support
- Thermal shock resistance
Grog content of 20–30% is ideal for pit firing.
Drying Matters
Even the best clay will crack if it’s not fully dry. Pit firing requires bone-dry pieces—no moisture hiding in thicker areas.
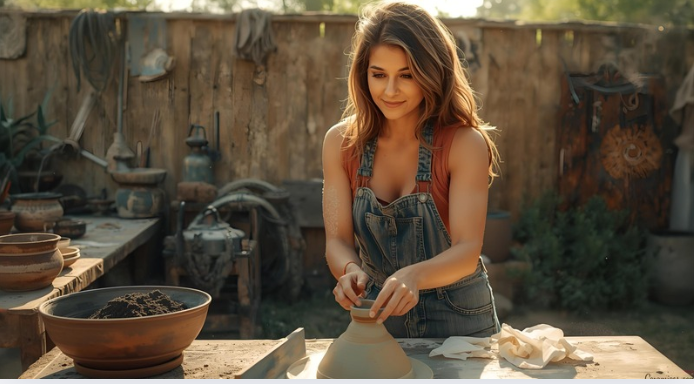
Preparing Your Ceramics for Pit Firing
This step matters more in pit firing than in any other firing method.
1. Make your walls even
Uneven thickness increases the risk of cracking.
2. Smooth the surfaces
Since glazed decoration isn’t used, the clay surface is the star. Burnishing (polishing with a stone or spoon before firing) gives a glossy finish.
3. Bisque firing (optional but recommended)
Some artists pit fire greenware, but this increases the cracking risk. A low bisque firing:
- Strengthens the pottery
- Reduces breakage
- Allows you to focus on surface effects
If you don’t bisque fire, dry your pieces for at least 2–3 weeks.
Choosing and Preparing a Pit Firing Site
The “pit” is your improvised kiln. A good site is:
- Away from buildings or fences
- In an area where open fire is allowed
- On private property or permitted land
- Clear of dry brush
Pit Size
A typical pit is:
- 2–3 feet deep
- 2–4 feet wide
Larger pits require more fuel and more heat management but allow bigger pieces.
Soil Type
Hard-packed earth works best because:
- It insulates heat
- It prevents wall collapse
- It holds fire longer
If your soil is sandy, reinforce the pit with rocks.
Materials You Can Use for Pit Firing
Pit firing is highly creative because you can load the pit with various materials that influence color, temperature, and markings.
Fuel Sources
- Hardwood logs
- Softwood for fast burning
- Sawdust
- Wood chips
- Shredded paper
- Cardboard
- Pine needles
- Dry leaves
More fuel = higher heat.
Finer fuel (like sawdust) = slower burn, more smoke.
Color and Pattern Enhancers
These natural materials leave unique traces:
- Salt – creates white flash marks
- Copper wire – produces green streaks
- Banana peels – leaves darker smoke stains
- Coffee grounds – adds speckles
- Seaweed – leaves reddish tones
- Steel wool – creates gray/metallic areas
- Horse manure – increases heat and creates strong smoke clouds
Protection Materials
To prevent over-burning:
- Broken potsherds
- Sand
- Clumps of clay
- Dry ash
These can be layered between pottery pieces.
How to Load the Pit: The Art of Stacking and Layering
Loading your pit is like composing a painting—you’re designing how heat, smoke, and chemistry will touch your pottery.
1. Add a base layer
Put 2–3 inches of:
- Sawdust
- Shredded newspaper
- Wood chips
This creates gentle early heat.
2. Arrange your pottery carefully
Place pieces with:
- At least 1–2 inches of space between them
- Rounded bottoms supported by sand or ash
- No touching if you want separate color patterns
If you want interesting burn marks, place:
- Copper wire around pots
- Seaweed draped over rims
- Salt sprinkled near bases
3. Add more combustibles
Cover the pottery with:
- More sawdust
- Leaves
- Straw
- Bark
- Paper
This middle layer controls the burn rate.
4. Add large fuel on top
Finish with:
- Logs
- Branches
- Dry firewood
This ensures long-lasting, high heat.
5. Build a dome
You can add:
- Metal sheets
- Broken kiln shelves
- Dirt mounds
This traps heat and reduces oxygen, creating smoky patterns.
Firing the Pit: Step-by-Step
This is where the magic happens.
1. Light the fire slowly
Start burning the upper layer—not the bottom. Gentle ignition prevents thermal shock.
2. Allow gradual heat buildup
The fire should slowly work its way downward. Fast temperature jumps are the biggest cause of cracks.
3. Maintain the fire
Let it:
- Burn steadily
- Consume the upper wood
- Smolder into the deeper layers
A good pit fire lasts:
- 4–24 hours depending on size and fuel
4. Cover the fire
Once the wood is mostly burned:
- Cover with a metal sheet, dirt, or sand
- Let it smother and cool slowly
Cooling slowly is extremely important.
5. Wait before unloading
Do not remove pottery while the pit is hot.
Your work should cool:
- At least 12 hours
- Preferably 24 hours
Sudden cooling can crack pieces instantly.
The Temperatures You Can Expect in Pit Firing
Pit firing temperatures vary widely:
- 600°F to 1800°F, depending on fuel, airflow, and pit depth
This is lower than most kilns, which is why pit-fired pottery is usually decorative rather than functional for food or liquid storage.
Soft clays, burnished surfaces, and porous textures are typical results.
How to Get Different Effects in a Pit Fire
This is where pit firing becomes true art.
1. Smoky Black Surfaces
Use:
- Lots of leaves
- Pine needles
- Sawdust
- Newspaper
These produce long smoke patterns.
2. Red and Orange Blushes
Use:
- Seaweed
- Salt
- Manure
- Driftwood
The minerals produce warm tones.
3. Metallic and Gray Patterns
Use:
- Steel wool
- Iron filings
- Rusty objects
- Steel shavings
These leave unexpected flashes.
4. Speckled or Spotted Marks
Use:
- Coffee grounds
- Rice husks
- Ground charcoal
These leave small, artistic dots.
5. Fire Clouds
Caused by:
- Flame movement
- Log placement
- Uneven burning
- Hot spots
They’re random—and often beautiful.
After the Firing: Cleaning and Finishing Your Pieces
Once cooled, you’ll find your pottery covered in ash, soot, and debris.
Cleaning
Use:
- Soft cloth
- Water
- Gentle scrubbing
Avoid abrasive tools, which can scratch delicate pit-fired surfaces.
Sealing
Since pit-fired ceramics are porous, many artists seal them with:
- Wax
- Acrylic sealant
- Natural oils
- Ceramic varnishes
This brings out the colors and adds a soft sheen.
Buffing
Buffing after sealing creates a polished, gallery-ready finish.
Common Problems in Pit Firing and How to Avoid Them
1. Cracking
Usually caused by:
- Thick walls
- Uneven drying
- Fast temperature shocks
Solution:
- Dry longer
- Preheat gently
- Use grog-rich clay
2. Breaking from Weight
Occurs when:
- Heavy logs collapse inward
- Pieces are stacked incorrectly
Solution:
- Use a stable fuel arrangement
- Avoid putting heavy logs directly on pots
3. Weak Color Patterns
Caused by:
- Too much oxygen
- Too little smoke
Solution:
- Cover pit partially
- Add more sawdust or leaves
4. Overburning
Pieces turn charcoal-black.
Solution:
- Add protective layers like sand or potsherds
- Reduce direct flame contact
FAQs About Pit Firing Ceramics
1. Can beginners try pit firing ceramics?
Yes, beginners can try pit firing, but because it involves open flames, high heat, and outdoor burning, it requires adult supervision, safe preparation, and a suitable location that allows outdoor fire activities. Beginners should start with small pieces and learn proper safety practices.
2. What type of clay works best for pit firing?
Clay with high grog content works best because grog helps the piece handle thermal shock. Most “earthenware” or “pit firing” clays are ideal since they are formulated to withstand uneven heat.
3. Do ceramics need to be bone dry before pit firing?
Absolutely. Any moisture trapped inside the clay can expand when heated and cause the piece to crack or explode. The pieces must be completely dry before firing.
4. What materials can I use to create color effects in pit firing?
Common materials include:
- Copper carbonate
- Seaweed
- Salt
- Iron oxide
- Coffee grounds
- Dried banana peels
- Sawdust
These create smoke patterns and subtle natural color variations.
5. Can glazed ceramics be pit fired?
Glazes are usually not recommended for pit firing because they need stable temperatures to melt properly. Pit firing temperatures fluctuate significantly. Most artists leave their pieces unglazed to embrace the natural smoke effects.
6. Is pit firing safe to do in my backyard?
It depends on local laws and fire safety regulations. Many areas require permits or prohibit open fires. Always check local guidelines and ensure adult supervision if any fire process is involved.
7. How long does pit firing take?
A full pit firing can take anywhere from several hours to a full day, including the time needed for the fire to burn down and the ceramics to cool naturally.
8. Why do ceramics sometimes break during pit firing?
Common reasons include:
- Rapid temperature changes
- Moisture trapped inside the clay
- Using clay that isn’t formulated for open firing
- Uneven heat distribution
Even experienced artists occasionally lose pieces—it’s part of the nature of primitive firing.
9. Can I reuse the pit for future firings?
Yes. A pit can be reused many times as long as it remains stable. Some artists use the same pit for years.
10. Do pit-fired ceramics become waterproof?
No. Pit firing normally does not reach temperatures high enough to fully vitrify the clay. Pit-fired ceramics are usually decorative rather than functional for food or liquids.
Conclusion
Pit firing ceramics is one of the oldest and most expressive methods of transforming raw clay into finished artwork. The process blends creativity, experimentation, and natural elements in a way that modern kilns simply can’t replicate. While pit firing does require careful planning, safety awareness, and patience, it rewards artists with unpredictable yet beautiful results—smoke patterns, earthy tones, and organic markings that make each piece one of a kind.
By understanding how to prepare your clay, arrange your pit, add natural materials for color, and manage the burn safely, you can create meaningful ceramic pieces with a primitive firing technique that honors thousands of years of ceramic traditions. Whether you’re exploring the method for artistic expression, historical curiosity, or simply the joy of experimentation, pit firing offers a uniquely rewarding experience. With the right safety measures and a willingness to embrace unpredictability, anyone can enjoy the magic of turning clay into art using nothing more than earth, fire, and time.