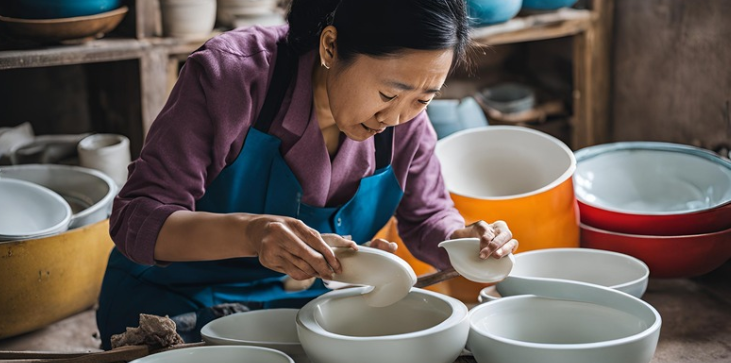
Ceramic items, from treasured heirlooms to everyday dishware, are prone to breaking due to their fragile nature. Whether it’s a favorite mug, a decorative vase, or a piece of pottery, knowing how to glue ceramic back together can save you from the heartache of losing a cherished item. Repairing ceramic requires the right adhesive, proper techniques, and a bit of patience. In this article, we’ll explore the best methods for gluing ceramic, the types of adhesives to use, and tips for achieving a strong and lasting repair. By the end, you’ll have all the knowledge you need to restore your broken ceramic items to their former glory.
Why Repair Ceramic Items?
Repairing broken ceramic items is not only cost-effective but also environmentally friendly. Here are some reasons why you might want to glue ceramic back together:
- Sentimental Value: Many ceramic items hold emotional significance, such as family heirlooms or gifts.
- Cost Savings: Repairing is often cheaper than replacing high-quality or custom-made ceramics.
- Sustainability: Fixing broken items reduces waste and promotes reuse.
- Functionality: Restoring everyday items like mugs or plates allows you to continue using them.
Learning how to glue ceramic back together is a valuable skill that can help you preserve your belongings and reduce unnecessary waste.
Tools and Supplies You’ll Need
Before you start repairing ceramic, gather the following tools and supplies:
- Ceramic Adhesive:
- Epoxy resin (two-part epoxy)
- Super glue (cyanoacrylate)
- Ceramic-specific glue
- Cleaning Supplies:
- Rubbing alcohol or acetone
- Cotton swabs or cloth
- Clamping Tools:
- Clamps, rubber bands, or masking tape
- Sandpaper or Emery Board: For smoothing rough edges.
- Protective Gear:
- Gloves
- Safety goggles
- Optional Supplies:
- Toothpicks (for applying adhesive)
- Disposable mixing tray (for epoxy)
Step-by-Step Guide to Gluing Ceramic Back Together
Follow these steps to ensure a strong and durable repair:
Step 1: Clean the Broken Pieces
- Wash the ceramic pieces with warm, soapy water to remove dirt and grease.
- Use rubbing alcohol or acetone to clean the edges where the adhesive will be applied. This ensures a strong bond.
Step 2: Dry the Pieces
- Allow the pieces to dry completely. Any moisture can weaken the adhesive bond.
Step 3: Sand the Edges (Optional)
- If the broken edges are rough, use fine-grit sandpaper or an emery board to smooth them. This helps the pieces fit together more precisely.
Step 4: Prepare the Adhesive
- For epoxy: Mix the resin and hardener according to the manufacturer’s instructions.
- For super glue: Ensure the nozzle is clean and ready for use.
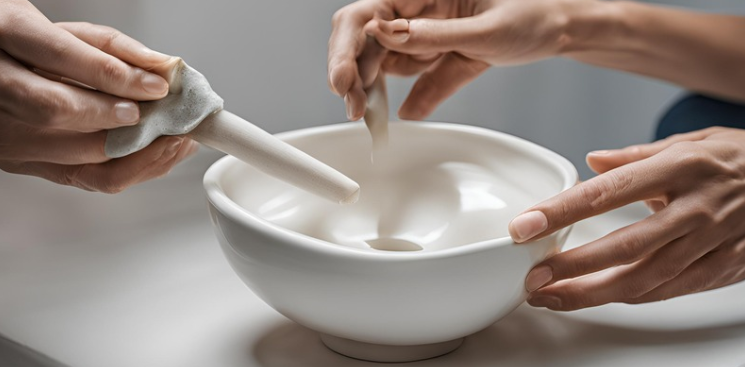
Step 5: Apply the Adhesive
- Use a toothpick or small brush to apply a thin layer of adhesive to one of the broken edges.
- Avoid using too much glue, as excess adhesive can weaken the bond and create a mess.
Step 6: Join the Pieces
- Carefully align the broken pieces and press them together firmly.
- Hold the pieces in place for a few seconds to allow the adhesive to set.
Step 7: Secure the Pieces
- Use clamps, rubber bands, or masking tape to hold the pieces together while the adhesive cures. Ensure the pressure is even to avoid misalignment.
Step 8: Let the Adhesive Cure
- Follow the manufacturer’s instructions for curing time. Epoxy typically takes 24 hours to fully cure, while super glue sets in minutes but may require longer for maximum strength.
Step 9: Clean Up Excess Adhesive
- Once the adhesive has cured, use a razor blade or fine sandpaper to remove any excess glue.
Step 10: Test the Repair
- Gently test the repaired item to ensure it’s secure. Avoid putting too much stress on the repaired area immediately.
Types of Adhesives for Ceramic Repair
Choosing the right adhesive is crucial for a successful repair. Here are the most common options:
- Epoxy Resin:
- Pros: Extremely strong, durable, and waterproof. Ideal for functional items like dishware.
- Cons: Requires mixing and has a longer curing time.
- Super Glue (Cyanoacrylate):
- Pros: Fast-drying and easy to use. Suitable for small repairs.
- Cons: Not as strong as epoxy and may not withstand heavy use.
- Ceramic-Specific Glue:
- Pros: Designed specifically for ceramic repairs. Often heat-resistant and waterproof.
- Cons: May be more expensive than other options.
Tips for Gluing Ceramic Back Together
- Work in a Well-Ventilated Area: Adhesives can emit strong fumes, so ensure proper ventilation.
- Wear Protective Gear: Gloves and safety goggles protect your skin and eyes from adhesive and debris.
- Avoid Overloading with Adhesive: A thin, even layer of glue is more effective than a thick, messy application.
- Be Patient: Allow the adhesive to cure fully before using the repaired item.
- Test the Repair: Start with non-functional items to practice your technique before repairing valuable pieces.
Common Challenges and Solutions
1. Misaligned Pieces
- Solution: Use clamps or tape to hold the pieces in place while the adhesive cures. Double-check alignment before securing.
2. Weak Bond
- Solution: Ensure the surfaces are clean and dry before applying adhesive. Use a stronger adhesive like epoxy for heavy-duty repairs.
3. Excess Adhesive
- Solution: Wipe away excess glue immediately with a cloth or cotton swab. Once cured, use a razor blade or sandpaper to remove hardened residue.
10 Long-Answer FAQs About Gluing Ceramic Back Together
1. Can I use regular glue to repair ceramic?
Regular glue is not recommended for ceramic repairs, as it lacks the strength and durability needed. Use epoxy, super glue, or ceramic-specific adhesive instead.
2. How long does it take for ceramic glue to dry?
Drying times vary by adhesive. Super glue sets in minutes but may take 24 hours to fully cure. Epoxy typically takes 24 hours to cure completely.
3. Can I repair a ceramic item that will hold water?
Yes, but use a waterproof adhesive like epoxy. Ensure the repair is fully cured before exposing the item to water.
4. What’s the best adhesive for repairing a ceramic mug?
Epoxy resin is the best choice for repairing ceramic mugs, as it’s strong, durable, and waterproof.
5. Can I use hot glue to repair ceramic?
Hot glue is not recommended for ceramic repairs, as it lacks the strength and durability needed for a lasting bond.
6. How do I remove old adhesive from ceramic?
Use acetone or rubbing alcohol to soften the adhesive, then gently scrape it away with a razor blade or sandpaper.
7. Can I paint over a repaired ceramic item?
Yes, once the adhesive has fully cured, you can paint over the repaired area. Use ceramic paint for best results.
8. What should I do if the repair doesn’t hold?
Clean the surfaces thoroughly and reapply the adhesive. Consider using a stronger adhesive like epoxy.
9. Can I repair a ceramic item with missing pieces?
Yes, but you may need to fill the missing area with epoxy or a ceramic filler before painting to match the original design.
10. Is it safe to use repaired ceramic items for food?
If using epoxy, ensure it’s food-safe once cured. Avoid using super glue for items that will come into contact with food.
Conclusion
Learning how to glue ceramic back together is a practical and rewarding skill that can save you money, preserve sentimental items, and reduce waste. By choosing the right adhesive, following proper techniques, and allowing adequate curing time, you can achieve strong and durable repairs that restore your ceramic items to their former glory. Whether you’re repairing a cherished heirloom or a everyday dish, this guide provides all the information you need to tackle the task with confidence.
So, the next time you’re faced with a broken ceramic item, don’t despair—grab your adhesive and get to work! With a little patience and care, you can bring your favorite pieces back to life.