Ceramic wall tiles are a popular choice for kitchens, bathrooms, and other areas due to their durability, ease of maintenance, and aesthetic appeal. However, installing ceramic wall tiles can seem daunting if you’ve never done it before. In this article, we’ll walk you through the entire process of how to install ceramic wall tile, from preparation to grouting and sealing. Whether you’re a DIY enthusiast or a homeowner looking to tackle a new project, this guide will provide you with all the information you need to achieve professional-looking results.
Why Choose Ceramic Wall Tiles?
Ceramic wall tiles offer numerous benefits that make them a popular choice for both residential and commercial spaces:
- Durability: Resistant to wear and tear, making them ideal for high-traffic areas.
- Water Resistance: Perfect for wet areas like bathrooms and kitchens.
- Easy Maintenance: Simple to clean and maintain, requiring only basic care.
- Aesthetic Appeal: Available in a wide range of colors, patterns, and finishes to suit any design style.
- Cost-Effective: Generally more affordable than natural stone or glass tiles.
Tools and Materials Needed
Before you start installing ceramic wall tiles, gather the following tools and materials:
- Ceramic Tiles: Choose the size, color, and finish that best suits your project.
- Tile Adhesive: A high-quality adhesive designed for wall tiles.
- Tile Spacers: To ensure even gaps between tiles.
- Tile Cutter or Wet Saw: For cutting tiles to fit.
- Notched Trowel: For spreading adhesive evenly.
- Grout: To fill the gaps between tiles.
- Grout Float: For applying grout.
- Sponge and Bucket: For cleaning excess grout.
- Level and Measuring Tape: To ensure tiles are straight and properly aligned.
- Protective Gear: Gloves and safety glasses to protect your hands and eyes.
Step-by-Step Guide to Installing Ceramic Wall Tiles
Follow these steps to ensure a successful installation of ceramic wall tiles:
Step 1: Prepare the Surface
- Ensure the wall is clean, dry, and free of dust or debris.
- If the wall has existing tiles, remove them and repair any damage to the surface.
- Apply a primer if necessary to improve adhesion.
Step 2: Plan the Layout
- Measure the wall and plan the tile layout to ensure a balanced and symmetrical appearance.
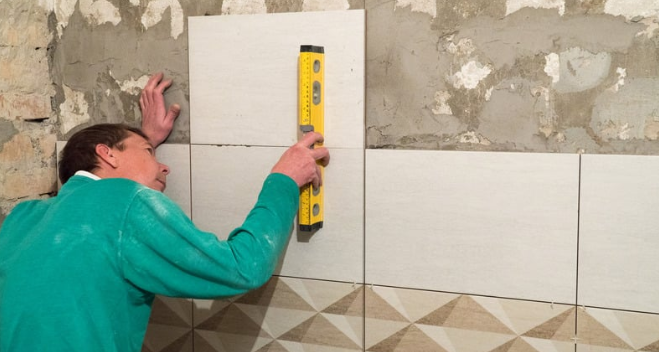
- Use a level and chalk line to mark guidelines for the first row of tiles.
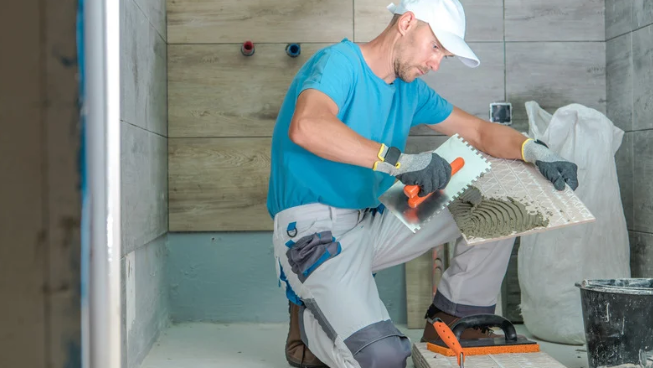
Step 3: Apply the Adhesive
- Using a notched trowel, spread tile adhesive evenly on a small section of the wall.
- Work in small sections to prevent the adhesive from drying out before you can place the tiles.
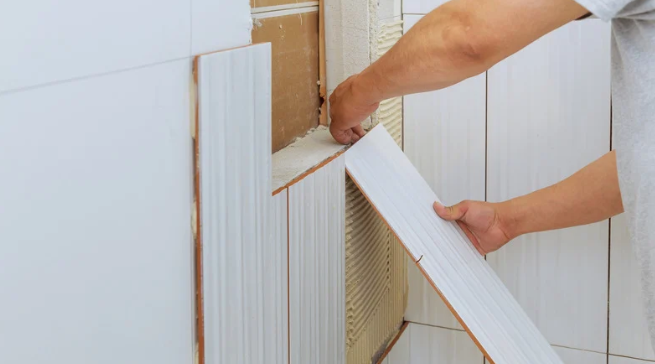
Step 4: Place the Tiles
- Start at the bottom and work your way up, following the guidelines you marked earlier.
- Press each tile firmly into the adhesive, using tile spacers to maintain even gaps.
- Check frequently with a level to ensure the tiles are straight and properly aligned.
Step 5: Cut Tiles to Fit
- Use a tile cutter or wet saw to cut tiles to fit around edges, corners, and fixtures.
- Measure carefully and make precise cuts to ensure a professional finish.
Step 6: Allow the Adhesive to Set
- Let the adhesive set for the recommended time (usually 24 hours) before proceeding to grouting.
Step 7: Apply Grout
- Using a grout float, spread grout over the tiles, pressing it into the gaps between them.
- Work in small sections and remove excess grout with the float.
Step 8: Clean the Tiles
- Use a damp sponge to wipe away excess grout from the tile surfaces.
- Rinse the sponge frequently and change the water as needed to avoid smearing grout.
Step 9: Allow the Grout to Cure
- Let the grout cure for the recommended time (usually 24–48 hours) before exposing it to moisture.
Step 10: Seal the Grout
- Apply a grout sealer to protect the grout from stains and moisture.
- Follow the manufacturer’s instructions for application and drying times.
Tips for Installing Ceramic Wall Tiles
- Start with a Level Surface: Ensure the wall is level and smooth before starting the installation.
- Use Tile Spacers: Tile spacers help maintain even gaps and ensure a professional finish.
- Work in Small Sections: Applying adhesive and placing tiles in small sections prevents the adhesive from drying out too quickly.
- Check Alignment Frequently: Use a level to ensure tiles are straight and properly aligned.
- Clean as You Go: Wipe away excess grout with a damp sponge to avoid it drying on the tile surfaces.
Common Challenges and Solutions
1. Uneven Tiles:
- Solution: Use a level and tile spacers to ensure even placement and alignment.
2. Adhesive Drying Too Quickly:
- Solution: Work in small sections and avoid applying adhesive to large areas at once.
3. Grout Haze:
- Solution: Wipe away excess grout with a damp sponge and clean the tiles thoroughly after grouting.
4. Tile Cracking:
- Solution: Use a tile cutter or wet saw for precise cuts and handle tiles carefully to avoid cracking.
10 Long-Answer FAQs About Installing Ceramic Wall Tiles
1. Can I install ceramic wall tiles over existing tiles?
Yes, but the existing tiles must be clean, stable, and free of damage. You may also need to apply a primer to improve adhesion.
2. What type of adhesive should I use for ceramic wall tiles?
Use a high-quality tile adhesive designed for wall tiles. Follow the manufacturer’s instructions for mixing and application.
3. How do I cut ceramic tiles to fit?
Use a tile cutter or wet saw for straight cuts. For curved cuts, use a tile nipper or angle grinder with a diamond blade.
4. How long does it take for tile adhesive to set?
Tile adhesive typically takes 24 hours to set, but drying times may vary depending on the product and environmental conditions.
5. Can I grout the same day I install the tiles?
It’s best to wait at least 24 hours after installing the tiles before grouting to allow the adhesive to set properly.
6. How do I prevent grout from drying on the tile surfaces?
Wipe away excess grout with a damp sponge as you work, and clean the tiles thoroughly after grouting.
7. Do I need to seal the grout?
Yes, sealing the grout helps protect it from stains and moisture, extending its lifespan.
8. Can I install ceramic wall tiles in a shower?
Yes, ceramic tiles are ideal for showers due to their water resistance. Ensure proper waterproofing and use a suitable adhesive and grout.
9. How do I fix a tile that’s out of alignment?
Carefully remove the tile while the adhesive is still wet and reposition it. If the adhesive has set, you may need to remove and replace the tile.
10. What should I do if I run out of tiles mid-project?
Purchase additional tiles from the same batch to ensure color and texture consistency. If this isn’t possible, consider redistributing the tiles to less visible areas.
Conclusion
Installing ceramic wall tiles is a rewarding project that can transform the look and functionality of any space. By following the step-by-step guide and tips provided in this article, you can achieve professional-looking results and enjoy the benefits of durable, easy-to-maintain tiles. Whether you’re updating a bathroom, kitchen, or any other area, ceramic wall tiles offer a versatile and cost-effective solution.
So, the next time you’re considering a home improvement project, don’t hesitate to tackle ceramic wall tile installation. With the right tools, materials, and techniques, you can create a beautiful and long-lasting finish that enhances your home’s aesthetic and value.
a