
A ceramic bowl is a regularly used item in our kitchen and dining. Sometimes our bowls are cracked, chipped, and broken by falling on the floor or with overhead food. Is your ceramic bowl broken, chipped, or cracked, and do you want to fix it? Can you fix a ceramic bowl while it is broken with many pieces? You can restore your lovely ceramic bowl using glue, adhesive, and milk.
No Metter how many pieces your bowl is, you need to have all the details to rejoin it—missing your favourite bowl because it is broken! No matter! Now time to collect all the pieces and rejoin to make your bowl looks new like before. Yeah, you can do it by yourself free of cost. Just invest a super glue or gorilla glue and your attention. That’s it.
However, follow all the tips and methods to fix up your ceramic bowl. We’ve divided our bowl fixing methods based on three types of problems cracked, chipped, and broken. So follow the guidance that your bowl needs. Also, you’ll get some relevant fixing question answers to have proper knowledge about fixing bowls. Let’s get into the bowl-fixing steps.
Can You Fix a Ceramic Bowl?
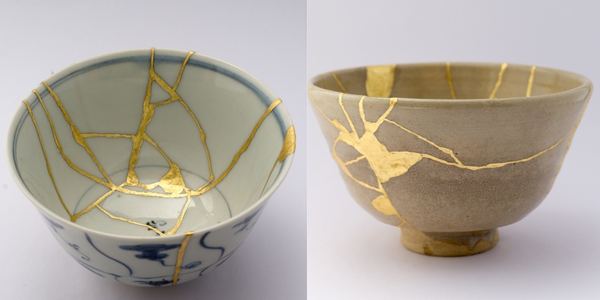
Yes, you can fix your ceramic or china bowl by gluing it. If you have all the pieces for rejoining back together, you’re ready to go for fixing. The easiest way to fix a bowl is with glue. Place them together and apply glue on them as well. It would be best if you taped those pieces together before using glue.
How To Fix a Ceramic Bowl | How To Fix Broken And Cracked Bowl
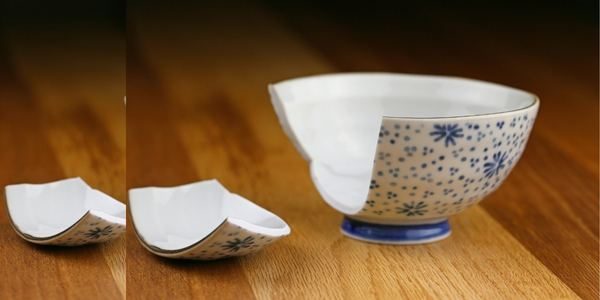
The ceramic bowl is fragile and can break by dropping down or getting hit. Fixing a bowl can be easy or hard, depending on its damage. If your bowl is broken into three to four pieces, your job will be pretty straightforward. But your job will be more complicated if you’re working with so many broken pieces. However, collect all the broken pieces and place them together. Get ready to join these fractured pieces together.
You’ll Need These
- School glue
- Masking tape
- Toilet paper
- Popsicle stick
- Sandpaper
- Clear spray paint
- Paintbrush
- Clear gloss sealant or epoxy glue
Gather The Pieces:
- Collect all the broken parts of the ceramic bowl and place them together.
- Clean all the debris and dust from these pieces.
- Wash them with soapy water if needed.
- Dry them properly before applying glue.
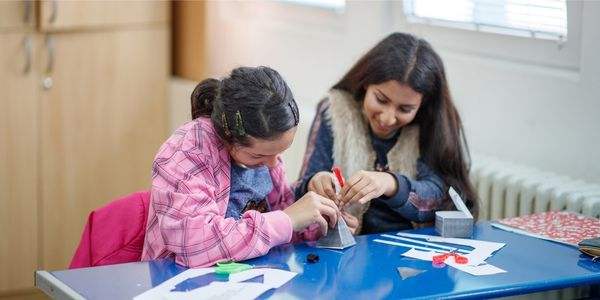
Apply Glue:
- Place the broken pieces straightly through the bowl.
- Apply super glue or gorilla glue on the broken pieces.
- Hold on straightly for 30 seconds.
- Repeat the same process after drying up the first pieces.
Taping the glued pieces: You can apply masking tape over the cracked place. Do this step very carefully and slowly. Make sure that the pieces don’t move from their proper place.
Making a paste with glue: Create a paste by using small pieces of toilet paper. Mix small amounts of toilet paper and glue them together and make a paste.
Filling up the gaps: Apply this paste where you find holes and cracks. Let the bowel away overnight to completely cure. Ensure that the paste is adhered to the bowl and dried properly before dealing with the next step.
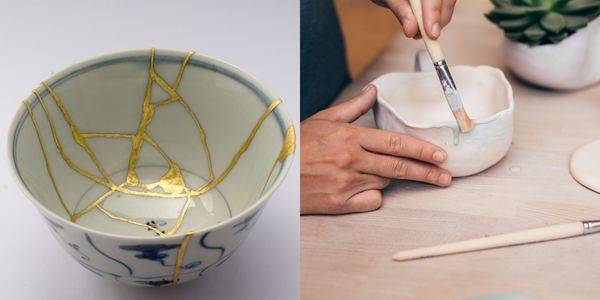
Sand Over The Bowl:
- Sand over the paste and make it smooth.
- Use 100-grit sandpaper to complete this step.
- Do not put lots of pressure while sanding.
Please give it a new look: Give a new look to your fixed bowl by painting. You can apply to spray paint to cover the cracks. Apply the color in two or three coats to adequately protect the damages. Dry the paint for 3 hours to stick the color on the bowl properly. Now you’re ready to go to drink soup with your bowl.
Can You Fix A Chipped Ceramic Bowl?
Yeah, you can fix your chip ceramic bowl by painting. But you have to choose a food-safe acrylic paint for food to contain the bowel. Most of the bowls are food include. So do not paint the bowl with ordinary paint. If the bowl is chipped inside, on the ring, or outside, you can easily give it a new look within an hour.
How To Fix A Chipped Ceramic Bowl
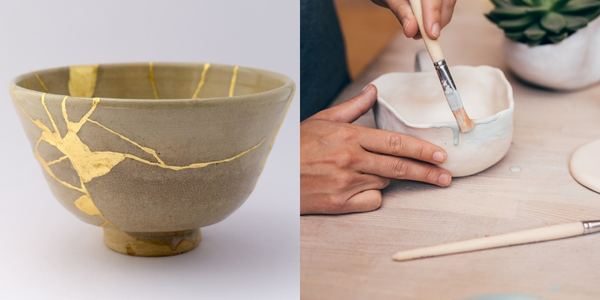
Most of the bowl is damaged inside, corner edge, outside, and on the bottom. You can fix up all the chips from the bowl. However, here is a simple guide to repairing chips from the bowl. You can apply this method to your ceramic, stoneware, Porcelain, and earthenware bowl. Just follow the instructions to hide chips and discolored looks from your bowl.
To fix a bowl, you’ll need to have some supplies next to you. Bring all the bowls that you want to restore and place them aside. It will save you time while you’re working on it. And you’ll also need some colored paint that you want to apply to the bowl. Also, it would help if you had some different types of paintbrushes for using paint on the bowl. So, you can gather all the supplies you need for fixing chips from your bowl and place them aside. Below we provide a list of your needed item; check the list and grab them all.
Things You’ll Need
- 2 part epoxy (you can find it at any store for approx. $5)
- Artist oil pastels (find an oil-based oil pastel, its price is $5)
- A toothpick
- Flat tray for mixing paints
- Razor blade
- Drop cloth or paper bag
Get ready: Take some newspaper on the table or floor where you want to fix your bowl. It is safe for unwanted paint drops on your bed or table. So, cover the work surface with a newspaper or any other paper.
Pour The Color:
- Bring a flat tray and clean it with a dry cloth before pouring paint on it.
- Pour some stain on the mixing tray.
- Do not pour an ample amount of color at this time.
- Use a clean stick (toothpick) for mixing colors.
Add epoxy and pastels: Add epoxy to the color mixing try. Also, add some pastels to the mixer.
Make a mixer: Once you’ve colored, epoxy, and pastels on the mixing tray, mix all the items with a toothpick. It is the crucial step for fixing the chip. Blend the color and epoxy gently to make the solution smooth. If you want to design your bowl in various colors, then do the mix for each color as mentioned above.
Apply mixed epoxy paint: At this time, you’ve 10 minutes to apply the epoxy to the chipped area. The epoxy will get more complicated after 10 minutes.
Apply the epoxy solution painted on the cheeped area. If there are some deep chipped, apply the epoxy and cover the deep hole. Wait for some minutes for the final finish. Apply the second coat after drying the first coat. In the end, go for the final finish and give it a smooth, shiny finish.
Give it some time: Let the painted bowl away to dry up completely. Maybe, it will take several hours to adhere epoxy to the bowl. You can leave the bowl overnight to cure the epoxy fully.
Final adjustment: This step is the last checking your bowl. Check the bowl; how is it? Is your bowl needed some adjustment? Make the last adjustment, such as remixing color, repainting, reapplying epoxy, and refinishing some chipped areas.
What Things To Use To Fix a Ceramic Bowl?
When we decide to fix a bowl, we may need some items and supplies to complete the job. In this section, we talk about which things we need to improve in a bowl.
- Super glue
- Adhesive
- Gap filler
- Sandpaper
- Masking tape
- Toilet paper
- Scraper
- Gorilla glue
How Do You Fix A Broken Porcelain Bowl?
Porcelain bowls and ceramic are the same. Porcelain is a type of ceramic clay. So you can use all the methods mentioned above on the Porcelain bowl to determine whether ceramic and Porcelain material properties are nearly identical. They act like same, but sometimes ceramic is more complex than Porcelain. However, we recommend using these methods above to repair the Porcelain bowl.
How To Prevent The Ceramic Bowl From Breaking
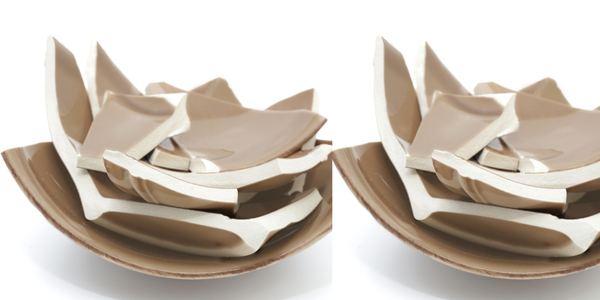
Some of the safety tips will prevent the bowl from breaking and cracking. Follow these tips to stop breaking the bowl.
Safe use: Use your bowl safely to give it a longer life.
Store in a safe place: Do not store in an area with more chance of falling and breaking.
Temperature: You must know how much temperature can withstand your bowl. Do not pour overhead beverages into the bowl. Overhead beverages can crack your bowl.
Microwaving: Confirm first whether your bowl is Microwave safe or not. If it is not Microwave safe, then do not use it in a microwave.
Dishwasher: Cleaning with a dishwasher is faster and more accessible. But if your bowl isn’t dishwasher safe, you may go for the hand wash.
Children: Do not allow children to play with the bowl; as a result, they can break it by dropping down.
How Do You Glue A Ceramic Bowl Back Together?
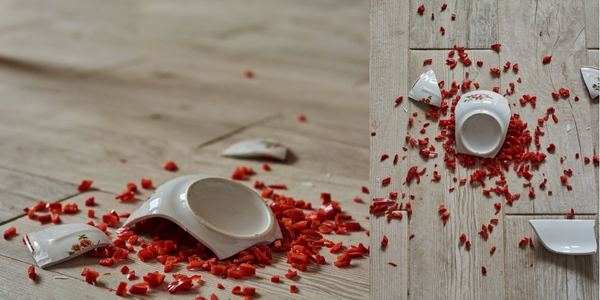
Gluing ceramic pieces back together is an easy method. You can complete this step if you have conscious. It just needs your attention to do the job.
- Clean all the pieces
- Make sure it is ultimately dust free
- Apply glue to a broken piece and another surface where you want to join
- Place the piece of ceramic straight on the surface as it is
- Hold the piece for 30 seconds
- Apply a cross tape while it harder
- Remove the tape while it is scorched. Then you’re done Gluing back ceramic together.
Can Super Glue Fix A Ceramic Bowl?
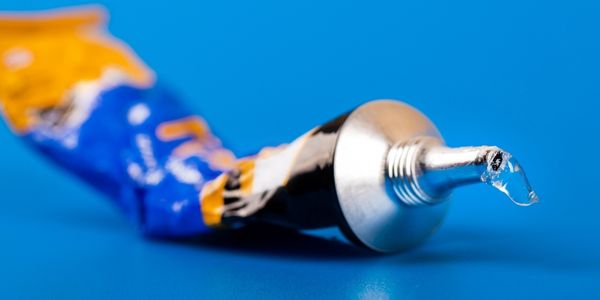
Super glue is the best fixing solution for repairing ceramic bowls. Ceramic bowl easy to fix by using super glue. Super Glue is a fast and most substantial item to fox anything. If you want a quick solution, super glue is an ideal selection. Use a food-safe super glue for an excellent contracts bowl to prevent toxicity. So, you can use super glue to fix the bowl without any doubt.
6 Easy Tips for Fixing a Ceramic Bowl
Fixing a cracked or chipped ceramic bowl is possible with some basic materials and careful handling. Here are six easy tips for fixing a ceramic bowl:
Safety First:
- Before you begin, ensure that you are working in a well-ventilated area. Wear safety goggles to protect your eyes from any flying ceramic shards. Additionally, consider wearing disposable gloves to keep your hands clean and safe.
Gather Your Materials:
- You will need the following materials:
- Epoxy adhesive: Choose a high-quality epoxy adhesive suitable for ceramics.
- Clean, lint-free cloths or paper towels.
- Disposable mixing containers and a stirring stick.
- Clamps (optional, but helpful for holding the pieces together while the epoxy cures).
- Sandpaper (optional, for smoothing the repaired area).
- Acetone or nail polish remover (for cleaning).
Clean and Prepare the Bowl:
- Thoroughly clean the ceramic bowl, especially the cracked or chipped area, using acetone or nail polish remover to remove any oils, residues, or contaminants. Allow it to dry completely.
Mix and Apply the Epoxy:
- Follow the manufacturer’s instructions for mixing the epoxy adhesive. Typically, you’ll need to mix equal parts of the epoxy resin and hardener.
- Apply a small amount of epoxy to one of the broken surfaces. Gently press the pieces together, aligning them as accurately as possible.
- Wipe away any excess epoxy that squeezes out from the joint using a clean cloth or paper towel.
Hold and Cure:
- Depending on the epoxy adhesive you’re using, you may need to hold the pieces together with clamps or your hands until the adhesive sets. Follow the curing time mentioned in the manufacturer’s instructions, which can range from a few hours to a full day.
- It’s essential to avoid any movement during the curing process to ensure a strong bond.
Finish and Smooth (Optional):
- Once the epoxy has fully cured, you can optionally sand the repaired area with fine-grit sandpaper to make it smoother and more aesthetically pleasing.
- If the bowl has any missing pieces, you can fill these areas with epoxy putty or a suitable filler, following the manufacturer’s guidelines, before sanding and finishing.
Remember that while these tips can help you repair a cracked or chipped ceramic bowl, the strength and durability of the repair may not be the same as the original. Handle the repaired bowl with care to prevent further damage, and avoid exposing it to extreme temperature changes, as this can weaken the bond. If the ceramic bowl has significant sentimental or monetary value, consider seeking professional restoration services for the best results.
How to Prevent Future Damages to Your Ceramic Bowl
Preventing future damage to your ceramic bowl is essential to maintaining its appearance and functionality. Here are some tips to help you keep your ceramic bowl in excellent condition:
Handle with Care:
- Treat your ceramic bowl gently. Avoid dropping it or banging it against hard surfaces, as this can lead to cracks, chips, or fractures.
Avoid Extreme Temperatures:
- Ceramic can be sensitive to rapid temperature changes. Don’t expose your bowl to extreme hot or cold temperatures, such as placing it in a hot oven and then immediately immersing it in cold water, as this can cause thermal shock and lead to cracks.
Use Appropriate Utensils:
- When using your ceramic bowl for cooking or serving, choose utensils that won’t scratch or chip the surface. Avoid using metal utensils or abrasive scouring pads that can damage the glaze.
Clean with Care:
- Handwash your ceramic bowl with mild dish soap and a soft sponge or cloth. Avoid using harsh abrasives or abrasive cleaners, as they can scratch the surface and dull the glaze.
- If your bowl is dishwasher-safe, place it on the top rack to minimize exposure to harsh detergents and high water pressure.
Store Safely:
- When storing your ceramic bowl, place it in a location where it won’t come into contact with other hard objects. Use soft, non-abrasive padding or cloth to separate stacked ceramic items.
Avoid Chemicals:
- Avoid exposing your ceramic bowl to harsh chemicals or solvents, as they can damage the glaze and finish. Be cautious with acidic foods, as they can potentially react with the ceramic surface over time.
Repair Promptly:
- If you notice any damage, such as small chips or cracks, address them promptly. Repairing minor damage can prevent it from worsening over time.
Use Coasters and Trivets:
- When placing hot pots, pans, or beverages on your ceramic bowl, use coasters or trivets to protect the surface from heat and potential staining.
Be Mindful of Weight:
- Avoid overloading your ceramic bowl with heavy items, especially if it’s delicate or thin-walled. Use it within its intended capacity to prevent stress on the ceramic.
Store Properly:
- If you plan to store your ceramic bowl for an extended period, make sure it’s clean and completely dry. Store it in a cool, dry place away from direct sunlight to prevent discoloration and fading.
By following these preventive measures, you can extend the life of your ceramic bowl and enjoy its beauty and functionality for years to come. Proper care and attention to detail can help you avoid future damage and maintain the bowl’s original condition.
Ceramic Bowls: Tips for Care and Maintenance
Ceramic bowls are a popular choice for serving, cooking, and decorative purposes due to their aesthetic appeal and versatility. Proper care and maintenance can help preserve the beauty and functionality of your ceramic bowls. Here are some tips for caring for and maintaining ceramic bowls:
Handwashing vs. Dishwasher:
Check the manufacturer’s instructions for your ceramic bowls to determine if they are dishwasher-safe. If they are, place them on the top rack to minimize exposure to harsh detergents and high water pressure. However, handwashing is generally gentler on ceramic and helps maintain the glaze’s shine and integrity.
Use Mild Dish Soap:
When handwashing, use a mild dish soap and a soft sponge or cloth. Avoid using abrasive scouring pads or harsh cleaners that can scratch or damage the ceramic’s surface.
Avoid Abrasive Materials:
Use non-abrasive utensils, such as wooden or silicone utensils, to prevent scratching the ceramic surface when stirring, serving, or scooping food.
Prevent Staining:
Be cautious with staining ingredients, such as tomato-based sauces or curries, which can discolor the ceramic glaze. Rinse and wash ceramic bowls promptly after use to prevent staining.
Remove Stains:
If your ceramic bowl develops stains, mix a paste of baking soda and water and gently scrub the stained area with a soft cloth or sponge. Rinse thoroughly to remove the paste.
Handle with Care:
Treat your ceramic bowls gently. Avoid dropping them or banging them against hard surfaces, as ceramic can chip or crack easily.
Store Properly:
When stacking ceramic bowls, place soft, non-abrasive padding or cloth between them to prevent scratching. Store them in a cool, dry place away from direct sunlight to prevent discoloration.
Avoid Extreme Temperatures:
Ceramic bowls can be sensitive to sudden temperature changes. Don’t expose them to extreme hot or cold conditions, as this can cause thermal shock and lead to cracks.
Check for Damage:
Regularly inspect your ceramic bowls for any chips, cracks, or glaze damage. Address any issues promptly to prevent further deterioration.
Use Coasters and Trivets:
When placing hot pots, pans, or beverages on your ceramic bowls, use coasters or trivets to protect the surface from heat and potential staining.
Avoid Harsh Chemicals:
Refrain from using harsh chemicals, solvents, or abrasive cleaners on your ceramic bowls, as they can damage the glaze and finish.
Display Decorative Bowls Safely:
If you use ceramic bowls for decorative purposes, handle them carefully when moving or arranging them to prevent accidental damage.
Repurpose Chipped Bowls:
If a ceramic bowl has a small chip or crack that affects its functionality, consider repurposing it for decorative or non-food-related uses.
Consider Professional Repair:
For valuable or sentimental ceramic bowls with significant damage, consider seeking professional repair or restoration services.
Proper care and maintenance will help you enjoy the beauty and functionality of your ceramic bowls for years to come. By following these tips, you can preserve their appearance and extend their lifespan.
FAQs About Fixing Ceramic Bowls
Certainly, here are some frequently asked questions (FAQs) about fixing ceramic bowls:
Can I repair a cracked or chipped ceramic bowl at home?
Yes, you can repair minor cracks or chips in ceramic bowls at home using epoxy adhesive designed for ceramics. However, for extensive damage or valuable ceramics, professional restoration may be necessary.
What type of adhesive should I use to fix a ceramic bowl?
Choose a high-quality epoxy adhesive suitable for ceramics. These adhesives provide strong, durable bonds that can withstand daily use.
How long does it take for epoxy adhesive to cure on a ceramic bowl?
The curing time depends on the specific epoxy adhesive you use. It can range from a few hours to a full day. Follow the manufacturer’s instructions for the recommended curing time.
Is it safe to use a repaired ceramic bowl for serving food and beverages?
If properly repaired with a food-safe epoxy, a ceramic bowl can be used for serving food and beverages. However, avoid using it for hot liquids or microwaving to prevent damage to the repaired area.
Can I repair a ceramic bowl with missing pieces?
Repairing a ceramic bowl with missing pieces is more challenging. While it’s possible to fill gaps with epoxy putty or filler, the results may not be as aesthetically pleasing or durable as an intact bowl.
Are there any safety precautions I should take when repairing a ceramic bowl?
When repairing a ceramic bowl, wear safety goggles to protect your eyes from flying ceramic shards. Consider using disposable gloves to keep your hands clean and safe.
Can I use a repaired ceramic bowl in the dishwasher?
It’s generally not recommended to put repaired ceramic bowls in the dishwasher, as the high water pressure and harsh detergents can weaken the bond of the epoxy over time. Handwashing is a gentler option.
Will the repaired area of a ceramic bowl be as strong as the original?
A properly repaired ceramic bowl can be quite strong, but it may not be as durable as the original. The strength of the repair depends on the quality of the epoxy adhesive and the skill of the repair.
Can I repair a cracked ceramic bowl without visible gaps or seams?
With skill and patience, you can repair a cracked ceramic bowl to minimize visible gaps or seams. Proper alignment and careful application of epoxy are key to achieving a seamless repair.
Can I paint over the repaired area of a ceramic bowl to conceal the repair?
Yes, you can paint over the repaired area of a ceramic bowl to help conceal the repair. Use ceramic paint that is suitable for food-contact surfaces and follow the manufacturer’s instructions.
Conclusion
In the final thought, we would like to advise you to do all the steps with patience. Do not forget to use a hand glove while applying glue to the bowl. Also, please don’t touch the glue while it is still liquid. Because super glue is the strongest Adhesive, it adheres within 10 seconds. Touching glue causes can be skin problems.
We hope our mentioned methods and guidelines for repairing the bowl will be helpful to you. If you have any related questions about fixing up your bowl, feel free to ask in the comment section. We hope you’ll share your fixing experience in the comments section to impress others. Have a good day!