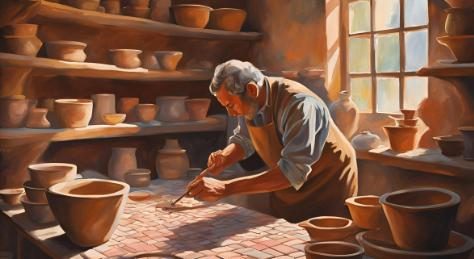
Ceramic tiles are one of the most popular materials for flooring, backsplashes, and walls, thanks to their durability, versatility, and attractive finish. While most people buy ceramic tiles ready-made from a store, you can create your own tiles at home if you have the right materials, tools, and know-how. This guide will walk you through the step-by-step process of making ceramic tiles, from preparing the clay to glazing and firing the tiles.
Whether you’re looking to create custom tiles for a unique home project or explore ceramic tile-making as a new hobby, this article will provide you with all the information you need.
What Are Ceramic Tiles?
Ceramic tiles are thin slabs made from natural clay, water, and minerals, which are shaped, dried, and fired in a kiln. They are often glazed to create a decorative, water-resistant surface. Ceramic tiles are used in many applications, including floors, walls, countertops, and backsplashes, and are known for their durability, easy maintenance, and wide range of design possibilities.
The process of making ceramic tiles involves shaping clay, drying it, and firing it at high temperatures to create a strong, permanent structure. Glazing adds a smooth, glossy, or matte finish to the tile, protecting it from moisture and wear.
Materials Needed to Make Ceramic Tiles
Before starting your ceramic tile project, make sure you have all the necessary materials and tools on hand. Here’s what you’ll need:
Materials:
- Clay: Choose ceramic clay suitable for hand-building or tile-making. Earthenware, stoneware, or porcelain clay can be used, depending on your preference.
- Water: For moistening and working with the clay.
- Glaze: To apply a decorative, protective finish to the tiles.
- Underglazes: If you want to add designs or patterns before glazing.
- Slip (optional): Liquid clay used for joining pieces or adding texture.
- Kiln: For firing the tiles.
- Stencils (optional): For creating patterns on the tiles.
Tools:
- Rolling pin or slab roller: For flattening the clay to the desired thickness.
- Clay cutters or knives: To cut the clay into tile shapes.
- Ruler and straightedge: To ensure even cuts and consistent tile size.
- Texturing tools (optional): For adding designs to the tile surface.
- Sponge and water bowl: For smoothing the clay and cleaning tools.
- Work surface: A smooth, non-porous surface like a plastic mat or canvas.
- Kiln shelves and kiln stilts: To place the tiles inside the kiln during firing.
Step-by-Step Guide: How to Make Ceramic Tile
Step 1: Prepare Your Workspace
Set up a clean, smooth surface for working with the clay. This could be a piece of canvas or a plastic mat to prevent the clay from sticking to your worktable. Ensure your tools are within reach and the workspace is well-lit and organized.
Step 2: Choose and Prepare Your Clay
Select the type of clay best suited for your project. For ceramic tiles, you can use earthenware, stoneware, or porcelain clay. Earthenware is a good choice for beginners due to its lower firing temperature, but stoneware and porcelain offer increased durability and strength.
Before you start, knead or wedge the clay to remove any air bubbles. This ensures that your tiles won’t crack during drying or firing.
Step 3: Roll Out the Clay
To create uniform tiles, you’ll need to roll out the clay to an even thickness, usually around 1/4 inch to 1/2 inch thick. You can use a rolling pin or slab roller for this step.
- Place two guide sticks (of equal thickness) on either side of your clay slab to help you roll the clay evenly.
- Roll from the center outward, ensuring the slab is the same thickness throughout.
- If you don’t have guide sticks, you can place books or other objects of equal height on either side of the clay to achieve an even thickness.
Step 4: Cut the Tiles
Once the clay is rolled out to the desired thickness, it’s time to cut the tiles. You can create tiles in any shape you like, but square or rectangular tiles are the most common.
- Use a ruler and a straightedge to measure and mark your tiles.
- Cut the clay slab into tiles using a clay cutter or knife. Be sure to make clean, precise cuts for a professional look.
- After cutting, carefully lift each tile and place it on a drying board or shelf. Avoid bending or warping the tiles as you handle them.
Step 5: Add Texture and Design (Optional)
If you want to give your tiles a decorative finish, this is the time to do so. You can use texturing tools, stamps, or stencils to create patterns or textures on the surface of the tiles.
- Press gently on the clay with your texture tool to create designs without distorting the tile.
- If you’re adding slip or underglazes, apply them now to create additional color or texture before the first firing.
Step 6: Dry the Tiles
Let your tiles dry completely before firing them. This process, known as “greenware drying,” can take several days, depending on the thickness of the clay and the humidity of your environment.
- Place the tiles in a dry, well-ventilated area.
- Flip the tiles occasionally to ensure even drying and prevent warping.
- Avoid drying the tiles too quickly, as this can cause cracking. A slower drying process yields better results.
Step 7: Bisque Fire the Tiles
Once the tiles are completely dry, they are ready for the first firing, known as bisque firing. This step hardens the clay and prepares it for glazing.
- Load the tiles into the kiln, placing them on kiln shelves or stilts to ensure they don’t stick to the kiln floor.
- Fire the kiln to the appropriate temperature for your clay type (usually around 1,800°F to 2,000°F for earthenware).
- Let the kiln cool completely before removing the bisque-fired tiles.
Step 8: Glazing the Tiles
After the tiles have been bisque-fired, you can apply glaze to give them a smooth, glossy, and water-resistant finish. Glazing also adds color and design to your tiles.
- Choose a glaze that works with your clay body and firing temperature.
- Apply the glaze using a brush, sponge, or by dipping the tiles into the glaze.
- Make sure to apply the glaze evenly, and remove excess glaze from the bottom of the tiles to prevent them from sticking to the kiln shelves during firing.
You can also apply multiple layers of glaze or use different colors to achieve unique effects. If you’re using underglazes, apply them before the glaze.
Step 9: Glaze Fire the Tiles
After glazing, the tiles need to be fired again in the kiln to set the glaze. This is called the glaze firing, and it typically occurs at a higher temperature than the bisque firing (usually around 2,200°F to 2,400°F for stoneware).
- Carefully load the glazed tiles into the kiln, ensuring that no glazed surfaces touch each other or the kiln shelves.
- Fire the kiln to the correct temperature for your glaze, and allow it to cool completely before opening the kiln and removing the tiles.
Step 10: Finishing Touches
Once your tiles have been glaze-fired and cooled, they are ready to use! Inspect each tile for any imperfections, and sand any rough edges if necessary. Your handmade ceramic tiles are now complete and can be used for a variety of applications, from decorative wall tiles to functional floor tiles.
Tips for Successful Tile-Making
- Use consistent thickness: Keeping the thickness of your tiles uniform ensures even drying and firing, reducing the risk of cracking or warping.
- Dry slowly: Rushing the drying process can lead to cracks. Cover your tiles with plastic and dry them slowly to prevent this.
- Experiment with textures: Don’t be afraid to get creative with your tile designs. Use stamps, stencils, and texturing tools to add unique patterns and finishes.
- Test glaze on a small batch: If you’re unsure how a glaze will look, test it on a small batch of tiles before glazing an entire set.
Creative Ideas for Handmade Ceramic Tiles
Handmade ceramic tiles can be used in a variety of ways beyond flooring and backsplashes. Here are a few creative ideas for incorporating your tiles into home decor:
- Custom wall art: Arrange tiles into a mosaic or pattern to create a one-of-a-kind piece of wall art.
- Trivets and coasters: Small ceramic tiles make great heat-resistant trivets or drink coasters.
- Tabletops: Use your handmade tiles to create a unique, durable tabletop for a coffee table or outdoor dining area.
- Decorative borders: Add a decorative tile border to a fireplace, kitchen backsplash, or bathroom wall for a personalized touch.
FAQs About Making Ceramic Tile
How long does it take to make ceramic tiles from start to finish?
The process of making ceramic tiles, from preparing the clay to the final glaze firing, can take anywhere from one to two weeks, depending on drying times and kiln availability.
What type of clay should I use for tile-making?
Earthenware, stoneware, and porcelain clays are all suitable for tile-making. Earthenware is easier to work with for beginners, but stoneware and porcelain offer more durability.
Can I make ceramic tiles without a kiln?
While it’s possible to air-dry clay for decorative projects, a kiln is essential for firing ceramic tiles to make them durable and functional. Without kiln firing, the tiles will remain fragile and prone to breakage.
What is the ideal thickness for ceramic tiles?
The thickness of ceramic tiles can vary, but 1/4 to 1/2 inch is common for most applications. Thicker tiles are better for flooring, while thinner tiles work well for walls or decorative purposes.
How do I prevent my tiles from warping during drying?
To prevent warping, dry the tiles slowly in a well-ventilated area. Flip them periodically during the drying process and avoid placing them in direct sunlight or areas with excessive heat.
Can I add designs or patterns to my tiles?
Yes! You can add designs using texture tools, stamps, or stencils. For more detailed designs, you can also paint the tiles with underglazes or carve patterns into the clay before it dries.
How do I glaze ceramic tiles?
Glaze is applied after the bisque firing. You can brush, dip, or sponge the glaze onto the tiles. Be sure to remove excess glaze from the bottom of the tile to prevent it from sticking to the kiln shelves during the glaze firing.
Can I mix different types of clay for making tiles?
It’s generally not recommended to mix different types of clay, as they may shrink or fire differently, leading to cracking or warping. It’s best to stick with one type of clay for your tile-making project.
What can I do with leftover clay?
Leftover clay can be recycled by rehydrating it. Break the clay into small pieces, cover it with water, and let it sit for a few days. Once rehydrated, wedge the clay to remove air bubbles, and it will be ready to use again.
How durable are handmade ceramic tiles compared to commercial ones?
Handmade ceramic tiles, when properly fired and glazed, can be just as durable as commercial tiles. The key is to ensure that the clay is fully dried, fired at the correct temperature, and finished with a quality glaze.
Conclusion
Making ceramic tiles at home is a rewarding and creative process that allows you to produce unique, customized tiles for any project. While it requires time, patience, and the right materials, the end result is beautifully crafted tiles that can be used for a variety of applications, from decorative wall pieces to functional flooring.
By following the steps outlined in this guide—preparing your clay, shaping and cutting tiles, drying them, and firing them in a kiln—you can create stunning ceramic tiles that are as durable as they are beautiful. Whether you’re a beginner or a seasoned ceramic artist, tile-making offers endless possibilities for artistic expression and home decor.
With a bit of practice and creativity, you’ll soon be able to produce handmade tiles that stand out from the mass-produced options in stores, giving your home or workspace a truly personal touch.
This comprehensive guide covers everything you need to know about how to make ceramic tiles from start to finish. By following these detailed instructions and tips, you’ll be able to craft beautiful, durable tiles that can be used in a wide range of creative projects.