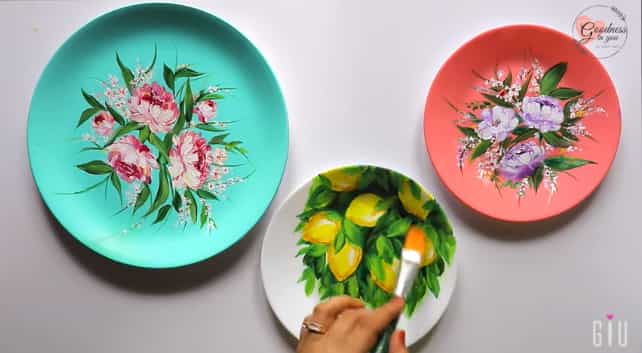
Nowadays, ceramic painted plates are everywhere, in homes and offices. They find it a good use due to its marvelous look and durability. Painting the ceramic plate on your own is a very easy process. All you need is little patience. If you have a creative mind, it is excellent to paint them on your own. Let’s learn how to paint a ceramic plate at home step by step.
How to paint a ceramic plate?
Cleaning the plates
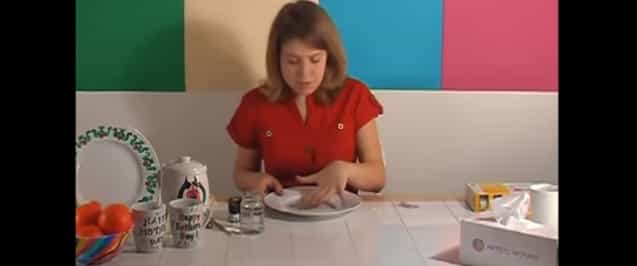
View Ceramic Plate on Amazon
1. Use white plates for painting, as the design on this plate looks brighter. The white plate offers a good and clear background. You don’t need any stickers on plates; if they are present, just peel them off.
2. Washing the plate is the next step you do. Using ordinary soap and water will clean up the plates. Soap will remove any debris on the surface, making it clean. For removal of dirt, which is settled firmly, use a sponge and rub it harder. Don’t forget to remove any sticker residue from the surface.
3. Try not to leave any soap residue on the surface. Hence, the use of alcohol is better in cleaning the soap residue. Dip a clean towel in an alcohol bottle, and rub the plate with it thoroughly. Be sure about barcode stickers that you have removed.
4. Once you finish cleaning the plate, place it in an airtight environment to get dry. Give 1-2 hours to plate for drying. Avoid painting while your plates are still wet. It affects the quality of paint. Additionally, don’t forget to clean your own hands after using alcohol. Read more, how to paint a ceramic lamp?
Creating a design for your ceramic plate
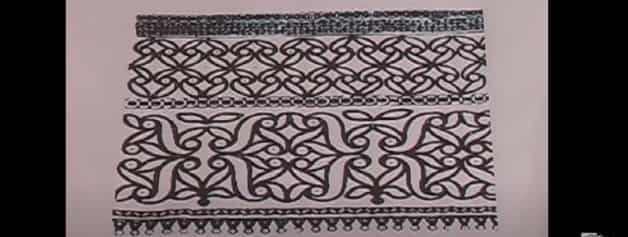
1. It is time to make your design. Practice the design on a rough paper first before actually drawing it on a plate. Commit mistakes while drawing, and eventually, you will be able to draw the sketch accurately. Basic and simple designs look beautiful and also easy to draw. Complicated designs take time and have more chances of getting disturbed. Use a design that satisfies you more.
2. Following this step, use the stencil to curve a statement onto the plate. When you paint, the stencil gives you a guide. Using stencil lightly along with a pencil, you will have the desired result. Instead, if this doesn’t satisfy you, try to use your own words and statements.
3. It includes drawing the geometric pattern. Make a perfect pattern of dots and shapes. You can go on creating stripes using painter’s tape. Stencils are useful in various ways. A painter can utilize them in making stars, hearts, and flowers.
4. Stir the paintbrush in different directions on the plate. Beautiful patterns look hilarious when we irregular colors in them. So, grab the brush and irregularly turn it on the plate until it gives a beautiful pattern. Choosing the various color combination is a new way to the invention of the printing plate. The bold colors pairing technique is excellent as it creates a pop-art design.
5. The use of a platter is good for creating an abstract. Check here, How To Paint Ceramic Mugs?
Painting the design on ceramic plate
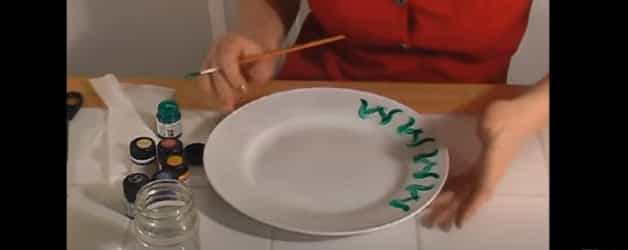
View Ceramic Paint on Amazon
1. Certain things matter while buying the paint. Buy a food-friendly paint if you serve the food on those painted plates. Otherwise, you can have certain health issues. Before buying paint, be assured of the fact that it is toxic-free.
On the other hand, painting your plates just for ornamental purposes, acrylic paint is the best option. Some of the brands of paint generally don’t last long. While some of them are durable and don’t get scratched. Depending upon the usage of plates, buy paint.
2. Painting the plates is not a hard thing to do. Firstly, if you are going to paint precisely, use a sharp brush. In the case of painting a large area over the plate with the same color, you don’t have to be précised; you can use a wide brush to complete the process quickly. The flat brush has many verities and qualities, as it works well in geometric patterns also.
Painter’s tape finds its use here. Apply painter’s tape on are, which doesn’t include to be painted. To clean an area, painter’s tape will help you. To have a different colored layer on your plate, don’t apply the paint one after one. Let the previous paint dry, and then use the new one. A popular article, How To Paint A Ceramic Pot?
Paint your favorite design over a ceramic plate
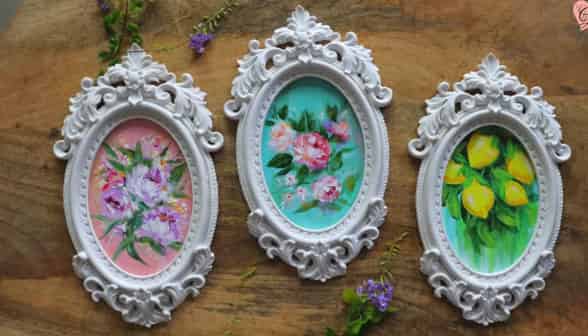
3. For creation for easy and fine designs, use a pointy brush. Flowers designs are easy to make and don’t require any technique. Don’t use toxic paint if the plate will use in food serving. Carefully wipe out paint if you happen to make any mistake. You don’t need to worry about that. You may need to dry your plate before painting again.
4. Go peeling the tape used to cover the plate. Paint can stick with the plate while you remove the sticker, get on with it. Try not to touch the paint while peeling the sticker off.
5. Paint gets dry before using it ahead. Depending upon the conditions, you can give rest of 1-3 hours to dry completely. At least let dry it for 24 hours. Try drying your paint in the airtight room; don’t dry it in a windy place or dusty place. Related article, how to make a ceramic Christmas tree?
Baking plates
1. Baking plates in the oven is a good option. Don’t put your newly painted plates in preheated oven. Try heating the slowly and steadily. If you use a very hot temperature in the oven, it can crack the plates. If you don’t want to use the oven, try to put the plates over balking pan or oven racks.
2. Let your heating machine achieve a specific temperature. Let it achieve the temperature of 163 degrees. The plates will be warmed to that temperature. This temperature is good because it helps to stick the paint to the plate.
3. Time is necessary to cure the plates. Different temperatures are necessary for different materials. Leave the temperature of 163 degrees for about 40 minutes. A timer is set in the oven. The oven beeps when the given time is over.
4. Remove plates from the oven after they cool. Don’t ever try to take out the plates while it is still warm. Cool your plates well before touching them.
5. Giving time to plates is good before using them. Put the plate in a place where children cannot disturb. Wash the plates after you have dried them completely. Thanks for being with how to paint a ceramic plate article.
Best way to paint ceramic plates
Painting a ceramic plate at home is a creative and enjoyable craft project. Here’s a step-by-step guide to help you get started:
Materials You’ll Need:
- Ceramic Plate: Choose a plain ceramic plate as your canvas. Ensure it’s clean and free of any dust or grease.
- Acrylic Paints: Acrylic paints are suitable for painting ceramics. They come in a variety of colors and are easy to work with.
- Paintbrushes: Select a range of paintbrushes in different sizes and shapes to create various details and effects.
- Palette: Use a palette or a disposable plate to mix and blend your paint colors.
- Water and Paper Towels: Keep a container of water and paper towels handy for cleaning brushes and making adjustments to your painting.
- Pencil and Eraser: These can be useful for sketching your design lightly on the plate before painting.
- Sealer or Varnish (Optional): To protect your artwork and make it food-safe, consider using a ceramic sealer or varnish. Make sure it’s labeled safe for use with food.
Step-by-Step Guide:
Prepare Your Workspace: Cover your work surface with newspaper or a disposable tablecloth to protect it from paint splatters.
Design Planning: Decide on your design or pattern. You can draw it directly on the plate using a pencil or use stencils for guidance. Keep in mind that ceramics require high-temperature firing, so ensure your design can withstand the heat.
Mix Your Paint: Squeeze a small amount of acrylic paint onto your palette. You can mix different colors to achieve the shades you desire. Dilute with water if needed, but don’t make the paint too watery.
Painting plate:
Start painting your design on the ceramic plate. Begin with broad strokes and the background if you have one. Gradually add details and layer colors as you progress. Allow each layer to dry before adding the next.
Precision: Use smaller brushes for intricate details and fine lines. Be patient and steady-handed, and take your time to ensure precision.
Drying: Let your painted ceramic plate air-dry completely. This might take a few hours, depending on the thickness of the paint layers.
Sealing (Optional): To make your ceramic plate food-safe and durable, you can apply a ceramic sealer or varnish according to the manufacturer’s instructions. This step is crucial if you intend to use the plate for serving food.
Firing: If you have access to a kiln, you can fire your painted ceramic plate at the appropriate temperature according to the instructions on your acrylic paint bottles. This firing process will set the paint and make it permanent. Be cautious not to exceed the recommended temperature, as it may damage the plate.
Final Inspection: Once your plate is fired and cooled, inspect it for any touch-ups or adjustments you’d like to make.
Display or Use: Your painted ceramic plate is now ready for display or use. Enjoy your custom-designed plate for serving meals, as a decorative piece, or as a unique gift.
Painting ceramic plates at home allows you to unleash your creativity and personalize your tableware. With the right materials and techniques, you can transform a simple ceramic plate into a work of art that adds charm and character to your dining experience.
FAQs
Certainly! Here are some frequently asked questions (FAQs) about painting a ceramic plate at home:
Can I use regular acrylic paints for painting ceramic plates?
Yes, you can use regular acrylic paints for painting ceramic plates. However, you should be aware that these plates will not be food-safe unless you apply a food-safe ceramic sealer and follow the manufacturer’s instructions for baking or firing.
Can I use ceramic paint markers instead of brushes and acrylic paint?
Yes, ceramic paint markers can be a convenient alternative to brushes and acrylic paint. They are easy to use and can provide precise details. Just ensure that the markers you choose are suitable for ceramic surfaces.
How do I clean my paintbrushes after using acrylic paint on ceramic?
To clean your paintbrushes, rinse them with water immediately after use to remove most of the paint. Then, use mild soap and water to thoroughly clean the brushes. Avoid letting paint dry on the bristles, as it can be challenging to remove.
Can I use my painted ceramic plate in the microwave and dishwasher?
It depends on whether you’ve applied a food-safe ceramic sealer and followed the manufacturer’s instructions for firing or baking. If your plate is food-safe and properly sealed, it can be used in the dishwasher and microwave without issues.
How do I fix mistakes or make corrections when painting on ceramic?
If you make a mistake while painting, you can often wipe off wet acrylic paint with a damp cloth or sponge. For dried paint, you may need to lightly sand the area and repaint it. It’s a good idea to keep extra ceramic plates for practice and experimentation.
Can I paint over an already glazed ceramic plate?
While it’s possible to paint over a glazed ceramic plate, the paint may not adhere well, and the design might not be as durable. If you plan to paint over glaze, consider lightly sanding the surface to create a better paint-adherent texture.
Do I need a kiln to paint ceramic plates at home?
If you’re using acrylic paints, you don’t need a kiln. Acrylic paints air-dry and can be sealed without firing. However, if you’re using specialized ceramic paints that require firing, you will need access to a kiln.
Can I use my painted ceramic plate for decorative purposes only?
Absolutely! Painted ceramic plates make beautiful decorative pieces, and you can display them on plate stands or hang them on walls to showcase your artwork.
Is it safe to eat from a painted ceramic plate if I use food-safe materials?
If you use food-safe acrylic paints and a food-safe ceramic sealer, it should be safe to eat from the painted ceramic plate. However, always follow the manufacturer’s instructions for safety and usage guidelines.
Can I create a dishwasher-safe and microwave-safe painted ceramic plate at home?
Creating a dishwasher-safe and microwave-safe painted ceramic plate at home is possible if you use food-safe materials, follow the manufacturer’s instructions, and ensure proper sealing and firing. Always prioritize safety when using painted ceramics for food and beverages.
Conclusion
In conclusion, painting a ceramic plate at home is a delightful and rewarding artistic endeavor that allows you to transform a plain ceramic canvas into a personalized masterpiece. With the right materials, techniques, and a dash of creativity, you can add a touch of artistry to your tableware or create unique decorative pieces for your home.
Whether you choose to use acrylic paints, ceramic paint markers, or other artistic mediums, the process is limited only by your imagination. Remember to consider safety when using painted ceramic plates for serving food, ensuring you follow food-safe guidelines and sealing methods.
Painting ceramic plates offers endless possibilities for expressing your unique style and personality. So, gather your materials, let your creativity flow, and enjoy the artistic journey of turning a simple ceramic plate into a work of art that adds charm and elegance to your daily life.

If I use chalkboard paint with a black sharpie to make polka dots do you think that will work? I have affixitant as well as polyethurane finish. Just wanting your feedback before I proceed.